Rustic Wooden Lantern DIY
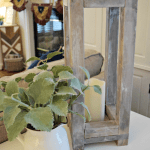
Create this simple and inexpensive rustic wooden lantern that is perfect for a fun indoor or covered outdoor home decor piece.
Materials
- 2 - 2 x2x8
- 1 - 1 x2x6
- 1 - 1 x8x6
- 2 ¼ inch flathead screws
- Wood Glue
- Stain
Instructions
Cuts you will need to make:
Cut 4 - 1-inch pieces out of the 2x2 boards (feet)- Cut 8 - 4 ¼ inch pieces out of the 2x2 boards (sides)
- Cut 2 - 4 ¾ inch pieces out of the 1x2 board (top crown)
- Cut 2 - 3 ¼ inch pieces out of the 1x2 board (top crown)
- Cut 2 - 7 ¼ inch pieces out of the 1x8 board. (top and bottom)
- Cut 4 - 17-inch pieces out of the 2x2 boards. (legs)
Further Instructions to put the Rustic Wooden Lantern together:
Measure in on one of the 1x8 cut board pieces a ½ inch from each side to mark your spot to drill and attach the feet and up into the legs. Do these on all four sides. We used flat head screws and drilled them with a countersink bit so that the screw would sit flush when your lantern is placed on a table.- You can see in the picture below we drilled through the feet into the base and into each leg. Add glue to the feet and leg pieces for strength.
- Now you are ready to attach the top. Add glue to the 4 legs and using the 2 ¼ inch screws attach the top board. You can use smaller screws for this if you have them but no need to purchase extra as you will need the 2 ¼ inch for the bottom. We again used the countersink drill bit so that the screw would sit flush.
- After the glue on these pieces set up, you are ready to work on the top crown piece. We decided to only attach these with glue, but you could also pop a few brad nails into them as well. NOTE: The smaller 3 ¼ inch pieces get sandwiched between the 4 ¾ inch pieces.
- Once the glue for the crown piece is set we can get back to business. You are ready to attach the bottom and top, sides. We again just used glue to attach these, but you could brad nail them as well.
Notes
I have provided pictures for each step in the post that I highly recommend viewing if you get stuck at any point in your build.