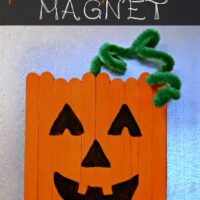
Popsicle Stick Pumpkin
Get your kids involved in crafting this fall and Halloween season with this super cute Popsicle Stick Pumpkin.
Materials
- popsicle sticks
- Craft Paint orange and black)
- Green Pipe Cleaner
- Cardstock or Cardboard
- Elmer's Glue
- Magnets
Instructions
- 1. Gather all of your supplies!
- 2. Layout 10 popsicle sticks to measure how wide you need to cut your cardstock or cardboard. We used cardstock for the backing of ours. Just make sure that you cut the width and length so that the sticks completely cover it.
- 3. Glue the popsicle sticks onto your board. You can do your design all straight across or choose to do them as we did and stagger them up and down. We thought the staggered look gave it a little more character.
- 4. The next step is to paint your popsicle stick pumpkin and let dry. If you are a teacher or someone looking to do this with multiple children it might be best to have all of the popsicle sticks prepainted orange, the backing precut, and additionally instead of painting on faces to have precut eyes, noses, and mouths.
- 5. Once your pumpkin is fully dry you can paint on his face. You can either follow the same design we did or give him his own unique face.
- 6. Lastly you will want to hot glue the green pipe cleaner onto the back. Before hot gluing, we wrapped it around our finger to give it a curl. Attach magnets to the back of your pumpkin and you are done. I used two .75 inch adhesive magnets to hold mine up.