

A while back {last spring I believe, so it may or may not be available anymore} at Hobby Lobby I bought 2 of these Bon Appetit placemats. My intentions were to turn them into a pillow but after giving it a go on the sewing machine the fabric was just to thick or my lack of sewing skills probably played a hand in that too. 😉 I stored the placemats for awhile until I decided to give fabric glue a try and it has worked out great. Not only that but it is so much easier than breaking out the sewing machine. Actually sewing would be a lot faster and just as easy so let me rephrase that and say it is so much easier for us sewing challenged. haha!
Here is a quick tutorial on how I made mine.


Once you have your placemats glued together you will want to wait a good 24 hours before you start filling with your poly fill. You don't want your pillow coming apart at the seams. After mine where dry I turned them inside out and filled them with poly fill. I stuffed them to my liking, folded the opening and used the fabric glue to finish it off. I used pins to hold the opening closed until the glue dried. You could also use a hand stitch on the closing if you wanted to go a different route.
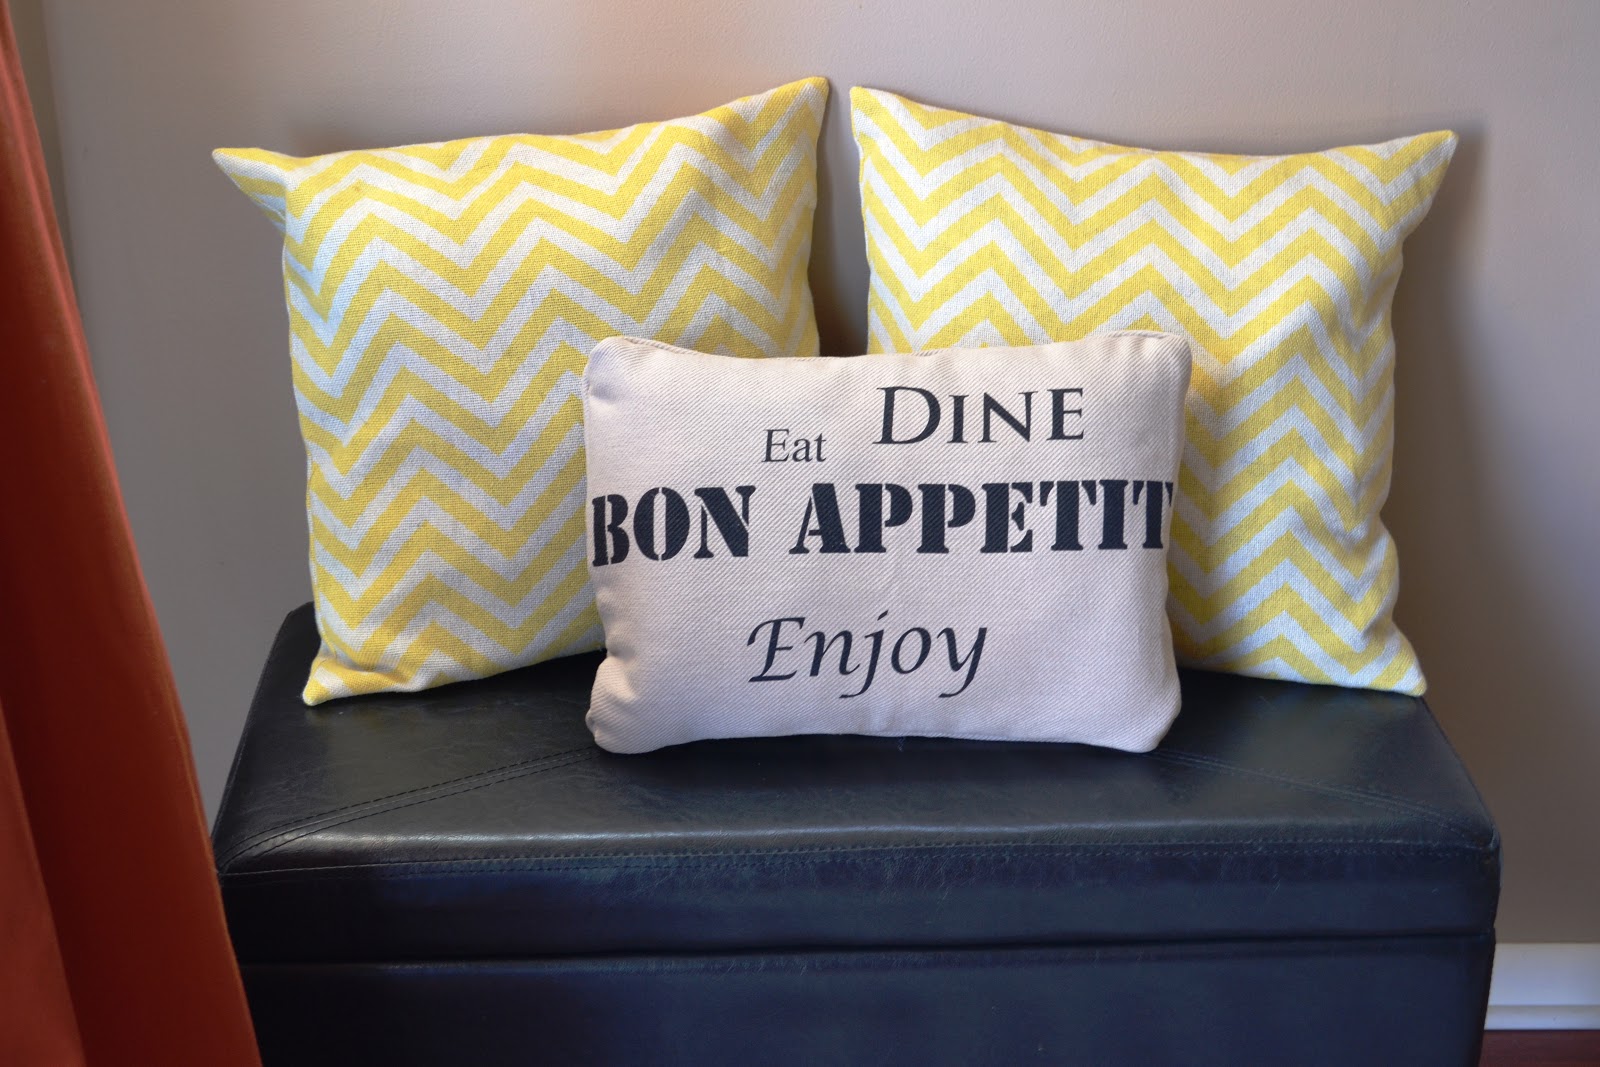
This blue and white pillow was made from a fabric napkin I had laying around.

My hubby thinks I'm already pillow crazy but I'm pretty sure I'll be keeping an eye out on interesting placemats. They always have cute holiday placemats available and would make for some cute holiday pillows, way cheaper than retail priced holiday pillows. Hmmm... maybe I should go check out the after Valentine's day sales. **off to the store** 😉 Hope you all had a great Valentine's Day and an even greater weekend.

Lindsey Fisher says
Super cute! Thanks for sharing!
I would like to invite you to my linky party Thrifty Thursday!
appleofmamaseye.blogspot.com
Hope to see you there!
-Lindsey
Melissa says
Thanks so much Lindsey. Sorry I didn't make it by your linky party but I will try to link up this week. 🙂
xoxo,
Melissa
Tonia L says
Fantastic idea and no sew too! 🙂 Thanks for sharing at The Gunny Sack!
Melissa says
Thanks 🙂
xoxo,
Melissa
Crystelle Boutique says
You are so sneaky....: gluing your pillows together..
great idea!
hugs x
Crystelle
http://www.crystelleboutique.com
Melissa says
Haha! Yep, once they are dry you would never even know they were glued together. 😉
xoxo,
Melissa
Gabriela @ Living a Renaissance Life says
Melissa I love this! I don't have that great of a relationship with my sewing machine (massive understatement!!!) but I have a weird impulse to save old t-shirts with cute wording on them in hopes of turning them into cute little throw pillows later. (I have a big bag in my closet of scrapes - it's sad). I'm so relieved to come across your no-sew way of creating pillows! 🙂
Melissa says
That would be an awesome idea for using old t-shirts, esp ones that have meaning to you. I love that idea.
xoxo,
Melissa
Kristine -Heart Shaped Sweat says
This is just what I needed! I don't have a sewing machine, but would love to make a few slipcovers for my pillows. Your tutorial is perfect! Love the chevron and printed pillow you chose, very pretty!
Melissa says
This is a great solution esp if you don't have a sewing machine. I have one but not that great at sewing, would much prefer no sew. haha! The chevron pillows are from hobby lobby (pillow covers @ $7 or 3.50 if you wait for a sale, great deal).
xoxo,
Melissa
Bailey- I Know All the Words says
I am totally sewing challenged! I'll have to remember this.
New follower from the 'Monday Beauties' blog hop. Looking forward to reading your blog 😀
http://www.iknowallthewords.com
Melissa says
Thanks so much for following. 🙂 I am definitely sewing challenged as well.
xoxo,
Melissa
lilliesandsilk says
Hello!
I found your blog through the blog hop and I'm a new follower:) Enjoy your week!
Carissa
Lillies & Silk
Melissa says
Thanks so much for following. 🙂
xoxo,
Melissa
TaMara Sloan says
Love the pillows! These look do-able, even for me. 🙂
Stopping in and following from the Social Weekend Hop.
TaMara
Tales of a Pee Dee Mama
Melissa says
Thanks so much for stopping by Tamara. They are definitely easy and there are so many great placemats out there for cheap and cute pillow options.
xoxo,
Melissa
Claudia Castro says
thats a great idea!! thanks for sharing....glue works great for me most of the time 🙂
I found you on the social weekend hop and am your newest follower. Hope you can look at my blog:
http://www.prettylittledahlia.blogspot.com
Melissa says
I would be afraid regular glue wouldn't hold up if you ever wanted to wash it. Most fabric glues are washable.
xoxo,
Melissa
Jasmine says
Super cute - great work!
Melissa says
Thanks Jasmine.
xoxo,
Melissa
Kathie SassyLittleLady says
I'd like to invite you to link up to Show and Tell Saturday at Sassy Little Lady!
http://www.sassylittlelady.com/blog/show-and-tell-saturday/show-and-tell-saturday-4-plus-a-giveaway
Kathie
Melissa says
I linked up these pillows.
xoxo,
Melissa