• Skip to primary navigation
  • Skip to main content
  • Skip to primary sidebar
Today's Creative Ideas logo
  • Tasty
    • See All
    • Appetizers
    • Snacks
    • Beverages
    • Breakfast
    • Desserts
    • Main Dishes
    • Side Dishes
    • One Dish Meals
    • Fun Recipe Round Ups
  • Home & Life
    • See All
    • Organizing
    • Cleaning
    • Creative Beauty Ideas
    • Homemade Solutions
    • Unexpected Uses for...
  • Crafty
    • See All
    • Crafts
    • Home Decor
    • Printables
    • Woodworking
    • Craft & Decor Round Ups
  • Celebrate
    • See All
    • SHOP - Gift Guides
    • Valentine's Day
    • St. Patrick's Day
    • Easter
    • 4th of July
    • Halloween
    • Thanksgiving
    • Christmas
  • >>> Shop
    • Favorite Amazon Picks!
    • Gift Ideas for Everyone
    • Farmhouse Home Decor Picks
menu icon
go to homepage
search icon
Homepage link
  • Tasty
  • Home & Life
  • Crafty
  • Celebrate
  • Shop
×
Home

DIY EAT Sign

By: Melissa Coleman Last Updated: Oct 29, 2018 This post may contain affiliate links.

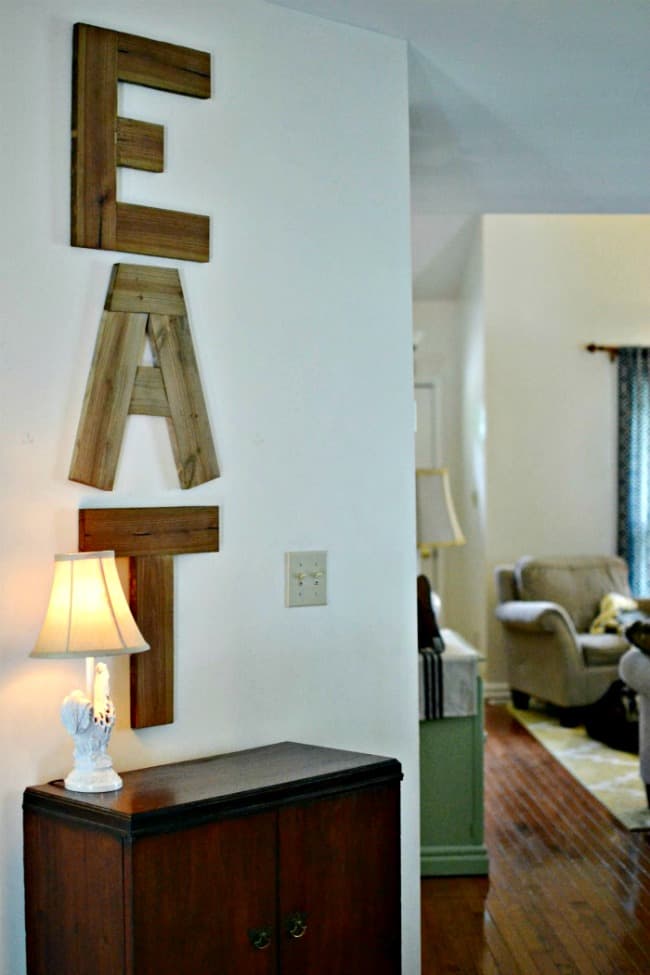
Last year I created this EAT sign and it worked perfectly for the area I needed it in. However, we moved and it just didn't fit like before so with a few dollars in wood (approximately $10) and maybe an hour in time to create I was all set with a new EAT sign.

Create this simple DIY EAT sign with $10 and an hour of your time!

This DIY Eat sign was inspired by The Turquoise Home's eat sign, although I made mine with regular 1x3 inch boards as I didn't have any pallets readily available. She didn't have any measurements which was fine because her letters are several inches bigger than mine (she said they are approximately 19-20 inches) which wouldn't fit were I wanted them anyways. Time for the freehand!

Create this simple DIY EAT sign with $10 and an hour of your time!

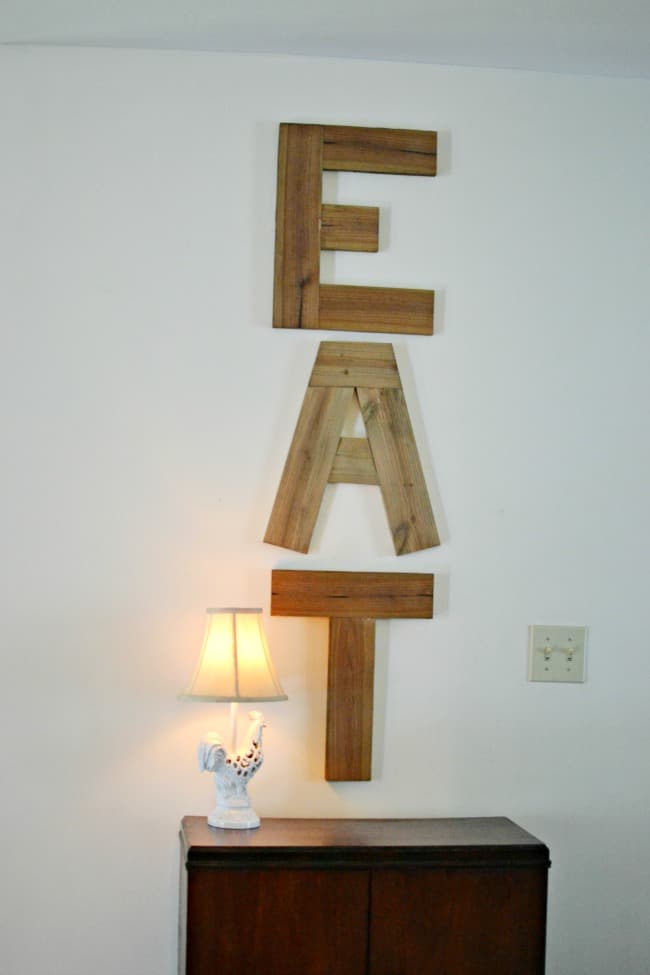
So like I said mine was cut to fit my area perfectly and if you are wanting one to fit in a specific spot I would definitely suggest measuring and adjusting to fit your individual spot. My letters are approximately 16 inches.

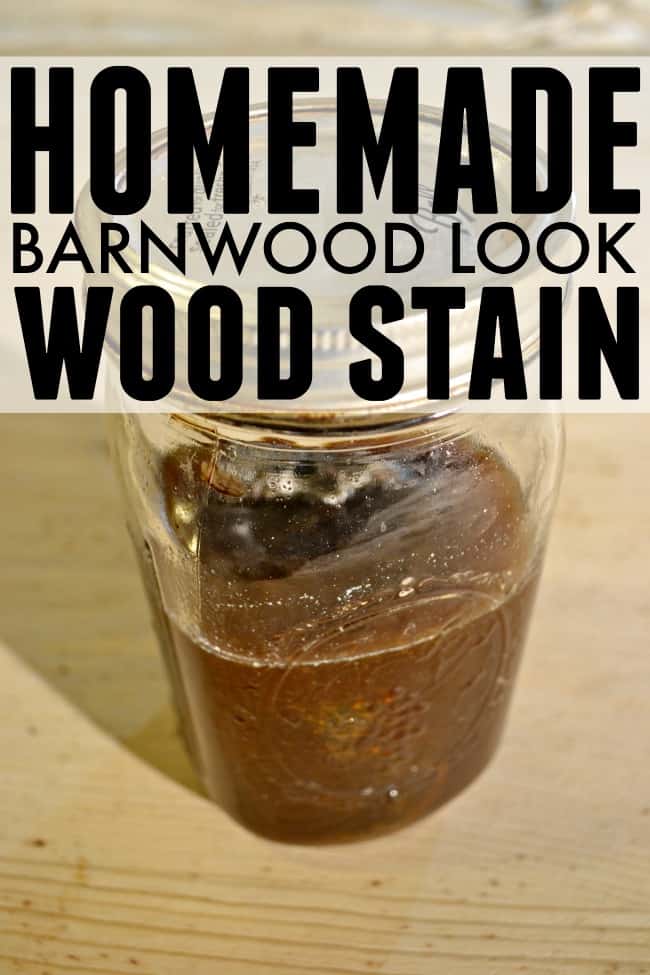
I also used my homemade stain to get that aged barn wood look, which I think you all know I have been loving.

An easy and inexpensive way to stain your wood projects and make them look old. Love this stain!

Let me know if you create a sign for yourself and tag me on social media, I would love to see pictures. 🙂

More Home Decor

  • DIY Sherpa Ghost | Easy Pottery Barn Copycat
  • Super Bowl Chalkboard Ideas
  • Collage of Valentines Chalkboard Art Ideas
    Valentines Chalkboard Art
  • Collage of New Year Chalkboard Art Ideas
    New Year Chalkboard Art Ideas

Reader Interactions

Leave a Reply Cancel reply

Your email address will not be published. Required fields are marked *

Primary Sidebar

Current Popular Posts:

  • Hamburger Hashbrown Casserole
  • Homemade Banana Pudding
  • How to replace vertical blinds
  • Chicken Spaghetti Recipe
  • Easy Southern Meatloaf Recipe

Thank you! You have successfully subscribed to our newsletter.

DON'T MISS A SINGLE POST!
SUBSCRIBE TO GET OUR NEWSLETTER.

Footer

↑ back to top

Connect Socially


  • Facebook
  • Pinterest
  • Instagram

About Me & Contact Info


  • About
  • Contact

Legal Terms & Privacy


  • Terms and Disclosure
  • Privacy Policy

Affiliate Disclaimer


We are a participant in the Amazon Services LLC Associates Program, an affiliate advertising program designed to provide a means for us to earn fees by linking to Amazon.com and affiliated sites.

Copyright © 2024 Today's Creative Ideas