
I was selected for this opportunity as a member of Blueprint Social and the content and opinions expressed here are all my own. Thank you Tulip for sponsoring this post.
I have posted about stenciled pillows before where I stenciled a lovely quote for a bedroom pillow as well as created some DIY no sew pillows from fabric napkins. If you can't tell by now I love pillows. I'm pretty sure when the movers come to pack our things for the big move next month there will be at least 3 boxes of just pillows. lol! Needless to say I am back again today with another one. This one is also do it yourself because well I like doing it myself and store-bought pillows can cost a small fortune. Plus by doing it yourself you get exactly what you want without spending months searching for it.
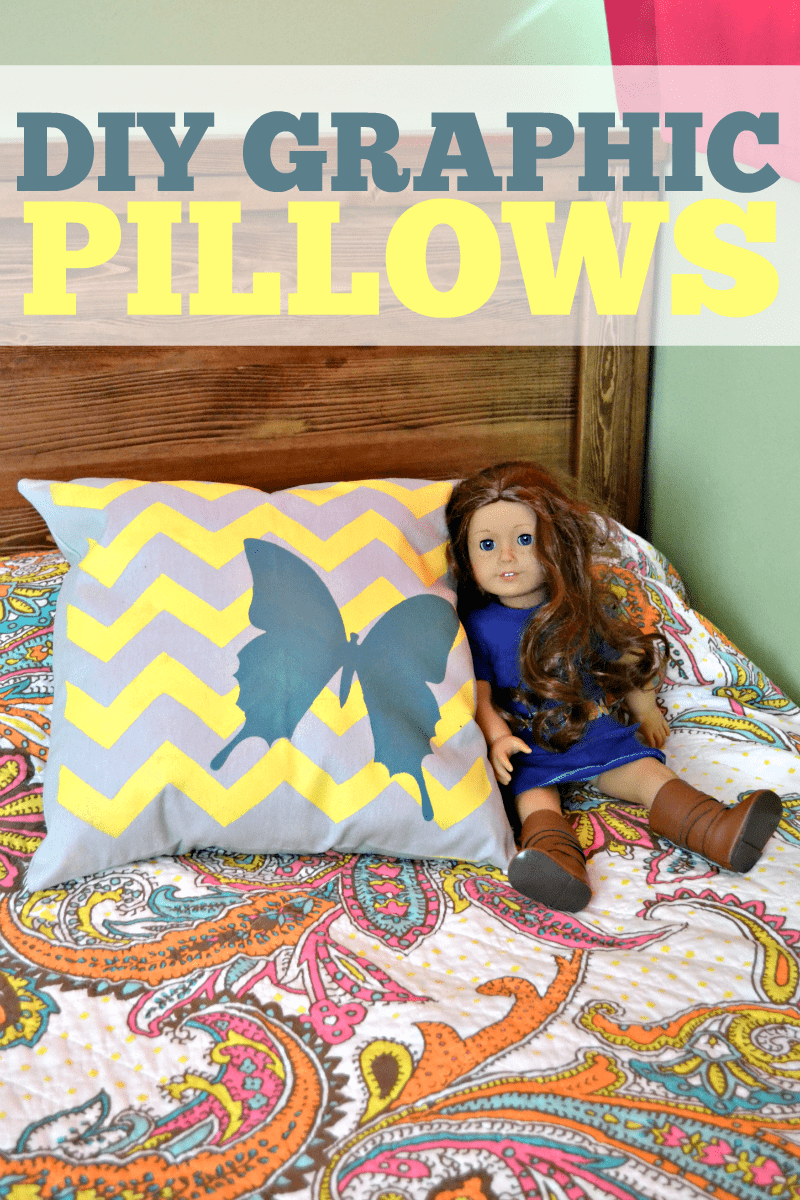
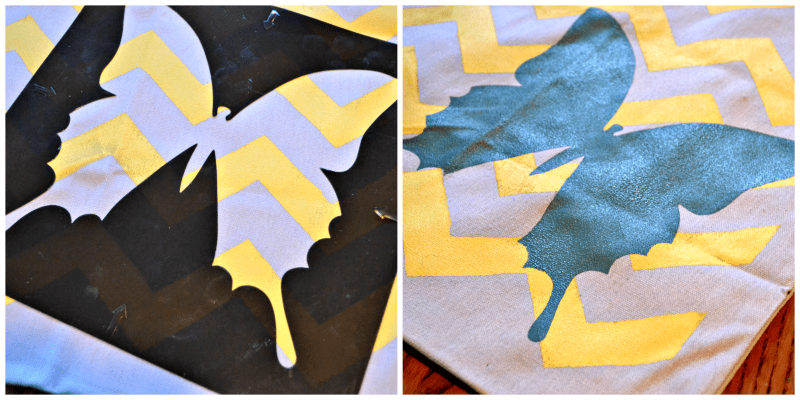
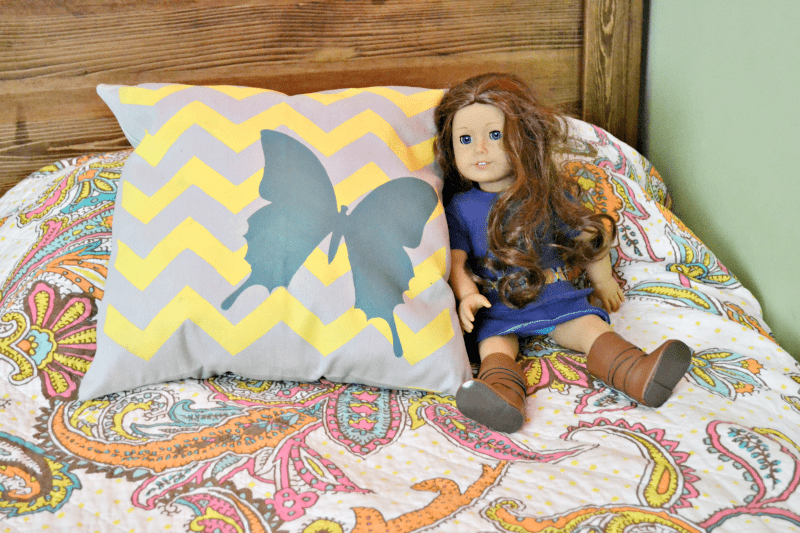
I created this pillow for my daughter's room using Tulip for your home products. She has just about every color in the rainbow in her bedspread but she really wanted the butterfly to be blue, which is her favorite color so I thought the yellow was a nice complimentary color.
SUPPLIES:
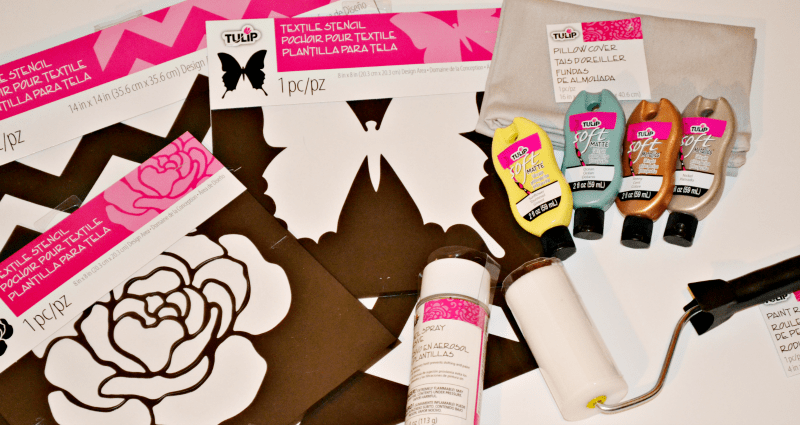
Pillow Cover
Stencils
Stencil Spray Adhesive
Fabric Paints
Roller Brush
TUTORIAL:
Step 1: You don't want the fabric paint bleeding through the back side of your pillow so first you will want to place a piece of wax paper or cardboard inside of your pillow insert.
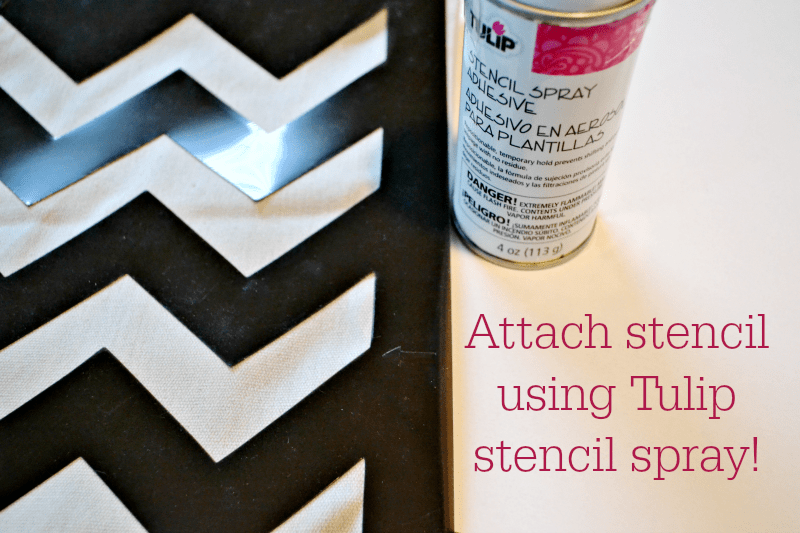
Step 2: Spray a fine mist of stencil adhesive to the back of your stencil. Tulip stencils have a matte and shiny side and for best results you will want to spray the adhesive to the matte side.
Step 3: Let the adhesive dry a minute then press onto your pillow cover. This will create a temporary bond to your fabric but allow for easy removal once painted.
Step 4: Use your roller brush to apply your paint evenly onto your fabric. Using masking tape on the edges is a good tip to prevent any accidental rolling past the end of the stencil.
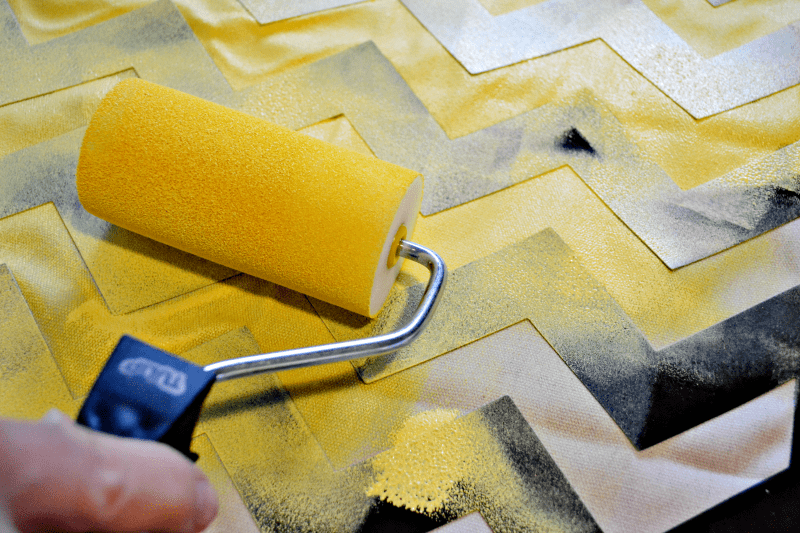
Step 5: Let paint dry for just a few minutes to prevent smearing and then you are good to peel off revealing your pretty new design.
Step 6: Allow to dry overnight and you are ready to rinse and repeat with the smaller stencil.
Allow to dry overnight and you are ready to decorate!
Helpful Tips:
- Do not over-saturate your paint roller. This could cause you to get bleeds under your stencils. It is better to do light coats and continue to go over the stencil until the opaqueness is to your liking.
- Clean stencils and roller brush immediately after use. With care they will both be reusable multiple times.
- Use a paper plate or like myself the back of the cardboard from the stencils for easy cleanup.
Also, don't just use these stencils for pillows either. I got the lovely rose stencil (seen above in supplies pictures) that I have planned for another project soon.
Have you stenciled pillows before?
Follow Tulip
Facebook | Twitter | Pinterest | Blog

brett says
the pillow is gorgeous. i also love the bedspread. i love being able to add personal touches like this!
Veronica says
What a simple but beautiful idea. And yet doesn't cost a ton of cash
Ashley M says
I had no idea it was really that simple! I'm visiting the website right now to see what i can find for my daughters room.
StacieinAtlanta says
That is a super cute pillow that you made! It looks pretty easy to do as well....thanks for the idea!
Krissy says
What a cute pillow! I am pretty sure mine would look NOTHING like that if I tried it though ,lol. My DIY skills are soo not there yet. lol.
katie smith says
Gorgeous! I love the 2 colors you used!
Pauline C. says
Wow, you're creative! Love the outcome. Super cute pillow!
Amanda Her says
This totally looks like something I would screw up in a heartbeat, but the pillow is oh so cute! Yours came out beautifully.
Melissa Coleman says
It really is pretty easy.
Shell says
That pillow turned out so cute! I'd never think to do that!
Chrysa says
Your pillows look awesome. I'm not sure if I would have such an easy time at it!
Chasing Joy says
Wow! It came out really good.
Joanna Sormunen says
I have some really beautiful DIY pillowcases that are my absolute favorites. Not done by me but given to me as a gift. It's really a special touch!
Rosey says
What a great way to use a stencil. This is an awesome project!
Christie says
I never knew it could be so easy! I love the finished product
Henrietta says
This is such a super cute idea! I've been wanting to try making my own graphic pillows, your tutorial makes it look like a project my daughter and I could accomplish together!
Keikilani says
I just love your pillow! I think it turned out beautiful.
Melissa Coleman says
Thanks Keikilani! 🙂
Melissa says
SO creative! I would love to do this for pillows in my basement.
Jessica (Savory Experiments) says
I'm in love with your pillow! I'm re-decorating our guest room to have a "Maryland theme" since no one visiting is actually from Maryland. I might use this technique to make a "MD blue crab" pillow! Now to find the stencil....
Melissa Coleman says
That would be fun.
Carly Bellard says
These are too cute! I love that this is a project that my daughter could help me with!
Jenn @ The Rebel Chick says
How lovely! You make it look like it's pretty easy to do also!
Jenn says
Super cute! I'd like to make one with a leaf on it for Gus' camping room.
Melissa Coleman says
That would be really cute.
valmg @ Mom Knows It All says
That looks great! Will any pillowcase work or is a specific type needed?
Melissa Coleman says
Tulip says some good ones. They are nice and thick but any would work.
Jaime says
Your pillow came out so great! I've never tried it myself, but I've considered it.
Autumn says
Your pillow looks adorable! I have to click away before my daughter spies it and asks me to make her one... but it does look simple enough 🙂 I love this idea!
Debbie Denny says
I really like your design. This is really great.
Hanan says
Oh, those are cool! Love the design you picked out. I've been thinking about making a pillow for a gift!
aimee fauci says
That came out wonderful! You could make those for b day presents...
Melissa Coleman says
They would be fun for birthday presents.
krystal says
I love the chevron design. This would be a fun weekend craft. Thanks for sharing!
Dina says
I've never stenciled pillows. These turned out so cute. I love the yellow chevron.
Robin (Masshole Mommy) says
Your pillow came out awesome! And you make it look so easy that I think even I could make one 🙂
Melissa Coleman says
It really is super easy. I was worried the stencil might try to bleed but the spray adhesive worked great.
julet says
Hi, pillow cover came out beautiful. Wondering what kind of roller brush you're using. Would it be a brayer type of roller? If so, soft or hard brayer roller brush. I'm trying to find the right name of that brush so I can look for it at the craft store or any of kmart or walmart here if they carry that brand.
I know it's not the roller brush we use to paint a house but would like to know what kind of roller that is so I can get the same for a fabric project.
Thank you
Melissa Coleman says
Julet,
It is just a sponge style roller brush.