
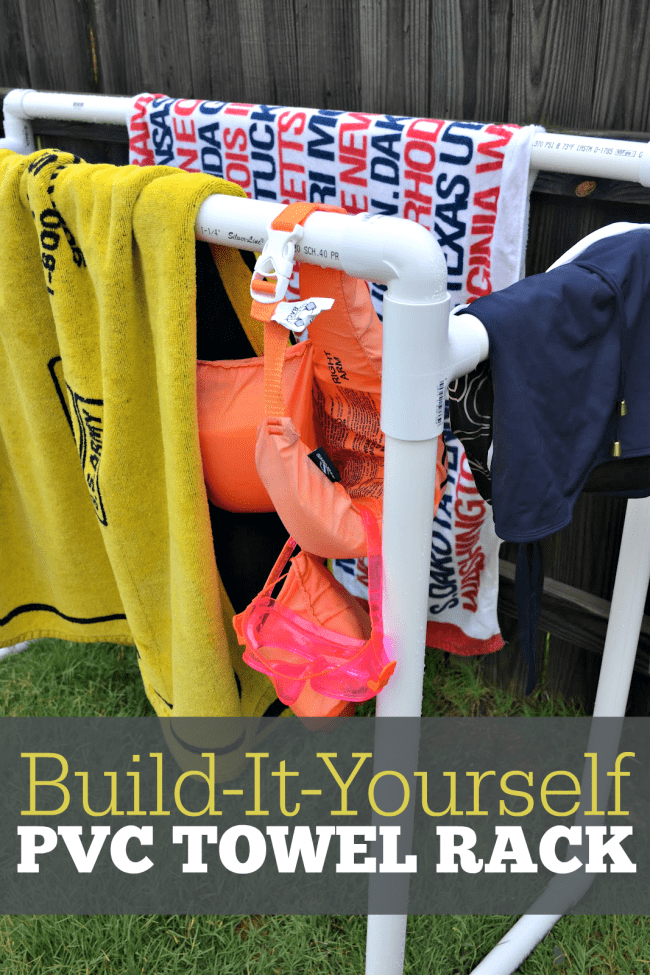
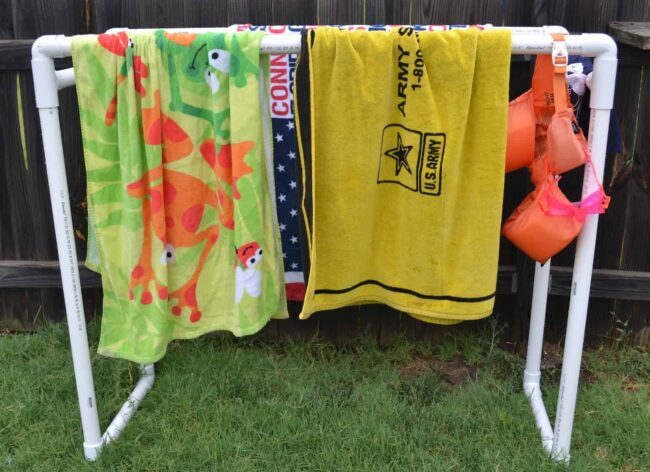
A simple DIY to build a functional PVC pool towel rack that is perfect for your backyard pool needs.
This homemade rack will keep dripping pool towels and swimsuits off the floor and out of the house.
There are so many great things you can do with PVC pipes, from kids' car washes to shoe organizers.
Just search PVC on Pinterest and you will find a boatload of ideas if you're interested.
During the Summer we are usually outside in the pool every single day so washing towels or swimsuits daily just isn't going to work.
Of course, you can purchase one if you would like, but we didn't really need one that big nor did I want to spend $200+.
There are all kinds of ways you can go about making a DIY pool towel rack from simple designs to large designs but we just wanted something simple that would hold our towels, plus a few swimsuits.
How to build a PVC Pool Towel Rack!
Materials you will need to make a DIY Pool Towel Rack
(3) 10' PVC Pipes
(We used 1 ¼" piping. If you use a smaller/bigger size make sure you get the correct fittings as well)
(4) 1 ¼" elbows (the feet)
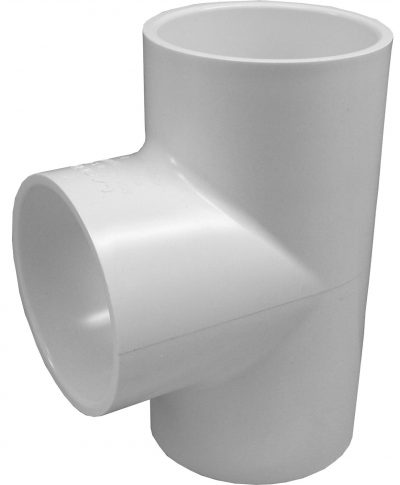
(4) 1 ¼" tees
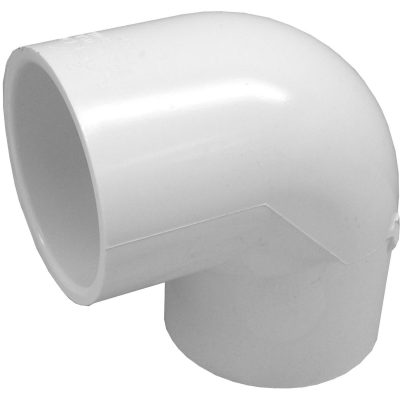
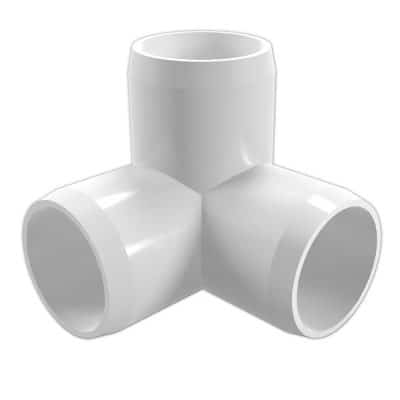
(4) 1 ¼" 90° elbow with slip
Here are some pictures if the fitting sizes are confusing.
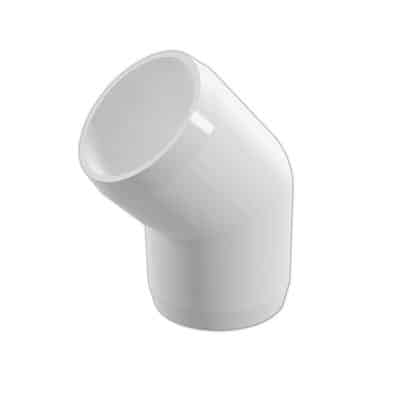
This picture below is called a side-out elbow.
This would work in place of the tee and elbow with the slip if you can find one in the sizing you need. We couldn't find any in the 1 ¼" size.
Cuts you will need to make:
(4) 37" pipe cuts (legs)
(2) 60" pipe cuts (towel bars)
(4) 17.5" pipe cuts (side bars, top & bottom)
DIY PVC Towel Rack Instructions
- Once you have cut all your pieces start fitting the pipe pieces into the fittings.
- You will connect the foot elbows with the 37" pipes (the legs) and then connect 2 of the legs to one 17.5" pipe.
At this point, you should have created two large side leg pieces. - You will then connect the tees to the tops of the 37" pieces and again connect the 17.5" pipes to those.
You will have created a rectangle and now you are ready to connect your elbows with slips. - The slip side will go down into the tees and you will connect your towel bars to the other side.
To be honest, trying to read the directions of me explaining it is probably more confusing than just using the pictures above and just eyeing it. I'm pretty sure all of you can figure out what goes where.
Things to keep in mind before building this project.
This PVC pipe is not furniture grade so you will have the ugly wording on the sidebars. It doesn't bother me for now but if you want you can paint your towel bar.
I would strongly suggest roughing it up with sandpaper prior to painting so the paint will adhere better. I would also recommend a coat of primer to help cover up the markings.
You could also purchase furniture-grade PVC, however, if the point is to keep cost at bay you will not be doing that. Furniture grade PVC will be much more expensive.
While we are talking about enjoying the fun poolside this summer, I thought I would let you know about some of our favorite pool accessories.
If you have a larger family and this towel rack won't fit your needs I found another DIY video instruction for a bigger version.
EVEN MORE SUMMER PROJECTS:
- Fun Pool Projects for Summer
- Water Activities for Kids
- Summer Play Recipes to Keep Boredom at Bay
- DIY Pool Noodle Drink Carrier
- DIY Lounge Chair Covers
Want to print or save these pool towel rack instructions?


Sandy says
FYI - to get the words/lettering off the pipe, simply wipe it down with paint remover. Works great and removes all scuffs, wording and dirt!
Melissa Coleman says
Awesome Sandy, thanks for the great tip. 🙂
CAPERNIUS says
This is a COOL DIY project!!! My only complaint about it is, "why didn't I think of that?" LOL
TY for sharing this. 🙂
To remove the words from the pipes forever, simple rubbing alcohol or plumbing pipe cleaner will do it. All you do is get it on a rag & wipe it off. period. no "elbow grease", no fighting or struggling..just gently wipe it on & watch it disappear.
one 10 foot section of pipe can be cleaned in about 2 - 3 minutes. You don't even have to wipe it down afterwards....once you wipe it down with the alcohol/pipe cleaner, it takes about 30 - 45 SECONDS to dry...you will feel no residue afterwards...ever.
I've plumbed many a house & barn, so I speak from experience.
Melissa Coleman says
I never thought about using alcohol to take the words off the pvc pipe, great idea. Thanks!
Emily says
Great Idea. I might not get it done this summer but I'm pinning it for next summer.
Stevie from GardenTherapy.ca says
this is such a great idea! I'm always looking for a spot for wet towels.
Steph @ Crafting in the Rain says
What a great idea!
The Lacquer Factor says
PVC is so versatile!! This is a great diy!!
♥ Shar says
Very good idea! And much better than spending $200 on Etsy!
A Proverbs 31 Wife says
PVC is incredibly versatile! Who said it was only for plumbing? 🙂
Julie Jordan Scott says
Oh, this is fantastic!! What a simple (and useful DIY!) I can see it put to so many good uses even beyond hanging pool towels.