
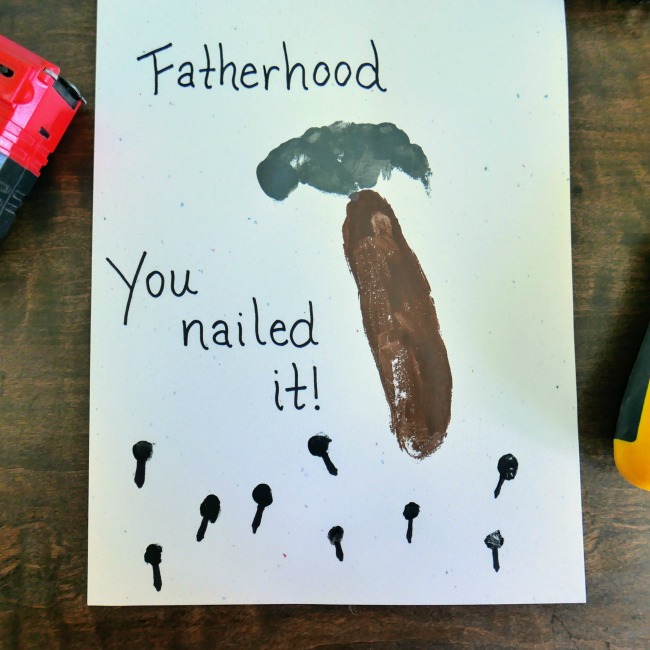
Create this Fatherhood, You Nailed It, homemade Father's Day card with just a few simple supplies.
Moms love homemade cards but guess what, so do dads.
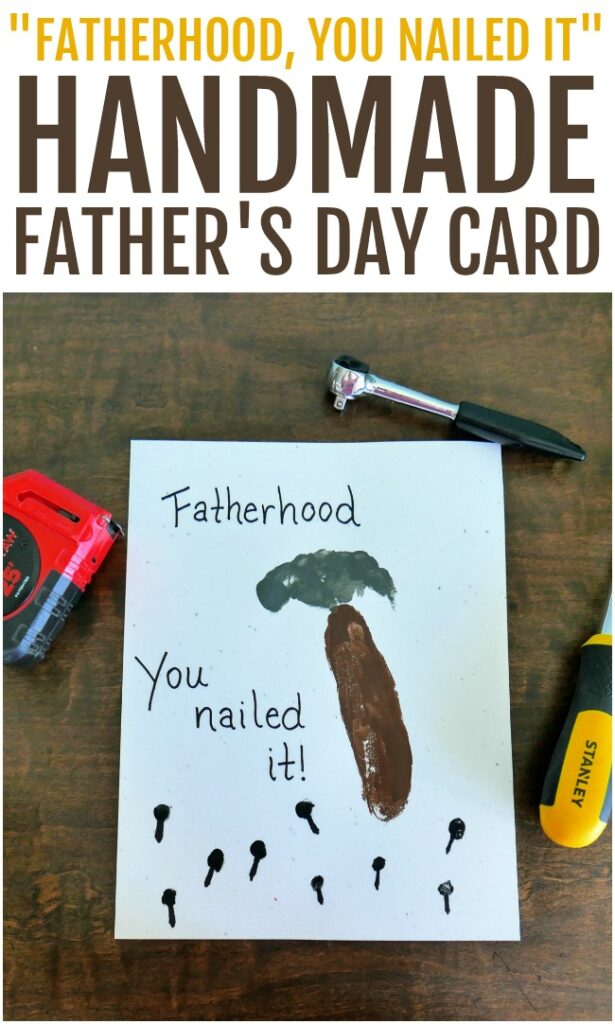
If you have a husband or a dad that is creative and likes to work with wood then he is sure to love this personalized hammer card.
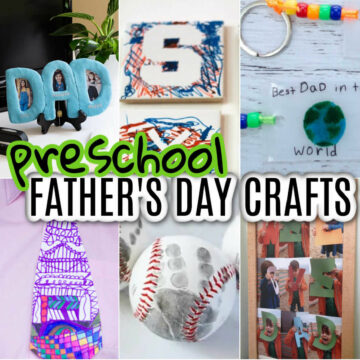
What can kids make for Father's Day?
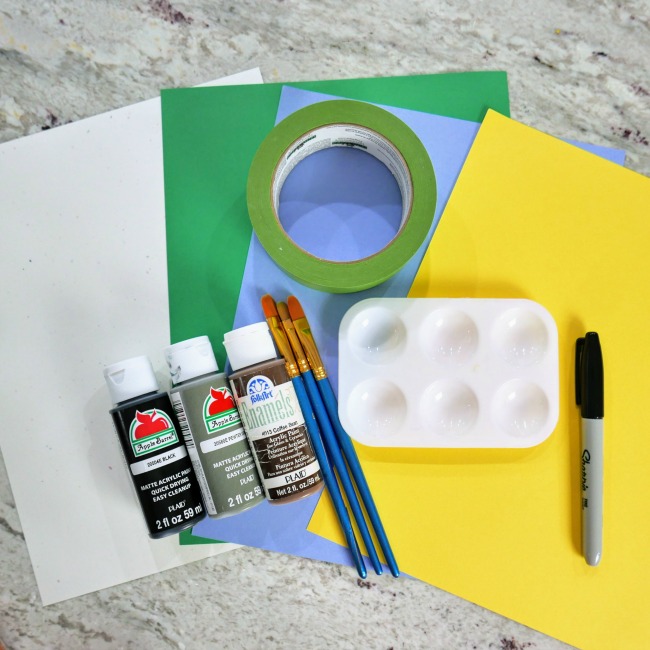
Materials you will need!
- Black, Brown, and Grey Acrylic Craft Paint
- Cardstock (any color of your choice)
- Painters Tape or Masking Tape
- Paintbrushes
- Black Sharpie Marker
- Paint Palette Tray (or paper plate will work fine)
How to make a Fatherhood, You Nailed It Handmade Father's Day Card!
Begin by tearing off a medium-size piece of painter's tape, and folding it back onto itself to create a loop.
Put one piece at the top, and another at the bottom of your cardstock.
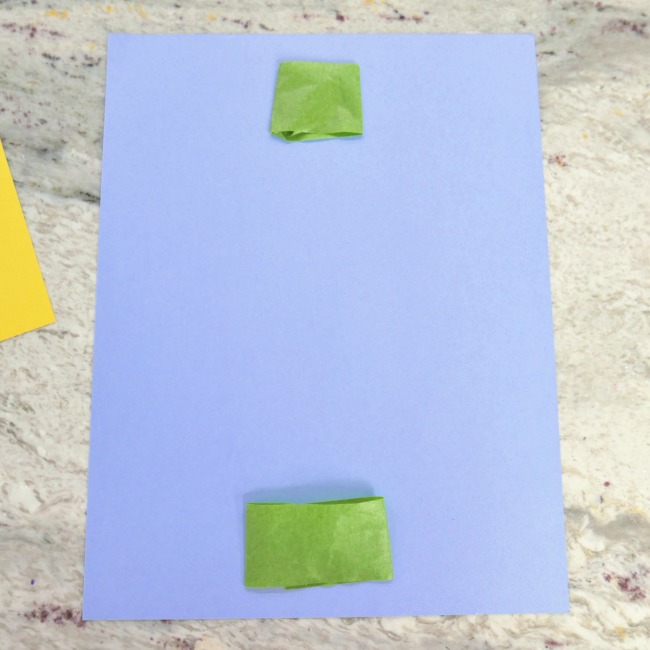
Turn the cardstock over, and attach it to the surface where you will be painting.
This will keep your cardstock from moving while you are stamping your arm and handprints.
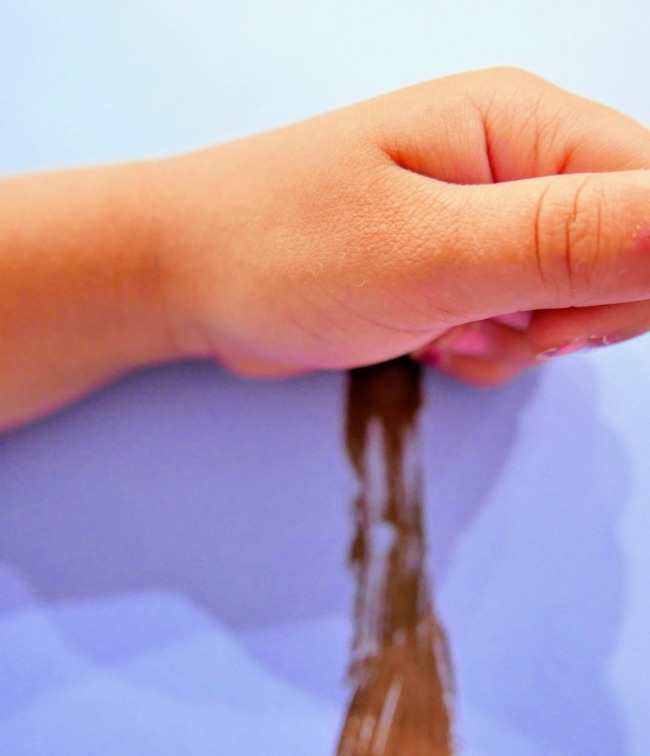
Next, using the brown paint, begin painting a thick line down the outside forearm of your child.
This will be the “wooden handle” of your hammer, so make sure you paint your line thick enough to look like a handle.
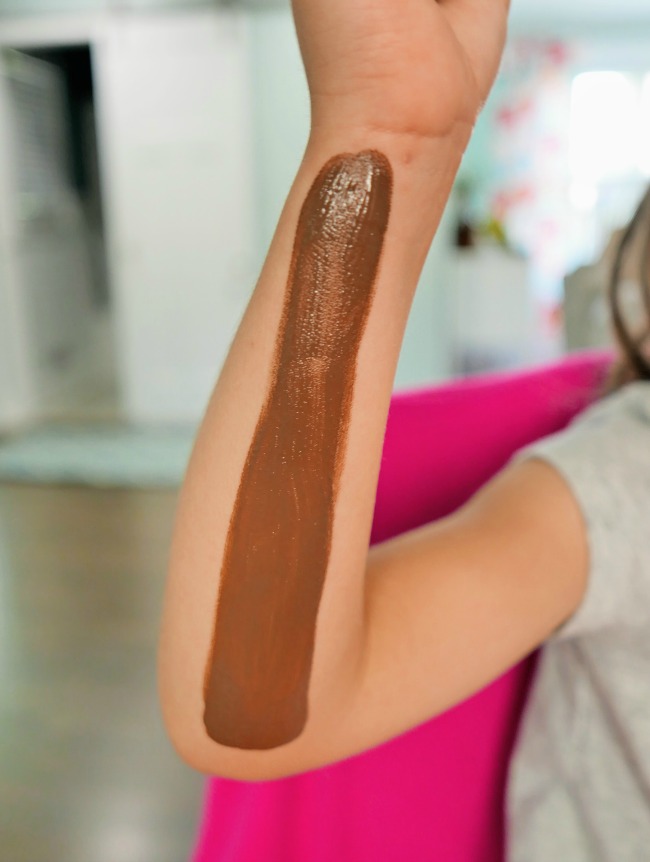
Have your child lay their arm onto the card stock, and lightly press to ensure they touch the arm completely to the paper.
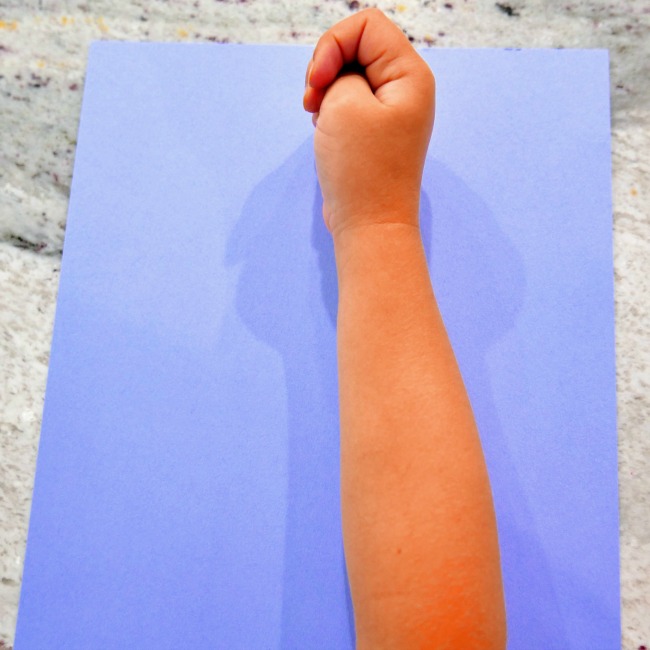
At this point, you will want to allow the "handle" to dry.
Since you are working with acrylics this will only take a few minutes.
Once the paint is dry, have your child make a fist with their hand.
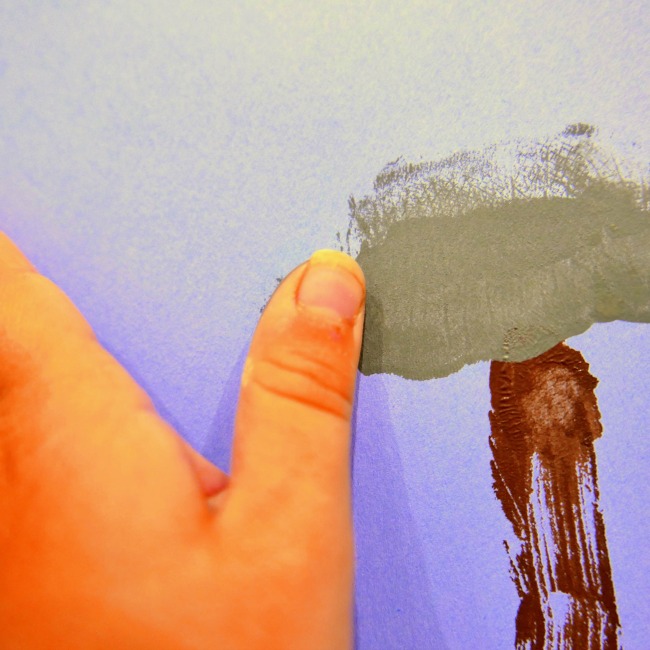
Paint the outer side of their fist, all the way down their pinky finger with the grey paint.
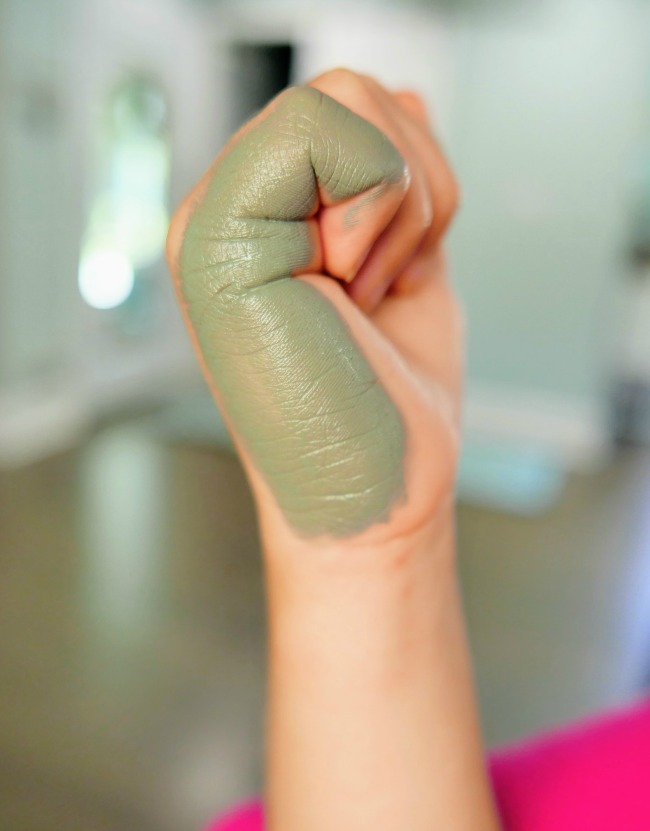
They will then lay their painted fist across the top of the brown handle on their cardstock.
Press lightly on their fist to ensure they make an imprint.
This will be the head of the hammer, with the pinky making the “claw” of the hammer.
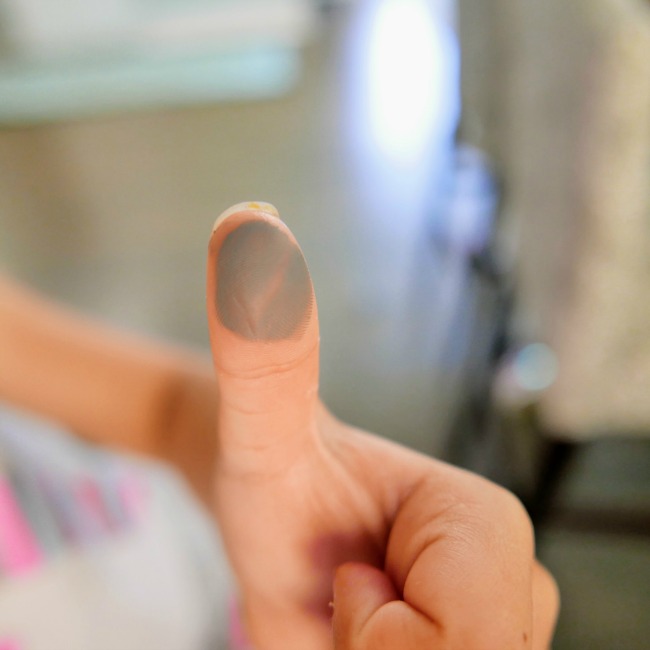
Next, you will want to paint your child's thumb with the grey paint and make a large thumbprint to create the “face” of the hammer.
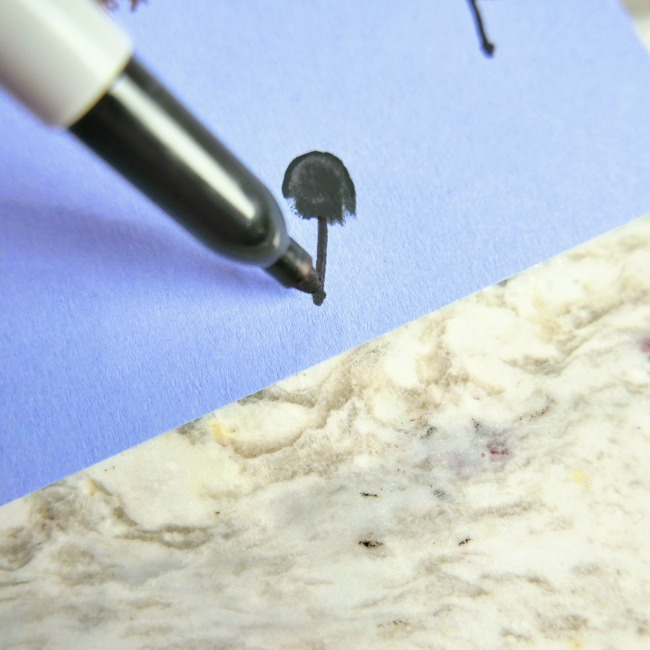
Now you can begin painting their fingertips black and dotting them at the bottom of the cardstock.
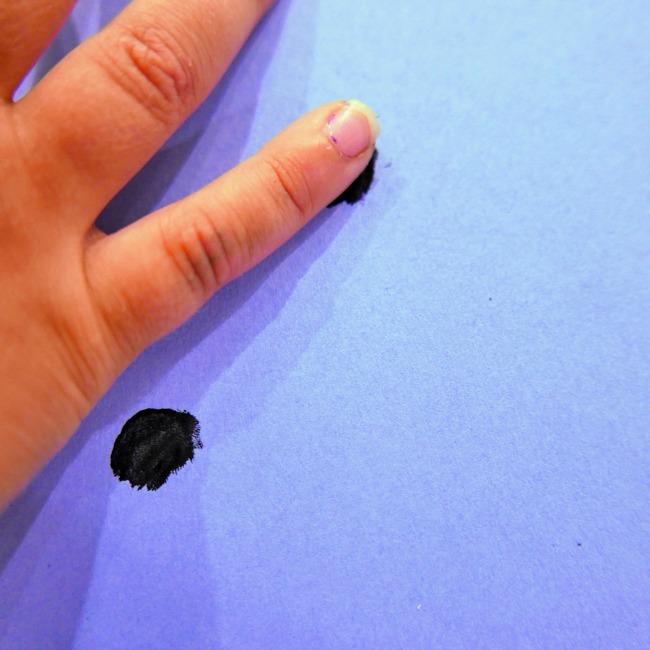
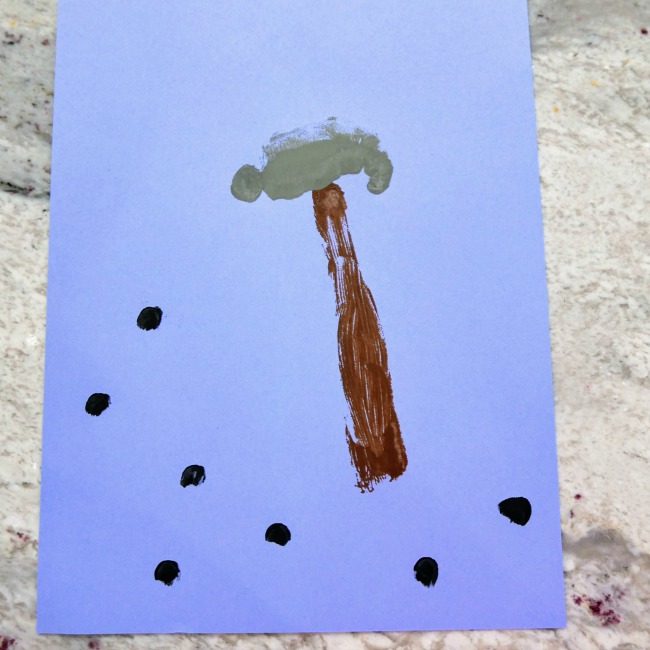
Using the black sharpie marker, draw little lines under the fingerprints to make “nails”.
Using the black sharpie marker, add a fun saying to your painting such as "Fatherhood, You Nailed It" or just a simple “Happy Father’s Day”.
If you have a toddler (with small enough feet) you could switch out the hand portion for an adorable footprint.
How cute would that be!?
Want to print these materials and instructions?


Leave a Reply