
Engage your little ones in a fun and patriotic activity with our Popsicle Stick Uncle Sam Craft!
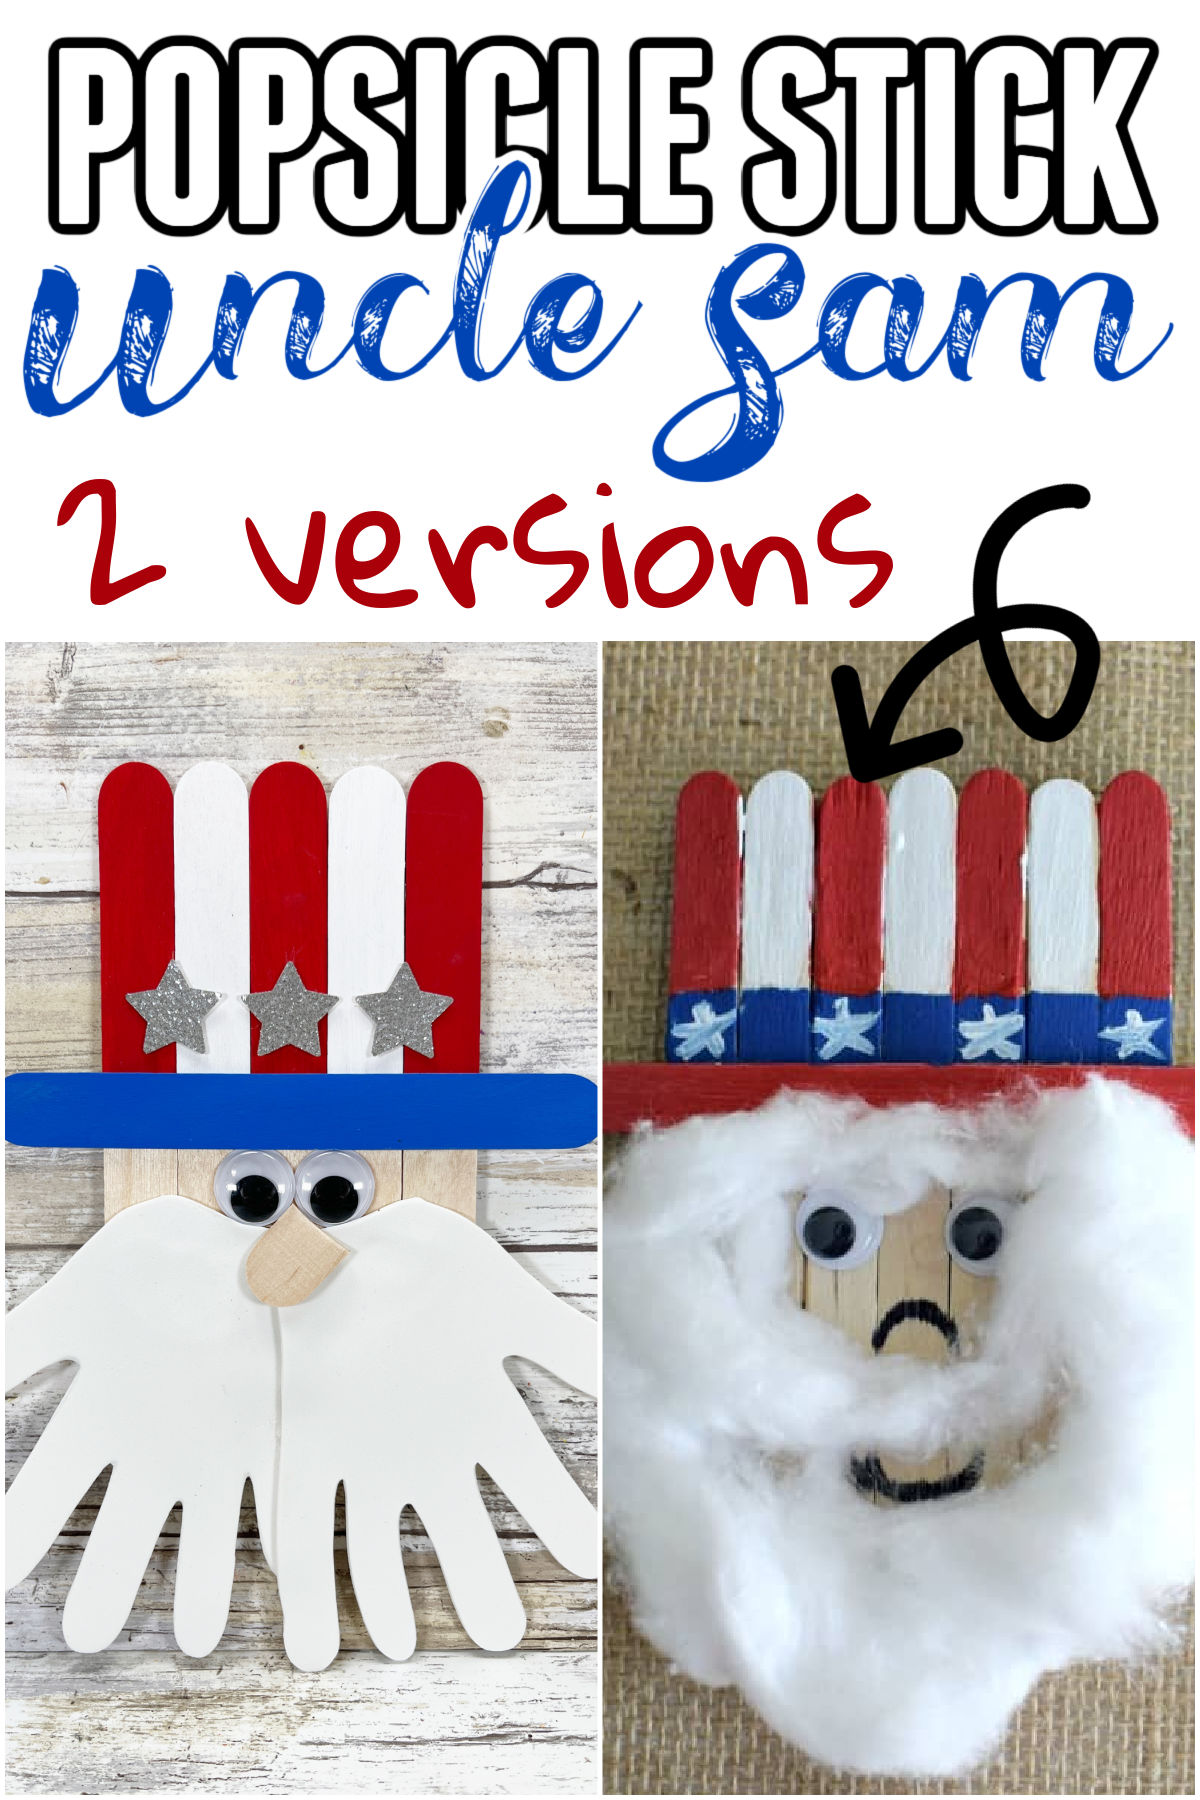
2 fun versions to choose from!
Follow our easy step-by-step guide to create an adorable Uncle Sam using popsicle sticks.
Let their creativity shine as they assemble the pieces, paint, and decorate their very own patriotic masterpiece.
Perfect for celebrating Independence Day or learning about American history.
Get ready to create this adorable salute to summertime and have a craft-filled adventure that will leave your kids feeling proud and inspired
Why you'll love this 4th of July craft for kids!
- Easy and accessible:
This Uncle Sam Popsicle Stick Craft is perfect for all skill levels, making it a fantastic activity for both kids and parents. The materials required are simple and readily available, ensuring a hassle-free crafting experience. - Patriotic pride: Celebrate the spirit of patriotism with this craft. It's a wonderful opportunity to teach children about Uncle Sam and the significance of American symbols, fostering a sense of national pride and understanding.
- Screen-free entertainment:
In a world filled with screens, this Uncle Sam Popsicle Stick Craft offers a refreshing break from technology. It engages kids in a tactile and imaginative experience, promoting offline creativity.
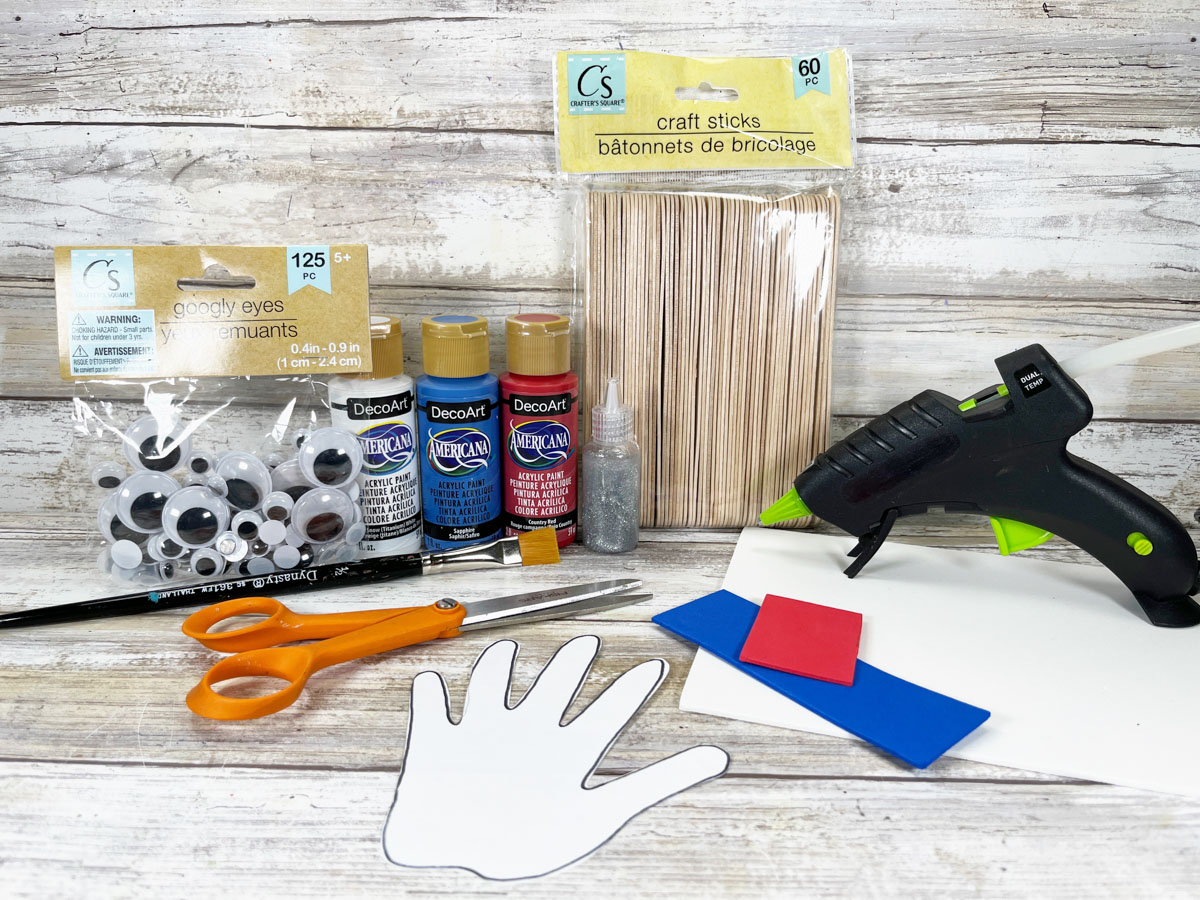
Supplies you need for a Popsicle Stick Uncle Sam Craft
VERSION 1:
- 8 Popsicle Sticks
- Red, White, and Blue Craft Paint (Apple Barrel Paint Kit)
- Paint Brushes
- Craft Glue
- 2 Wiggly Eyes (buy in bulk for numerous crafts)
- Cotton Balls
- Sharpie
- Cardboard or Cardstock
VERSION 2:
- Craft Sticks, Jumbo
- Craft Foam, White and Silver Glitter
- Wiggle Eyes
- Acrylic Craft Paint – Red, White, Blue
- Glue Gun and Glue Sticks
- Paintbrush
- Scissors
- Pencil
How to make a Popsicle Stick Uncle Sam Craft for Kids!
Popsicle Stick Uncle Sam Version 1
Start off by painting 1 craft stick red. Allow drying!
Glue on 7 plain craft sticks to your card stock or cardboard. Allow drying!
Once the sticks are dried onto your backing you can then glue on the first red stick to make his hat.
Allow that stick to dry and now you are ready to paint on the rest of the hat details.
We made a stripe of blue with stars and then red and white stripes.
Allow different colors to dry before using a different one.
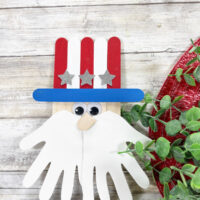
Once the hat is dried you can glue on his eyes and beard. Then draw on his mouth and nose.
If you want to turn him into a magnet I recommend a .75 inch adhesive magnet to hold it up.
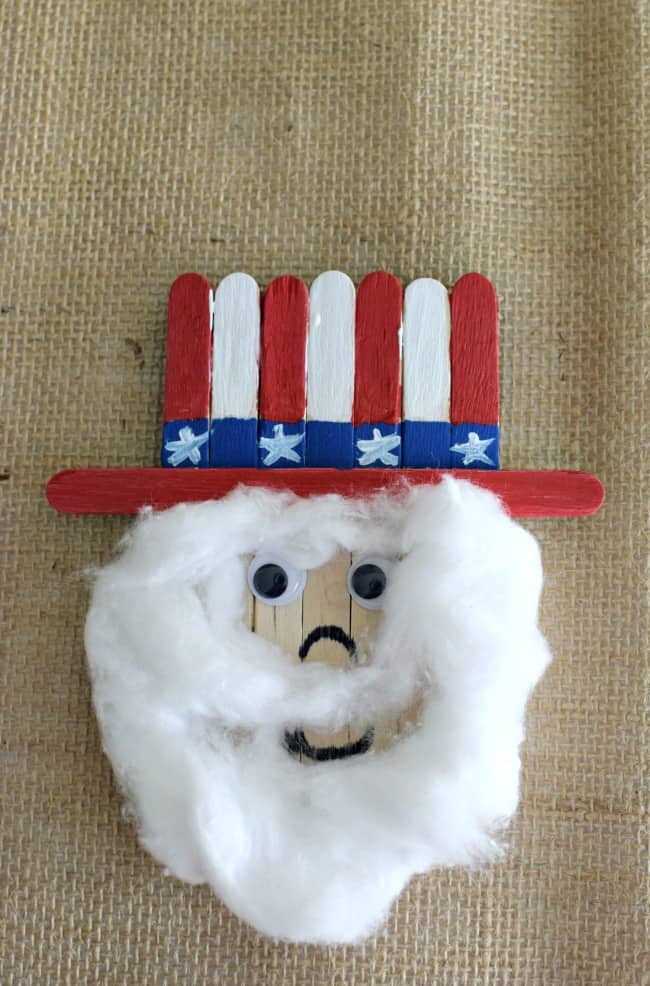
Popsicle Stick Uncle Sam Craft Version 2
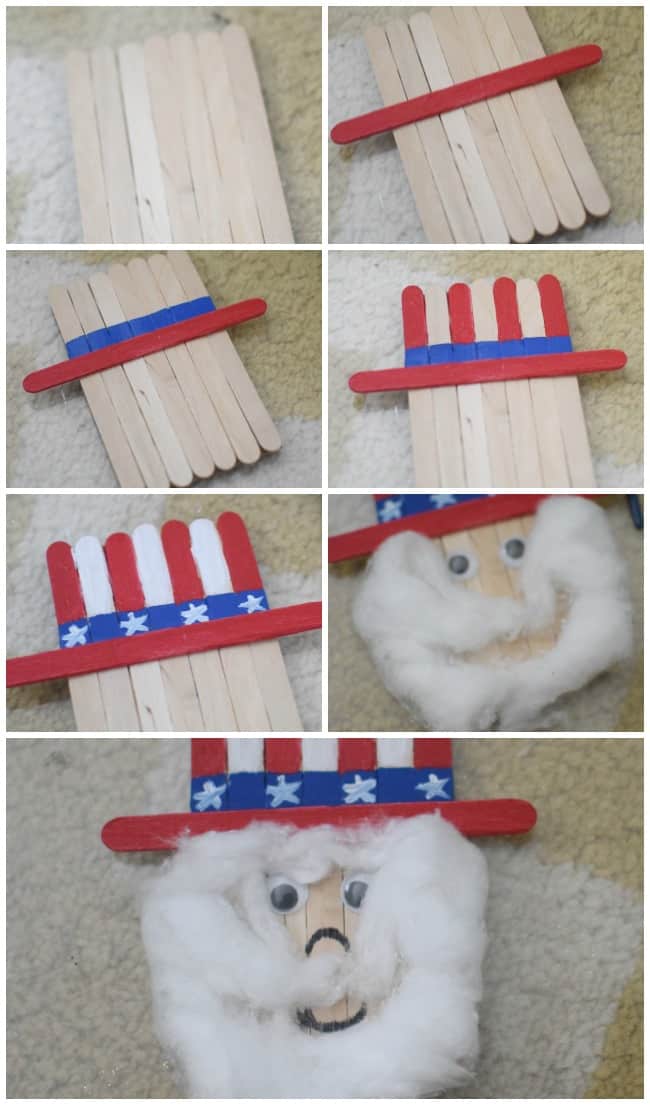
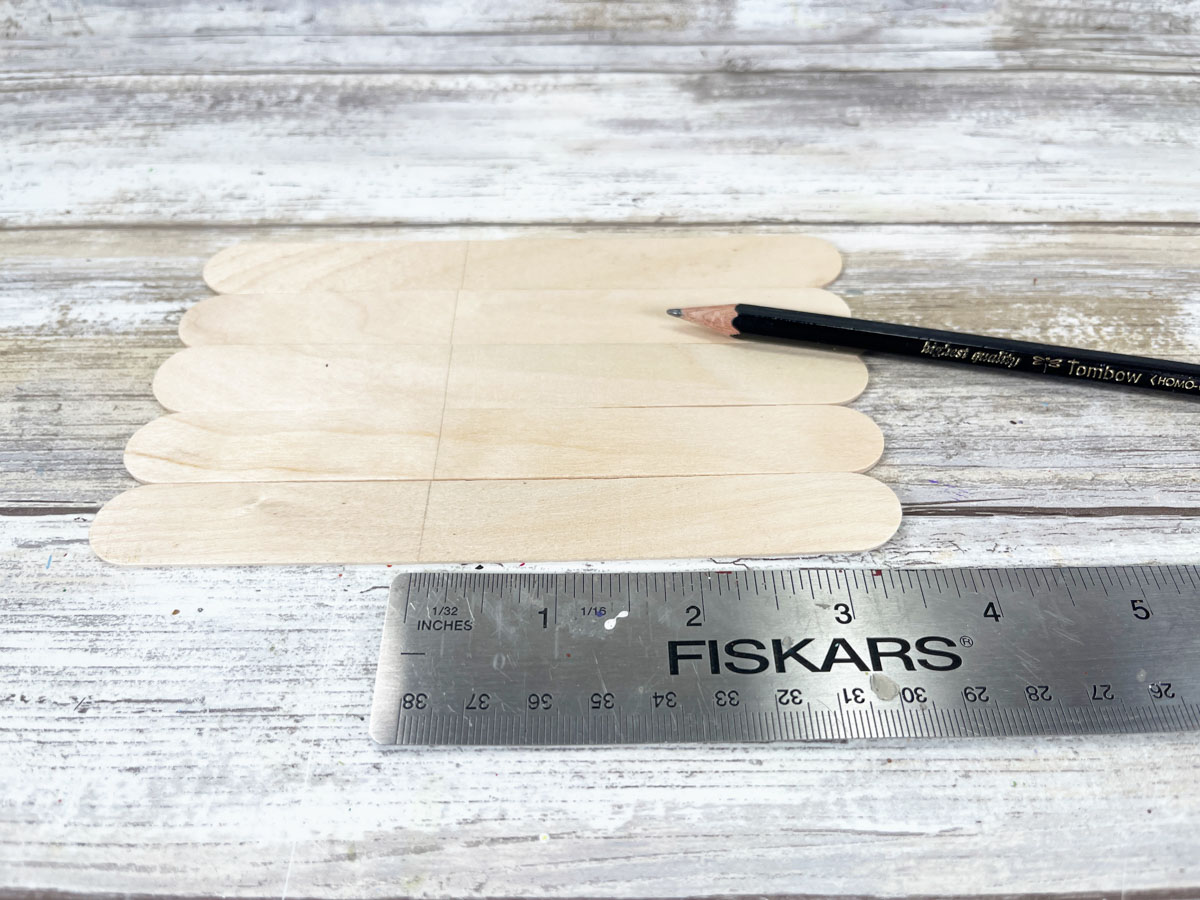
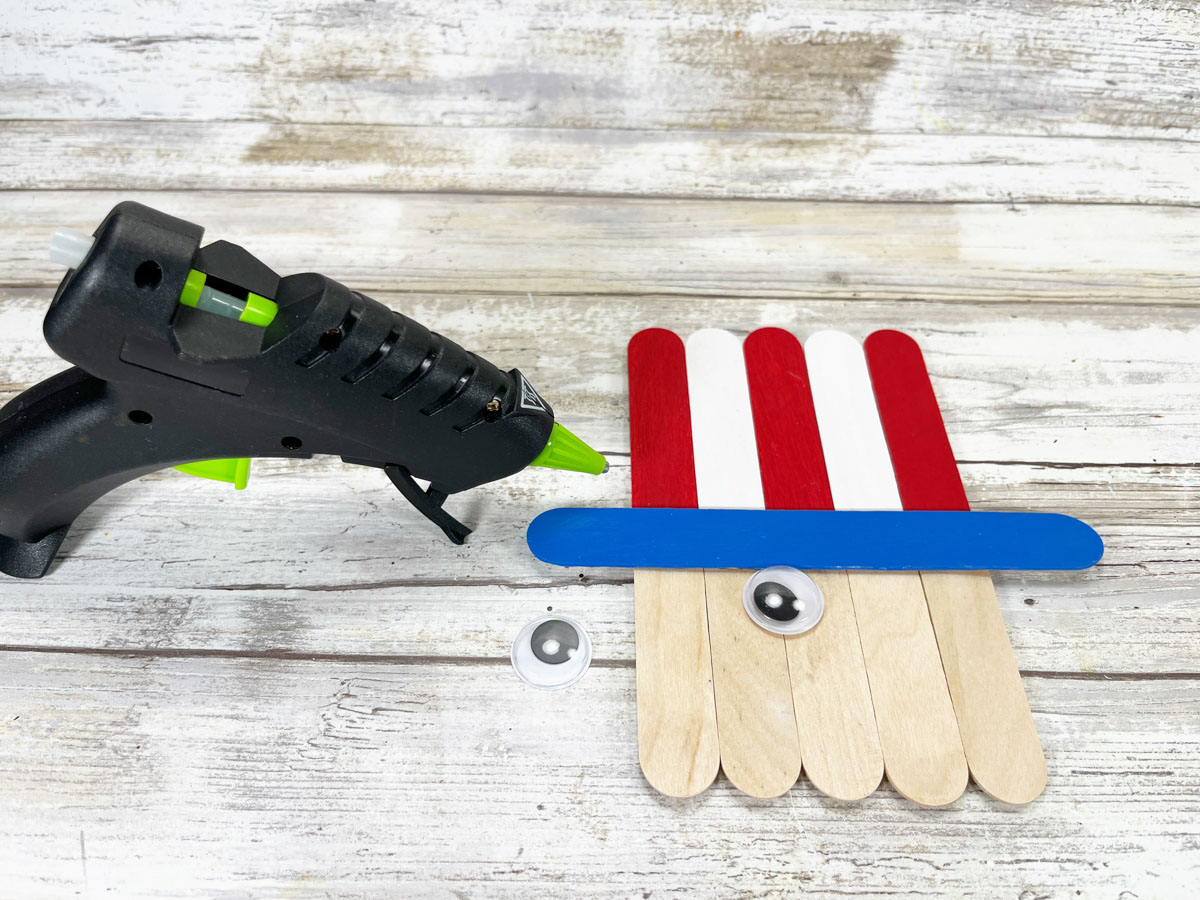
Gather all supplies. To create the Uncle Sam base, line up five jumbo craft sticks on your work surface. Measure 3.5” from the end of the craft sticks and draw a pencil line across all five craft sticks.
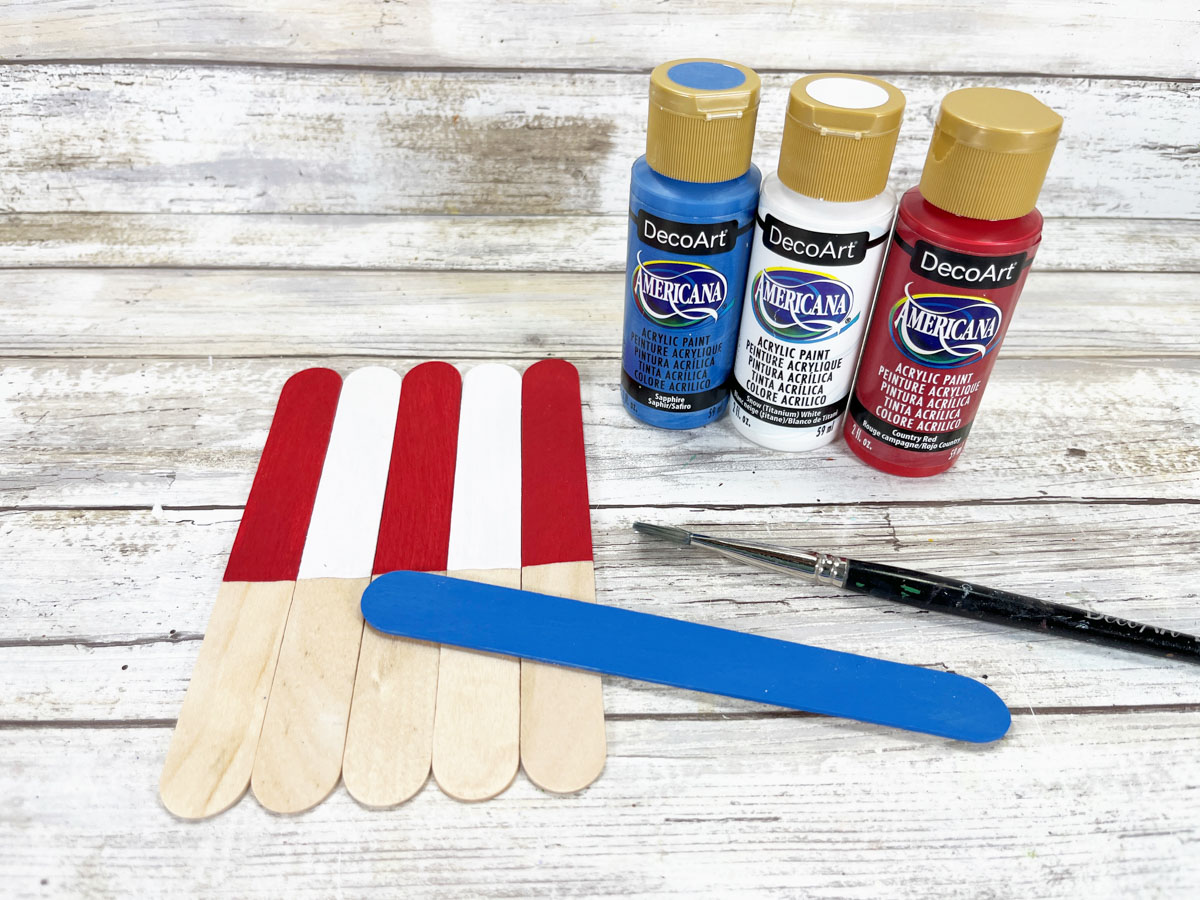
Basecoat the front and sides of three of the jumbo craft sticks with red acrylic craft paint, and the other two with white acrylic craft paint.
Basecoat one craft stick with blue acrylic craft paint. Let dry, and apply a second coat, if necessary.
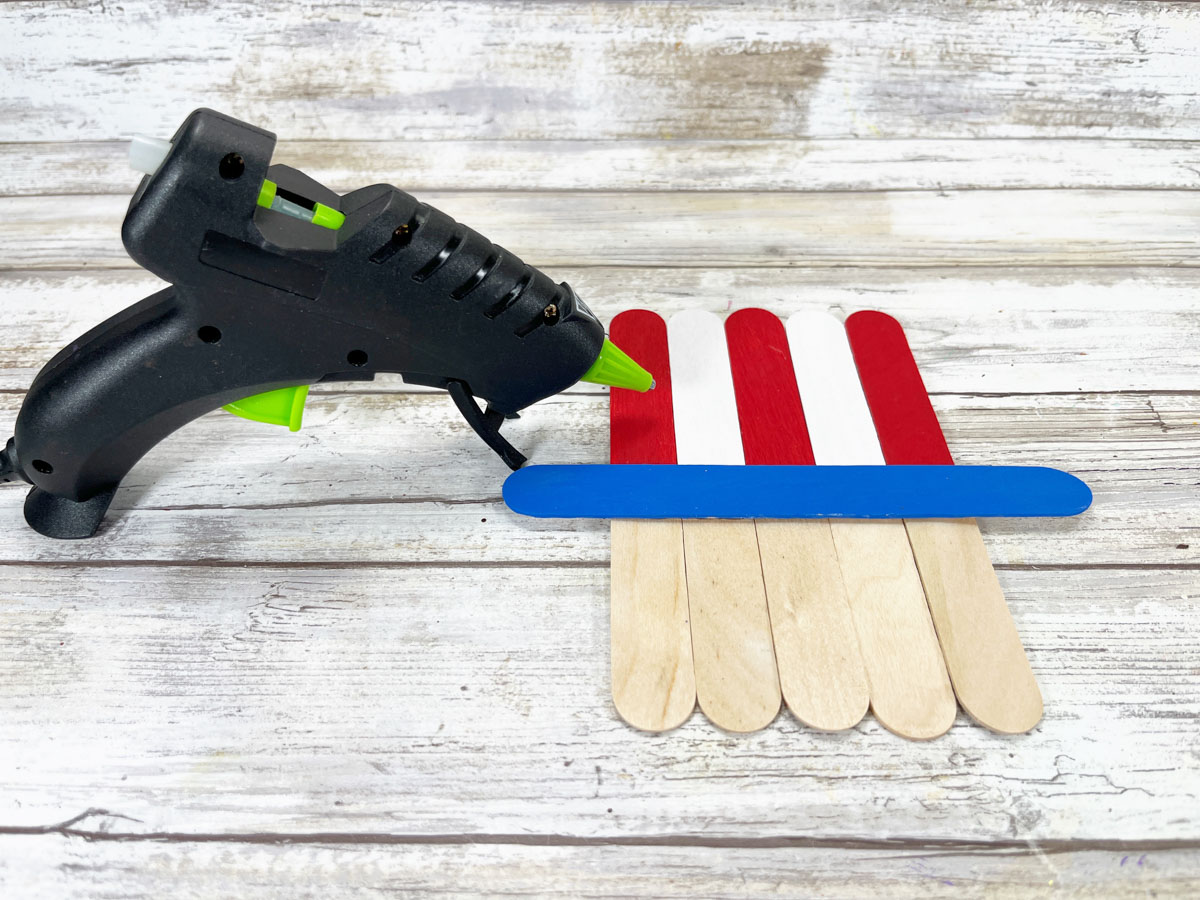
Line up the craft sticks on your work surface with the red and white at the top and the natural wood at the bottom. Attach the blue craft stick brim to Uncle Sam’s hat with a glue gun and glue sticks.
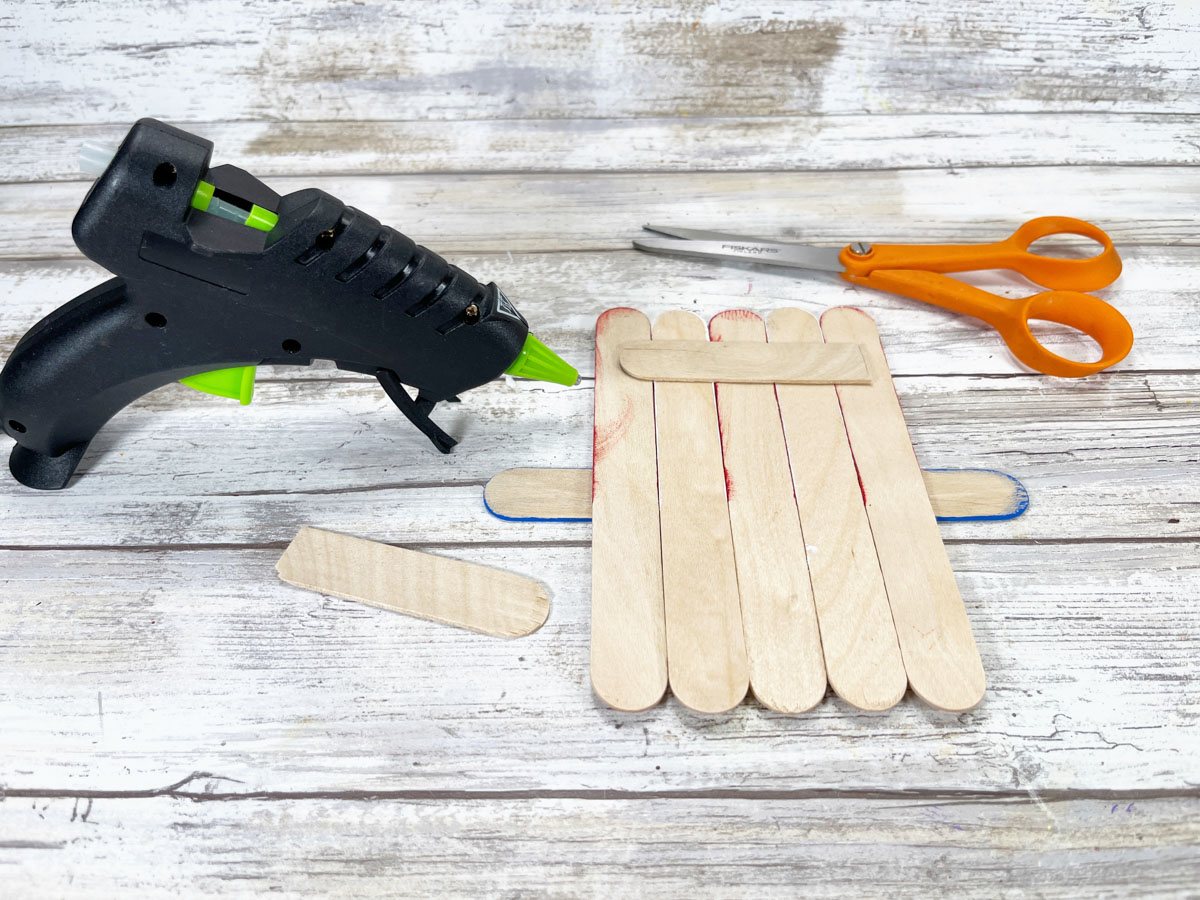
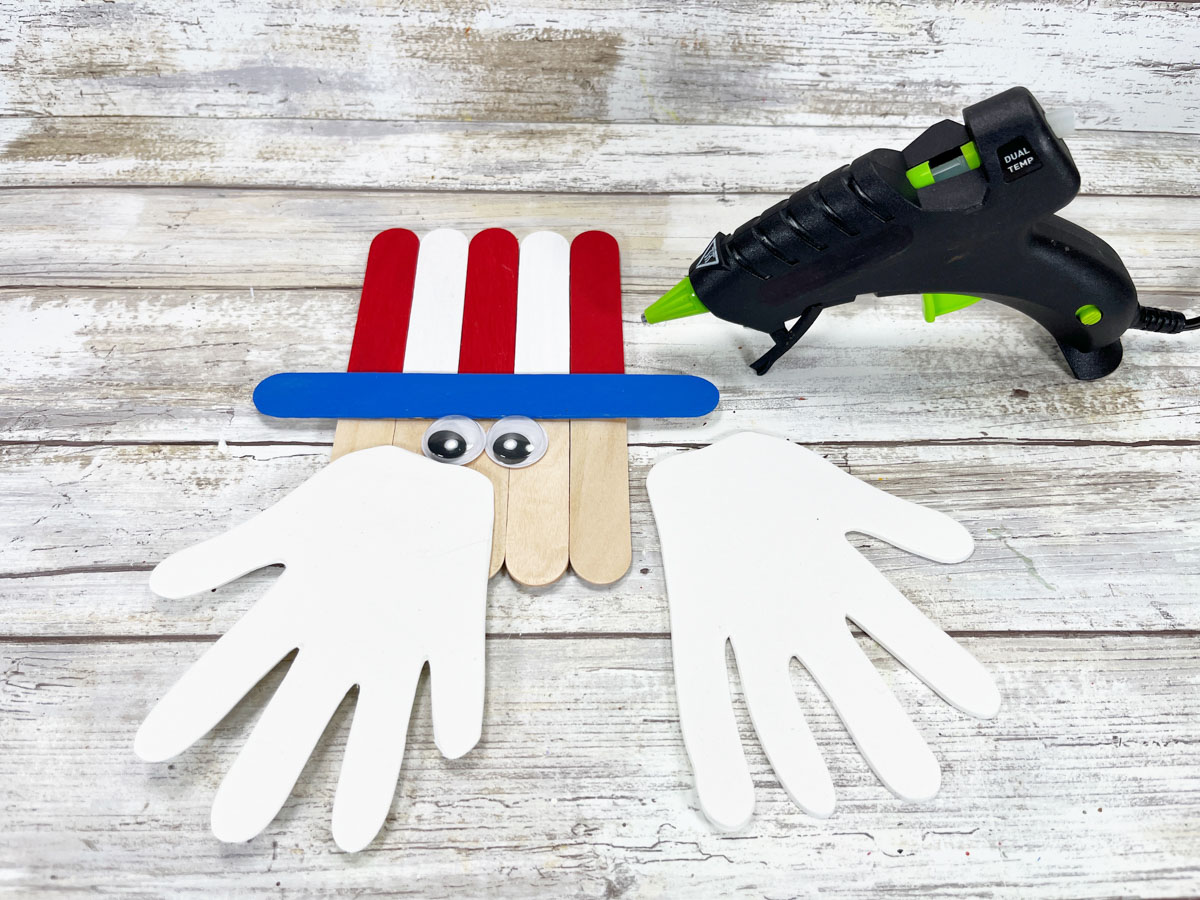
Flip over and using scissors, trim additional jumbo craft sticks to the width of Uncle Sam and attach with a glue gun and glue sticks.
Attach two wiggle eyes to the center of Uncle Sam’s face with a glue gun and glue sticks.
TIP: You can use liquid craft glue for this project, but you will have to wait for it to dry.
Trace your child’s hand onto white construction paper, cardstock, or craft felt and cut out.
Glue the two handprints to Uncle Sam’s face just under his nose to create his beard.
Using a piece of the cut popsicle stick from before chop a small section to create the nose. Attach to Uncle Sam’s face directly under his eyes to create a nose.
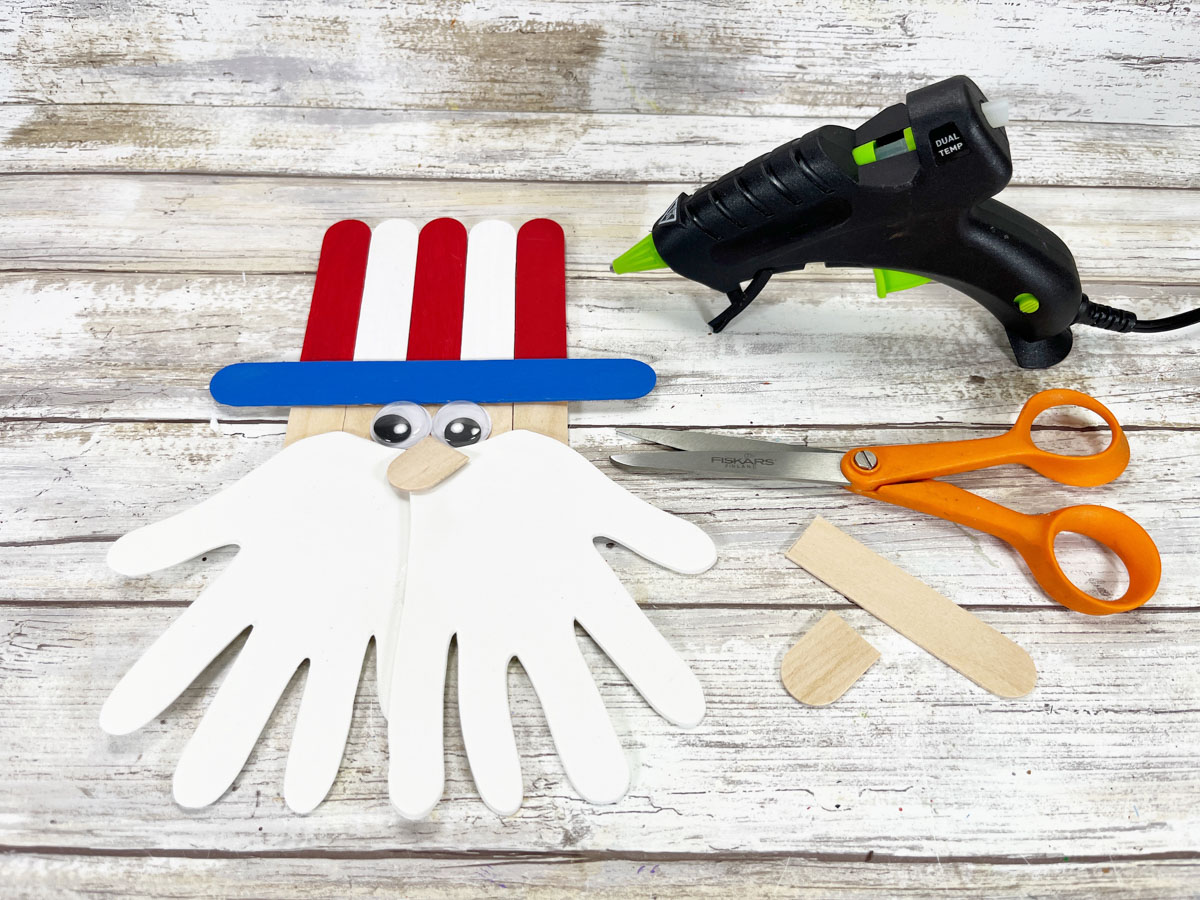
Trace three mini stars onto the back of silver glitter craft foam, and then cut out with scissors.
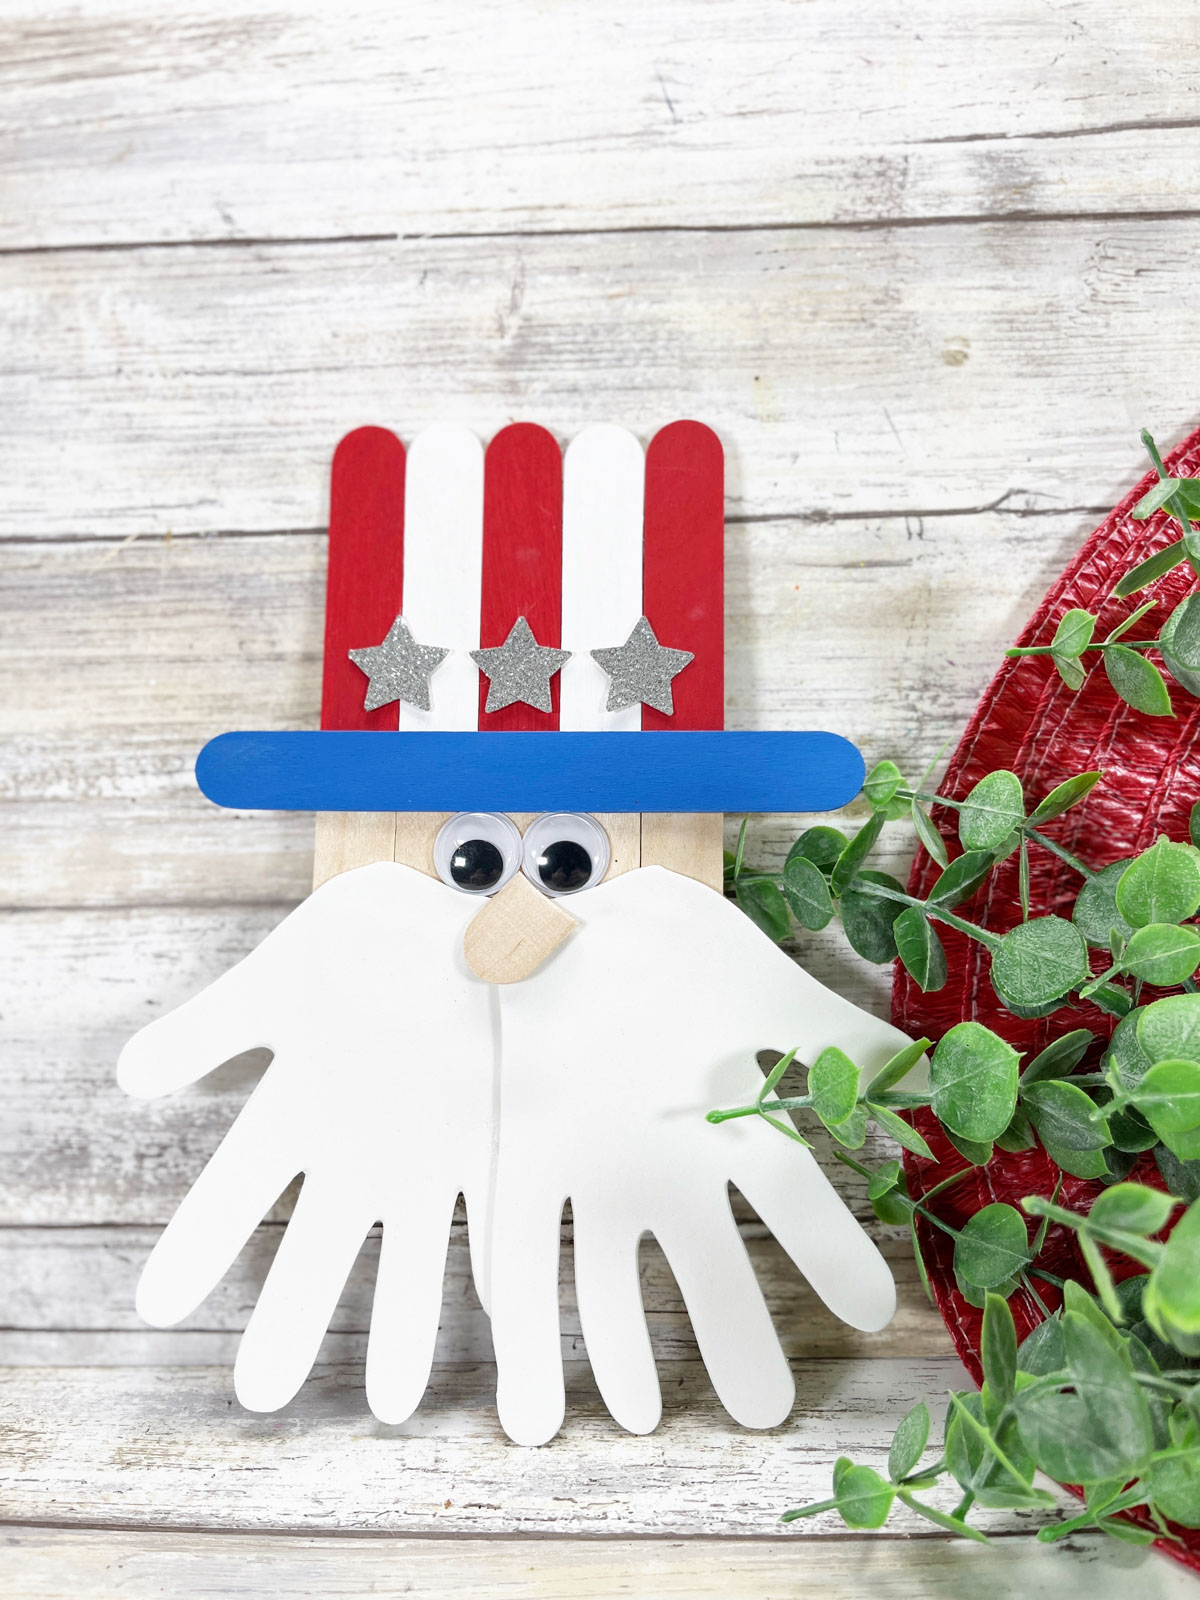
Attach the three silver glitter stars to Uncle Sam’s hat with a glue gun and glue sticks.
Want to print or save these popsicle stick Uncle Sam craft instructions?
Leave a Reply