
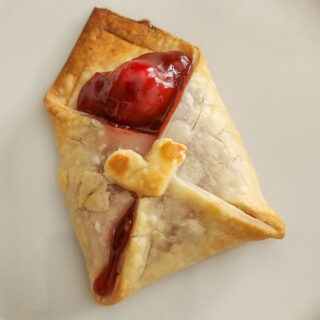
Satisfy your sweet tooth with these delicious cherry pie pastry envelopes! Ready with just 2 ingredients and in 15 minutes, it's the perfect quick treat to wow your friends and family.
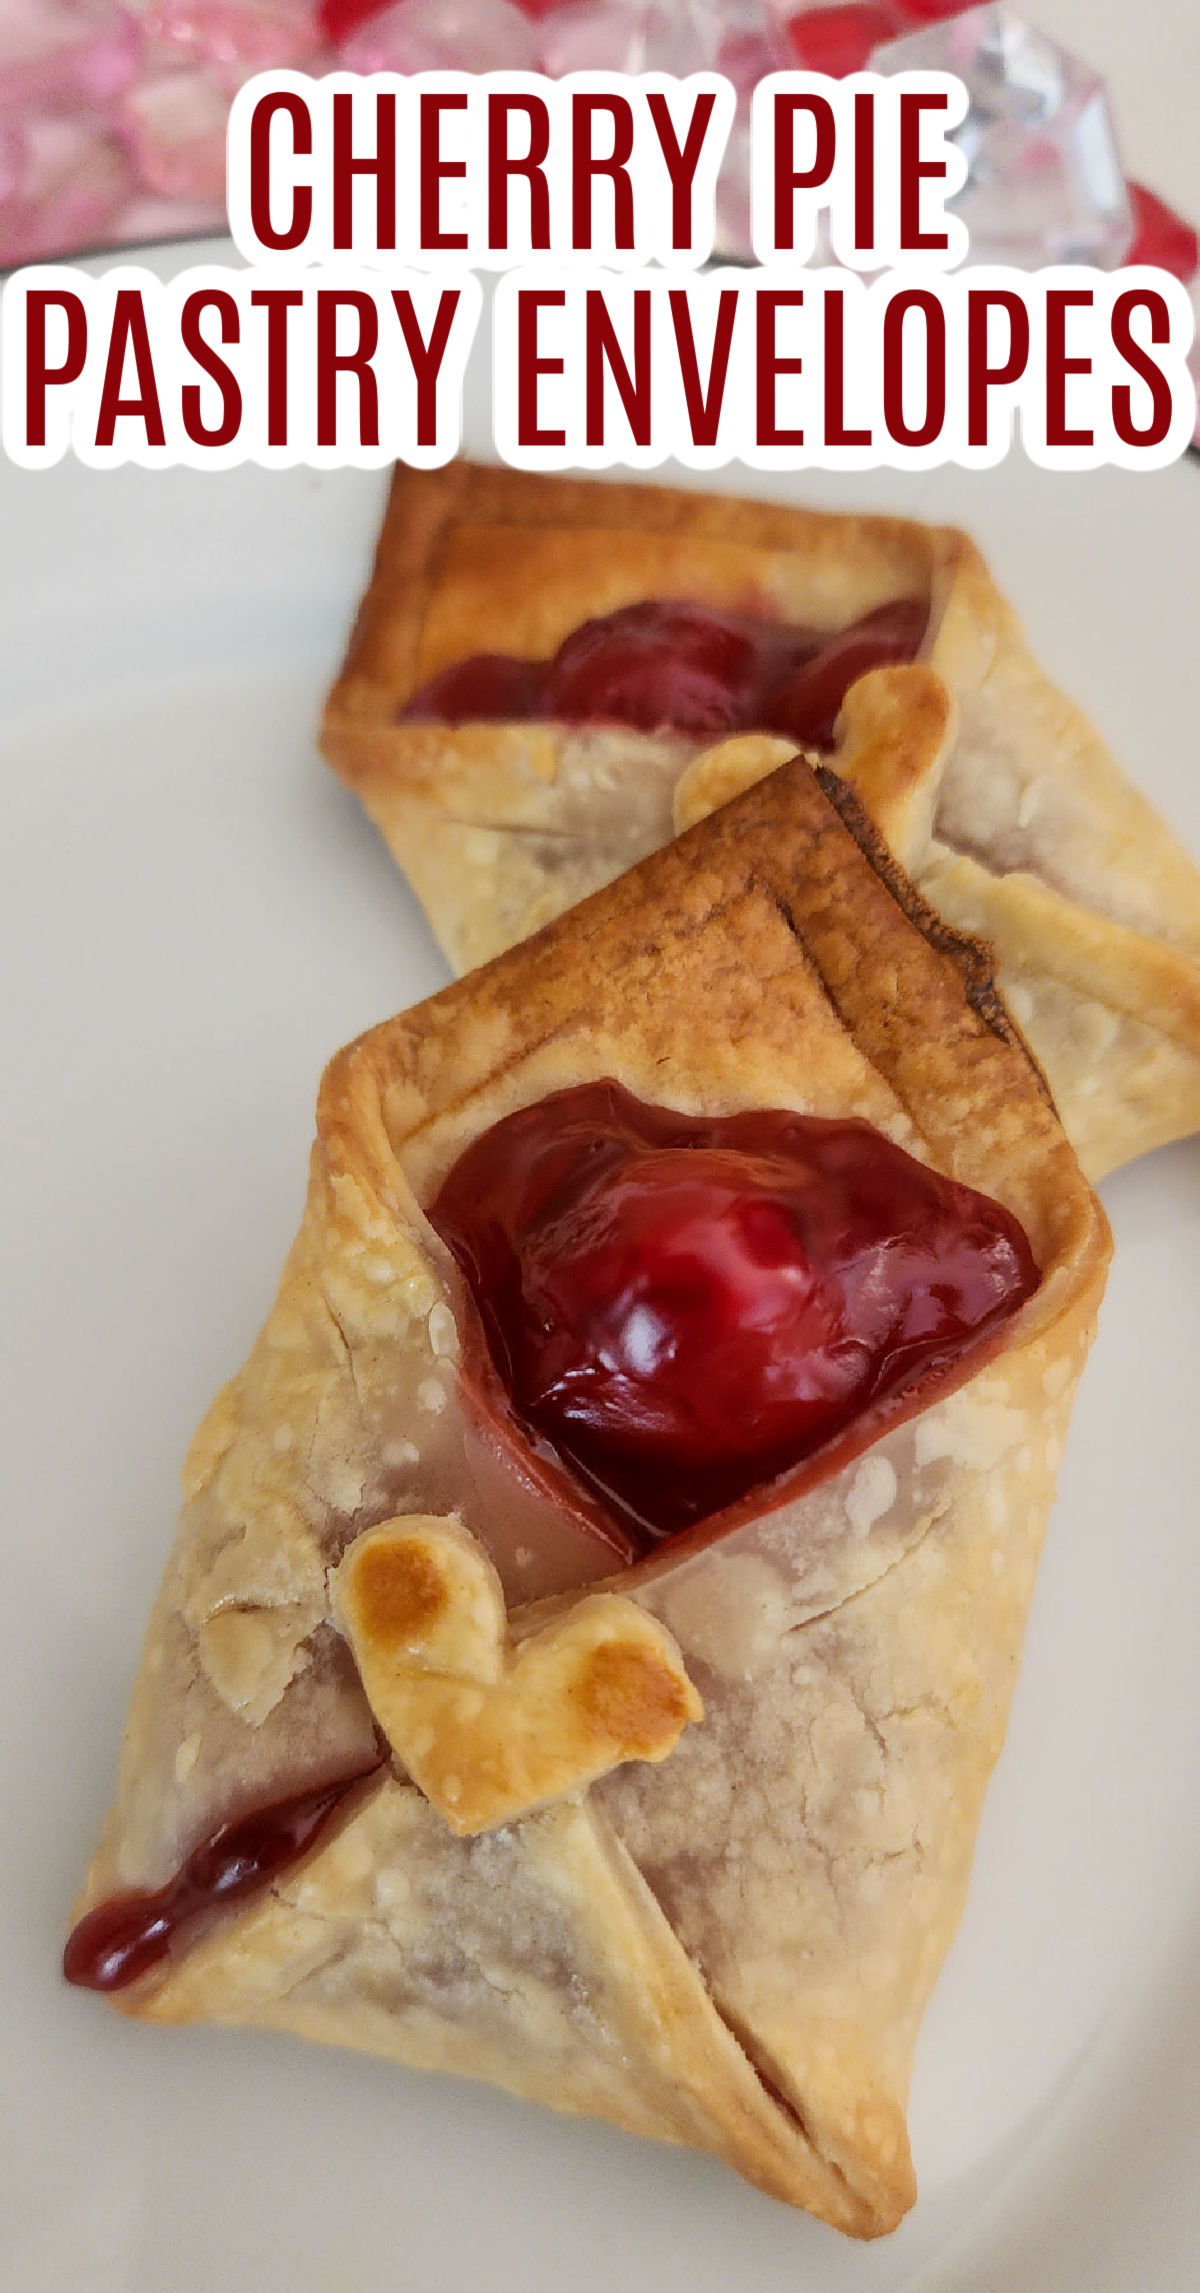
These buttery pie crusts filled with tart cherries are perfect for Valentine's Day and sure to be a hit with guests or simply an indulgent snack at home.
Why you'll love this recipe!
- Only requires 2 ingredients!
- Simple and Quick
- Great for Valentine's Day
- Delicious!
Ingredients you will need:
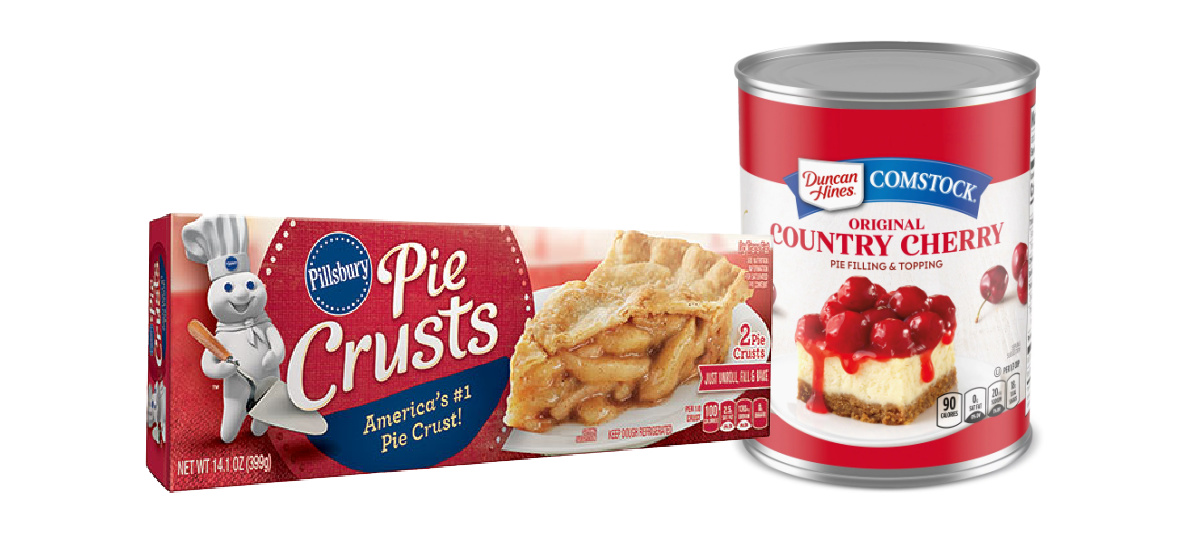
- Refrigerated Pie Crusts
- Cherry Pie Filling
- 1 Egg (for the egg wash, optional)
How to make Cherry Pie Pastry Envelopes for Valentine's Day!
Preheat oven to 450°F
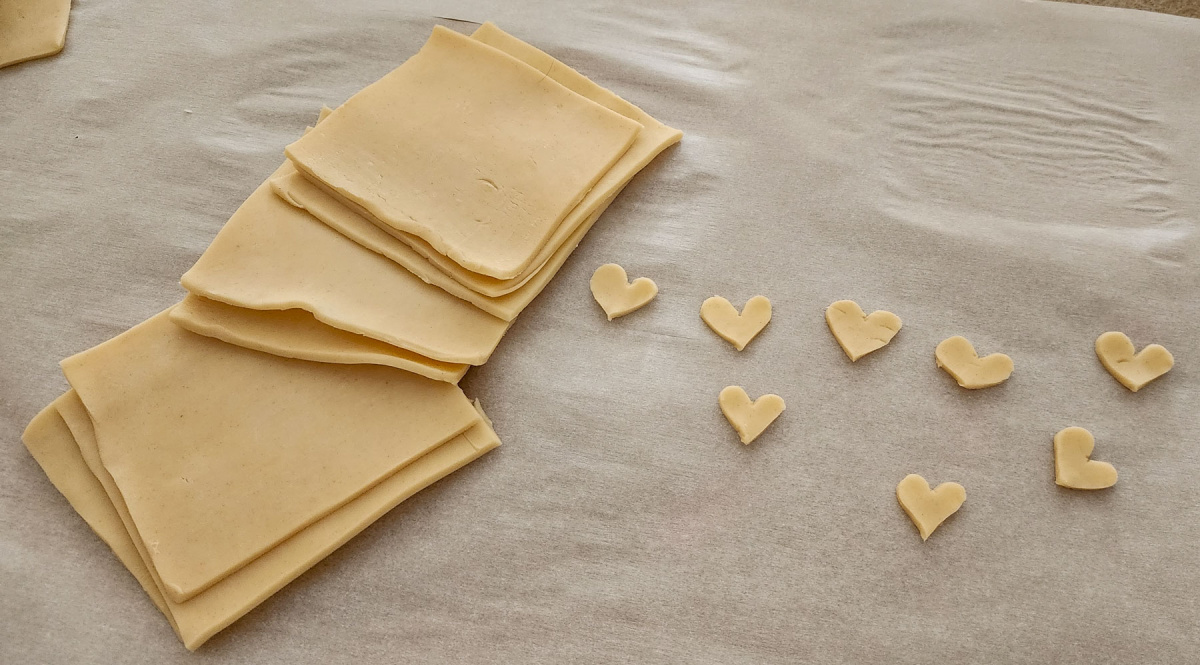
Unroll the pastry and cut them into squares.
The sizing is up to you, these are approximately 3-inch squares but up to 5-inch works too. You can get about 8 pies out of 1 pkg at 3 inches.
Use the extra dough to cut out small hearts. You can use a heart cookie cutter or freehand them.
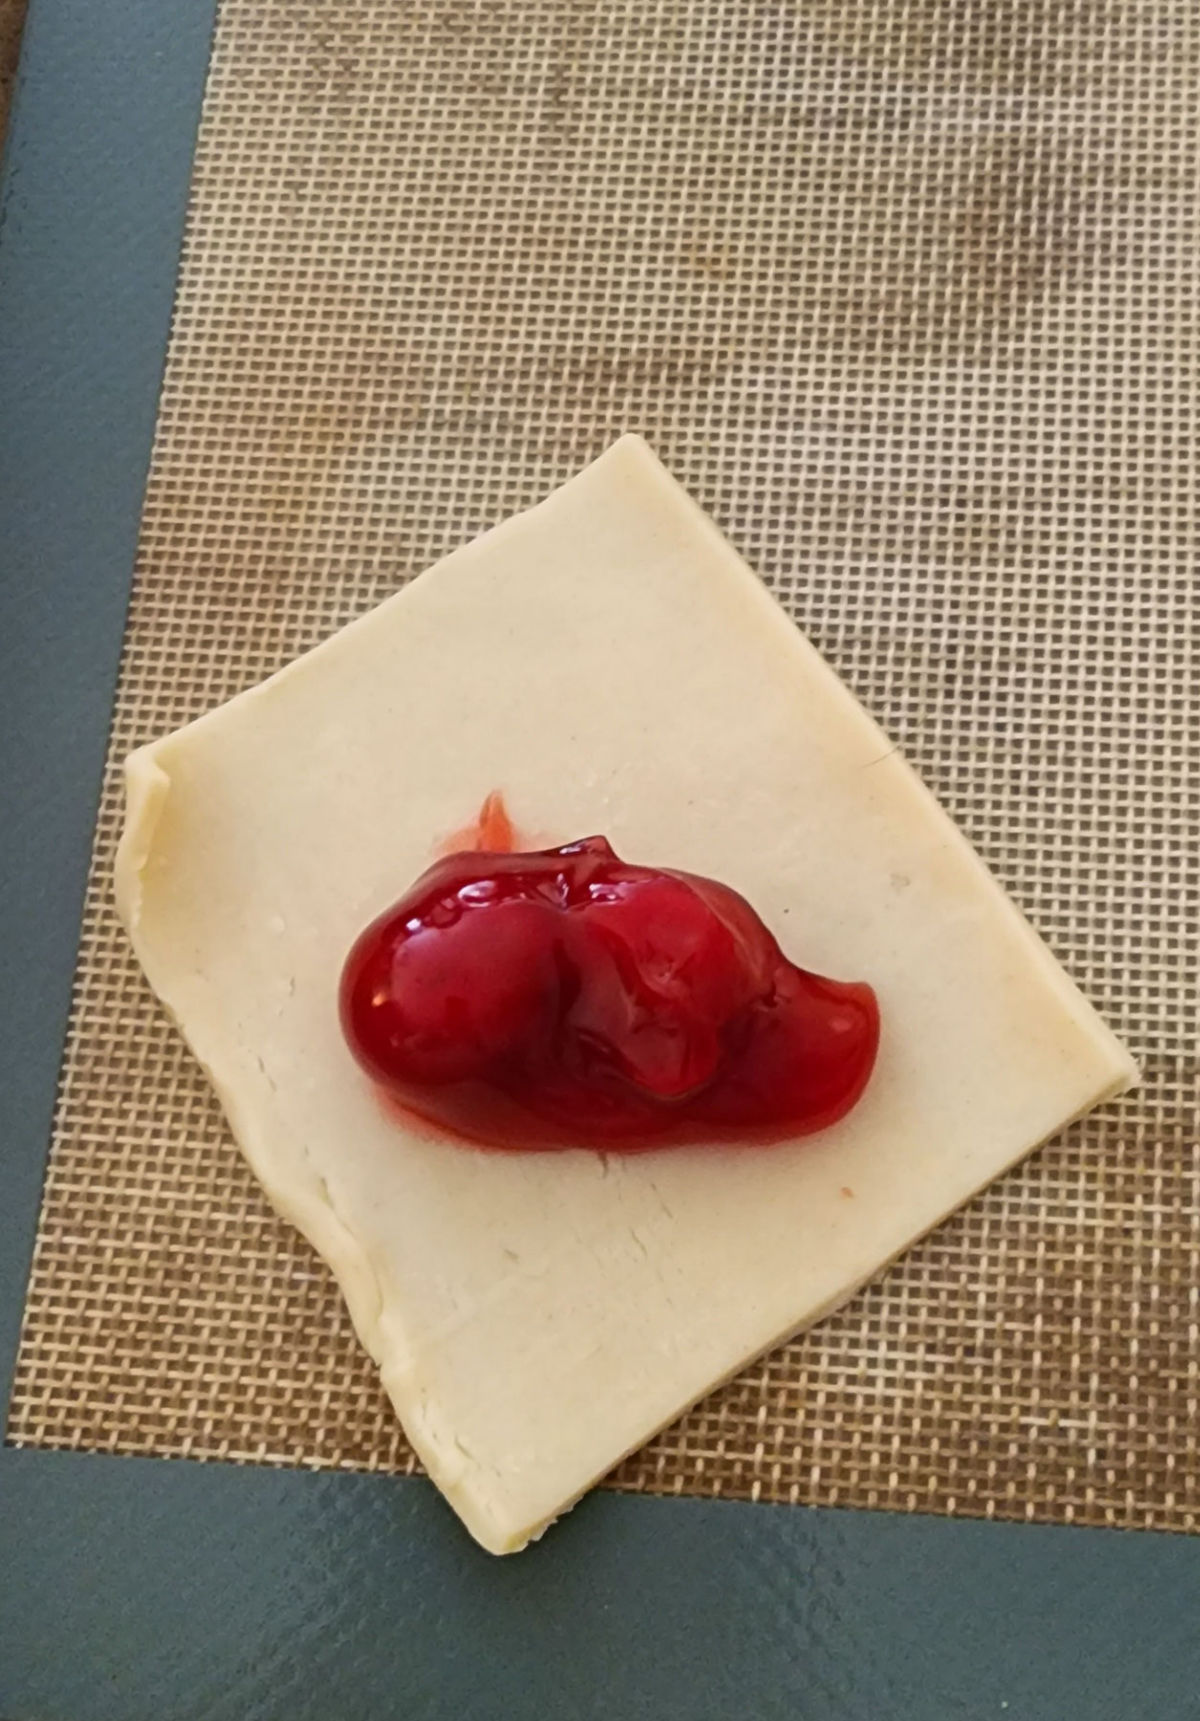
At this point, we filled the pastries with cherry pie filling. I want to make a quick note here about how I would change this up when fixing them again.
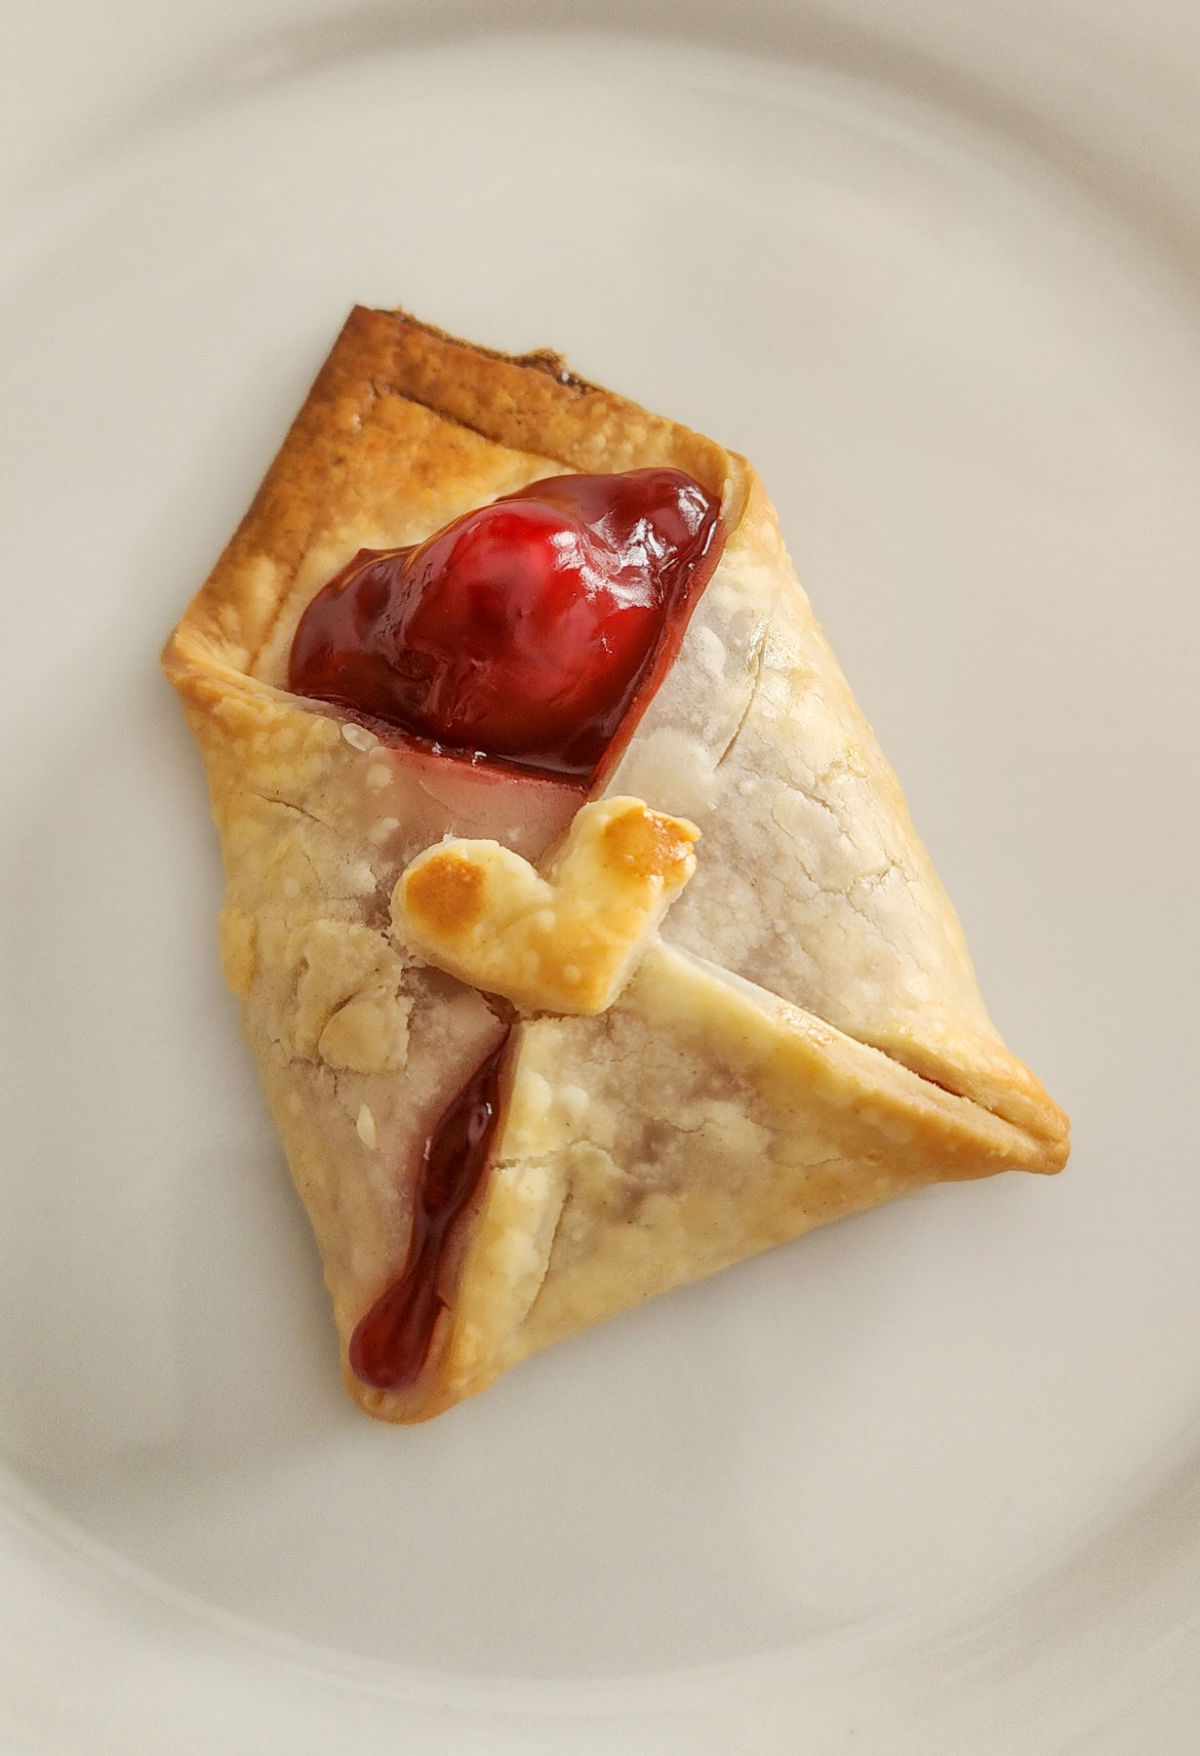
I had an issue with the filling busting out of the dough after it was cooked as you can see in the photos below.
You could fill them up less to prevent this, but I personally think you would be all pastry and no filling at that point.
How I would go about fixing this is by rolling up pieces of aluminum foil and putting them in the pocket as a placeholder.
Warm the pie filling up on the stove and fill them after the crust has baked.
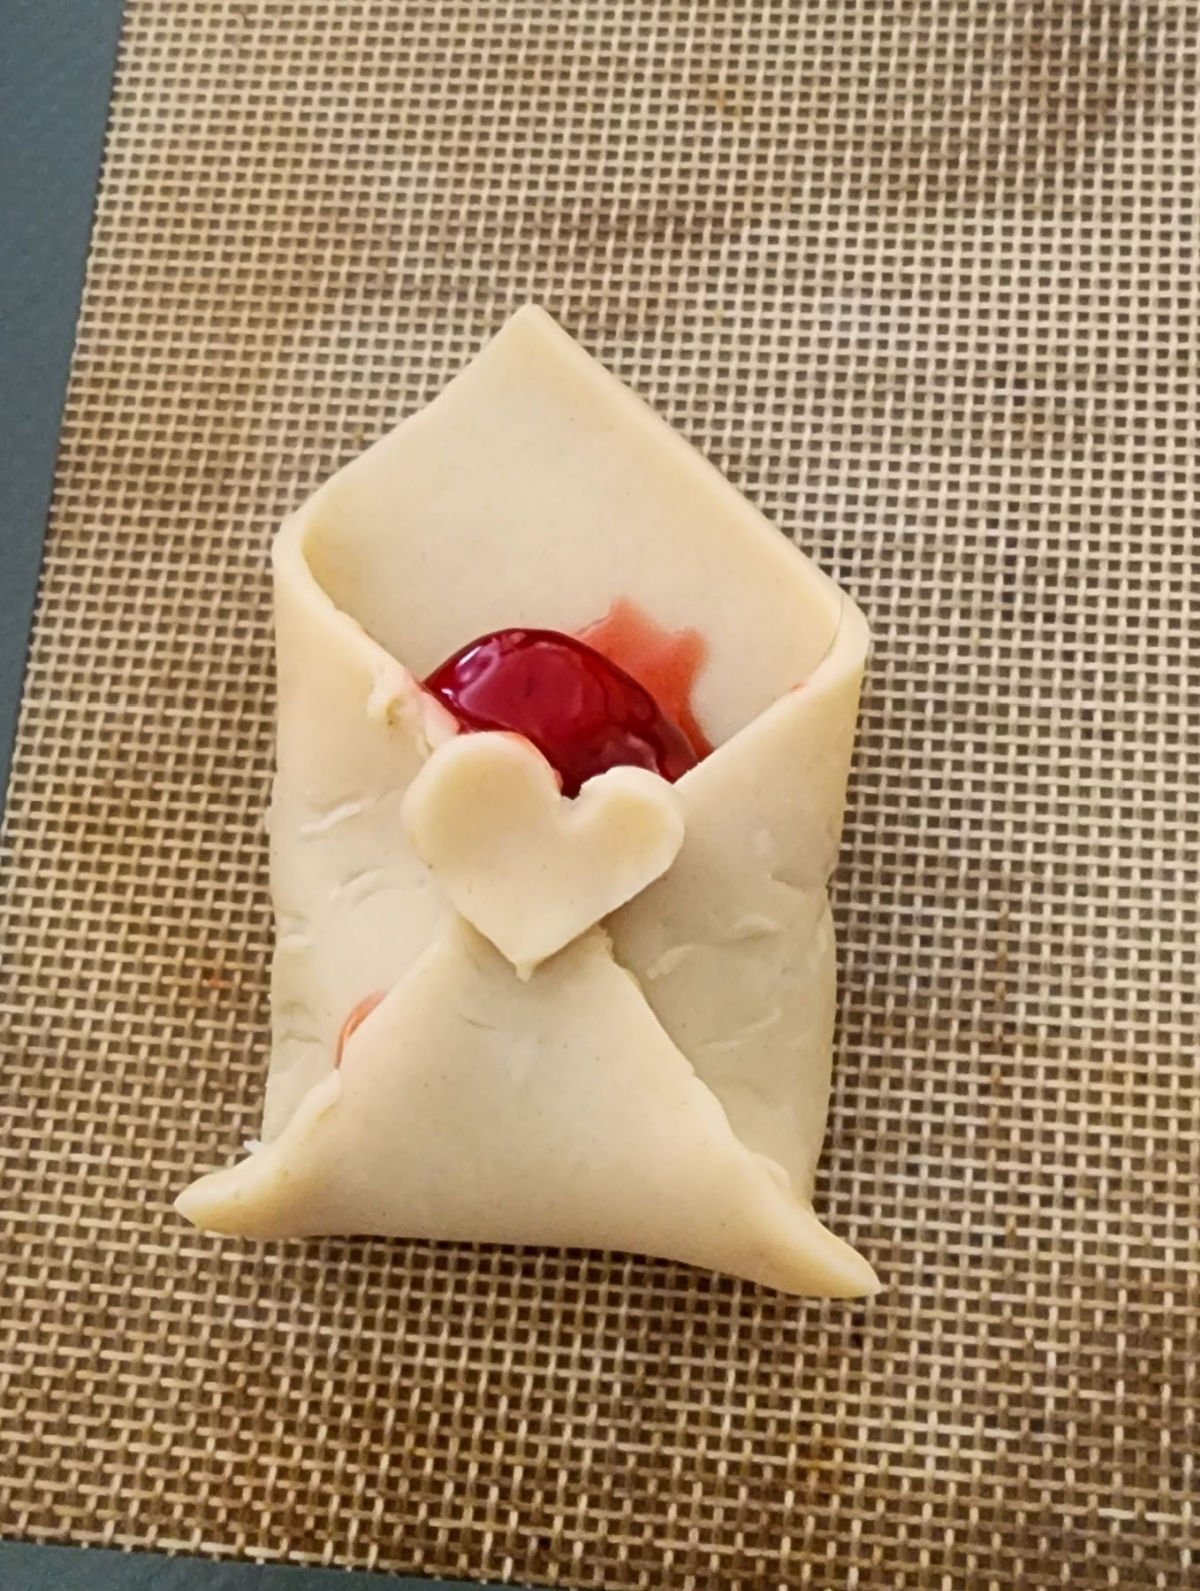
Once you have filled your dough (whether with the filling or foil) you are ready to close it up.
Dip your finger with water and wet the edges of the left, right, and bottom flaps.
Bring the two edges towards the center and the bottom piece up. See the pictures below if you need further instructions.


Dip your finger with water again and wet the back of the hearts and place them in the middle of the cherry pie pastry envelopes.
Baste the pastry with an egg wash if you desire.
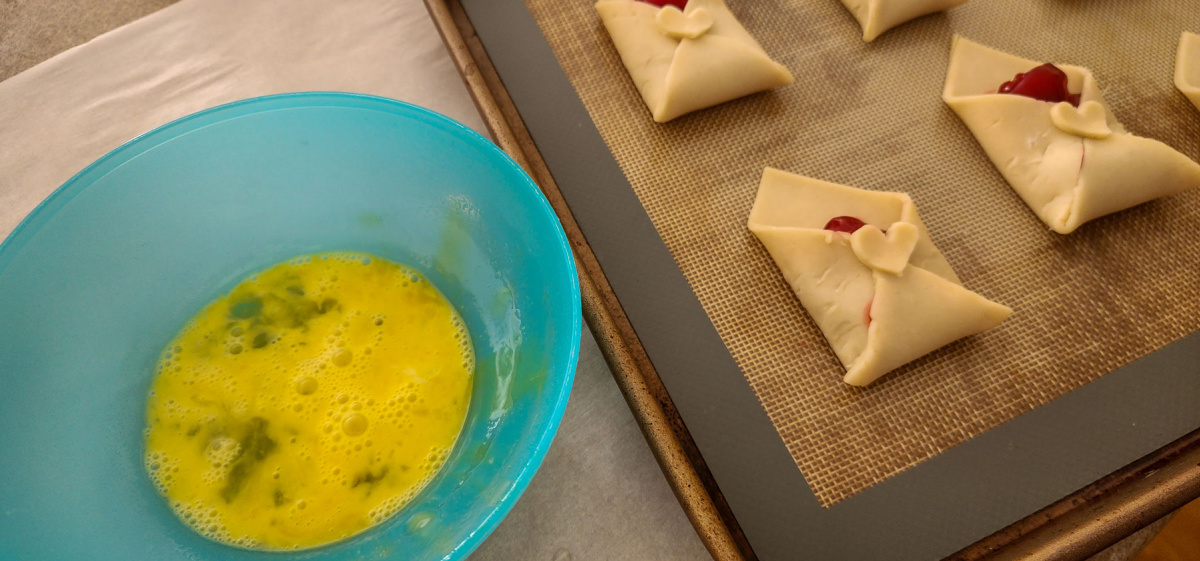
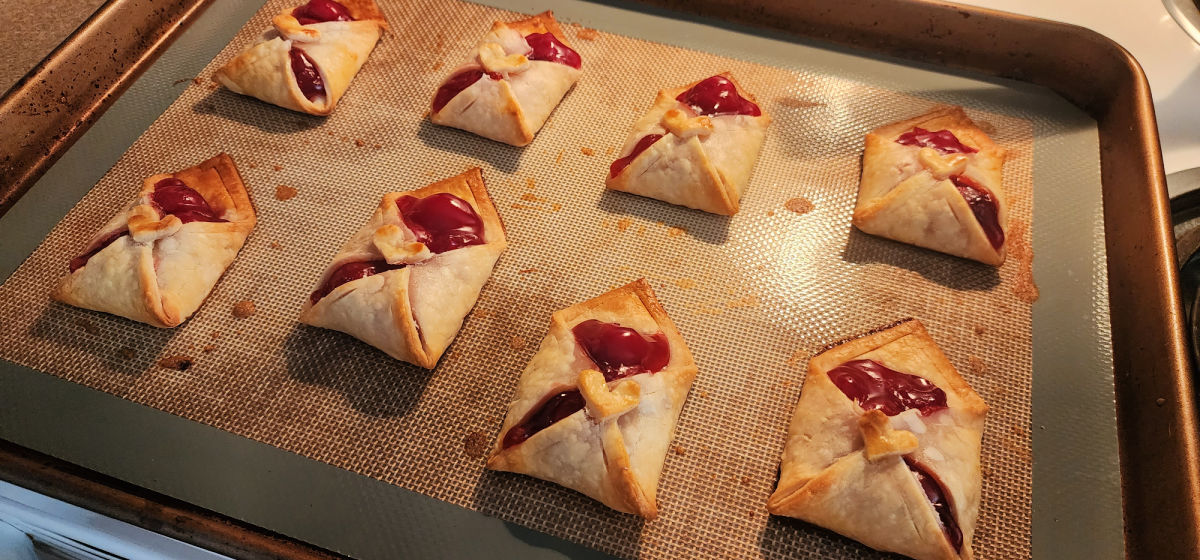
Bake the pastry for approximately 10 - 12 minutes, but just know all ovens cook differently so you will want to keep an eye on them and take them out when they are lightly browned.
We clearly went a little over lightly brown but even if you do they were still delicious! It's okay if they don't turn out perfect!
You can place a piece of aluminum foil over the top flaps of the envelopes if they begin to brown before the rest.
If you used the foil method and need to still fill them allow the pies to cool completely before stuffing.

Want to print or save this Cherry Pie Pastry Envelopes recipe?
Valentine's Day Cherry Envelope Pastries
Ingredients
- Refrigerated Pie Crusts
- Cherry Pie Filling
- 1 Egg optional
Instructions
- Preheat oven to 450°F
- Unroll the pastry and cut them into squares. The sizing is up to you, these are approximately 3-inch squares but up to 5-inch works too. You can get about 8 pies out of 1 pkg at 3 inches.
- Use the extra dough to cut out small hearts. You can use a heart cookie cutter or freehand them.
- At this point, we filled the pastries with cherry pie filling. See the post instructions for additional notes on how to fix the pies from bursting open.
- Once you have filled your dough you are ready to close it up. Dip your finger with water and wet the edges of the left, right, and bottom flaps.
- Bring the two edges towards the center and the bottom piece up.
- Dip your finger with water again and wet the back of the hearts and place them in the middle of the cherry pie pastry envelopes.
- Baste the pastry with an egg wash if you desire.
- Bake the pastry for approximately 10 - 12 minutes until lightly browned.


Leave a Reply