
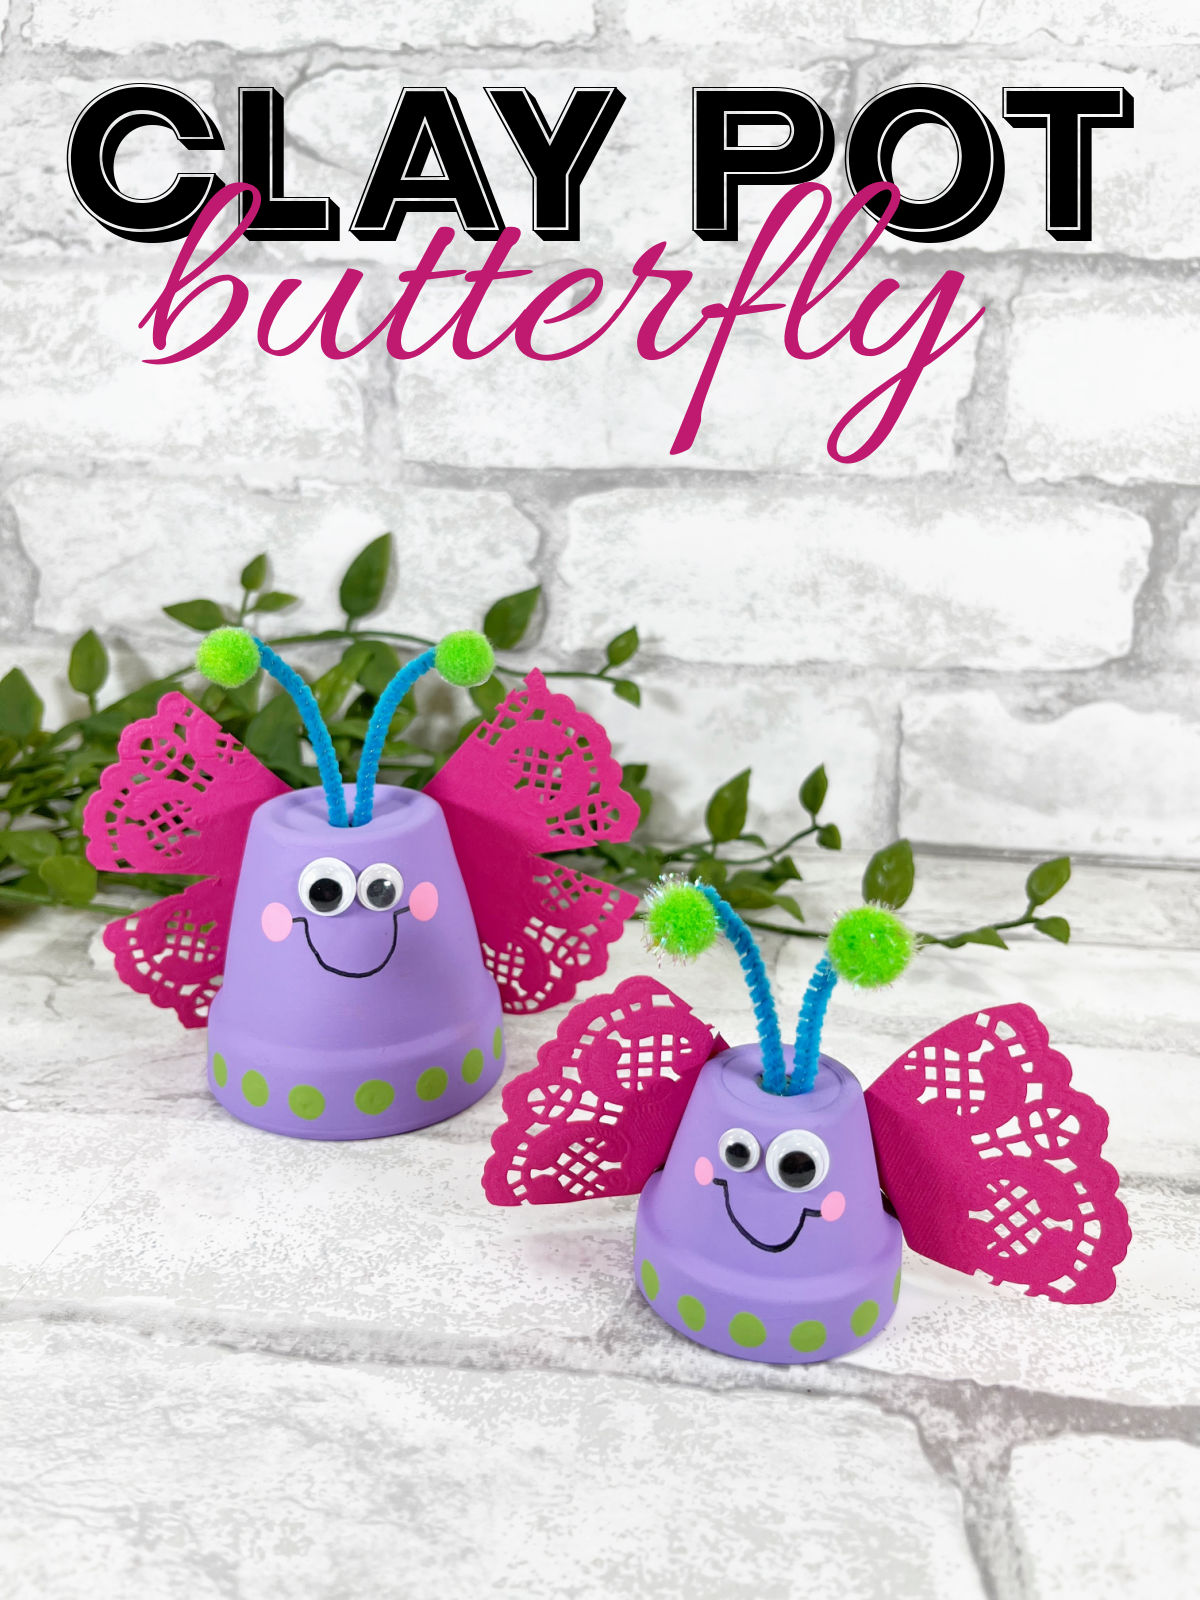
Get creative with this adorable clay pot butterfly craft! Follow these easy steps to make your own unique and colorful butterfly.
Looking for a fun and easy craft project to do with your kids?
Simple mini clay pots along with paint, wiggle eyes, doilies, and pom poms transform into a Mama and Baby Butterfly just in time for the summer garden season.
Materials you will need:
- Small Clay Pots – 2.5” and 1.5” in diameter
- Acrylic Craft Paint – Lavender, Green, Pink
- 4 Wiggle Eyes
- 4 Pom Poms, Green
- Chenille Stem, Blue
- 2 Small Pink Paper Doilies
- Glue Gun and Glue Sticks
- Black Permanent Marker
- Scissors
- Paintbrush
- Pencil with New Eraser

How to make a clay pot butterfly craft for kids to make!
STEP ONE
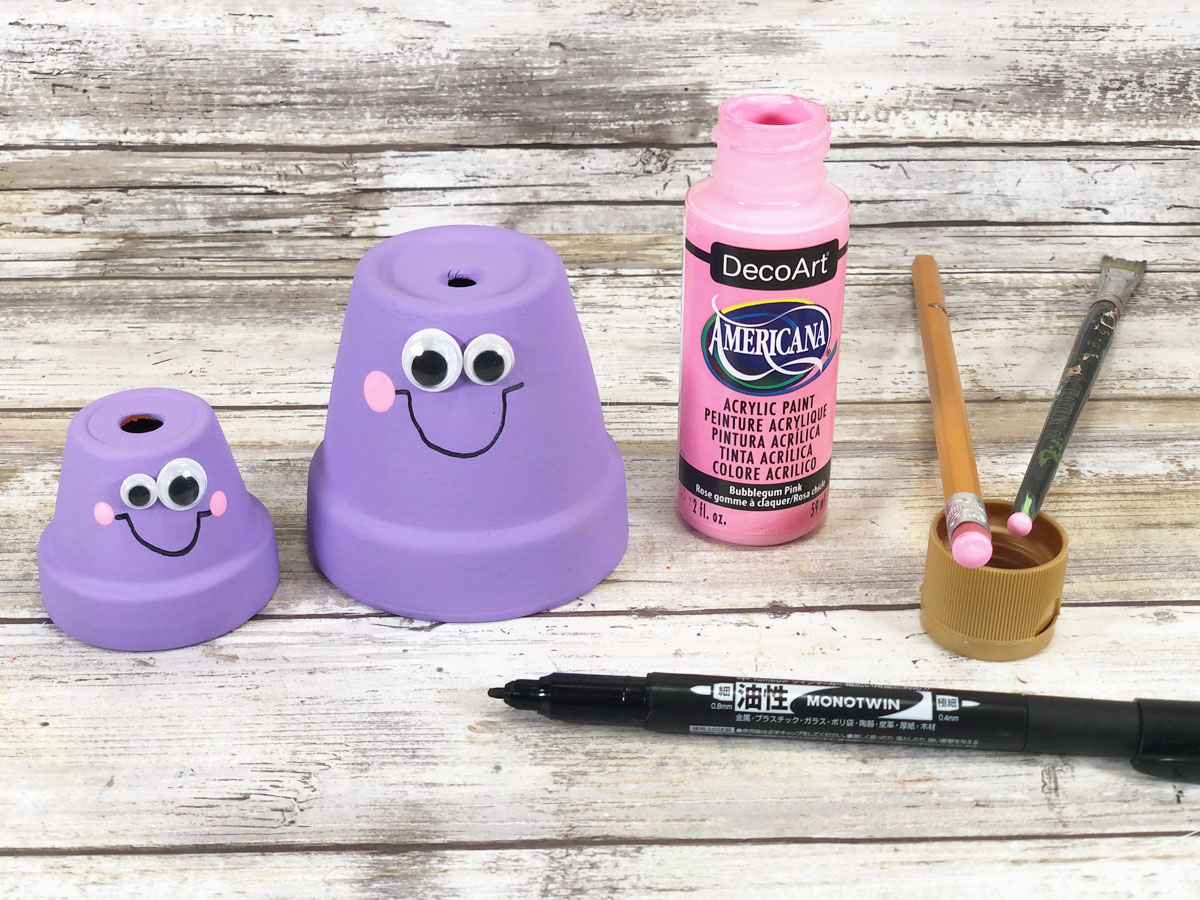
Basecoat both clay pots with lavender acrylic craft paint. Let the paint dry and then apply a second coat, if necessary.

STEP TWO
Attach two wiggle eyes to each Butterfly head with a glue gun and glue sticks. You can use liquid craft glue for this project, but you would have to wait for it to dry.
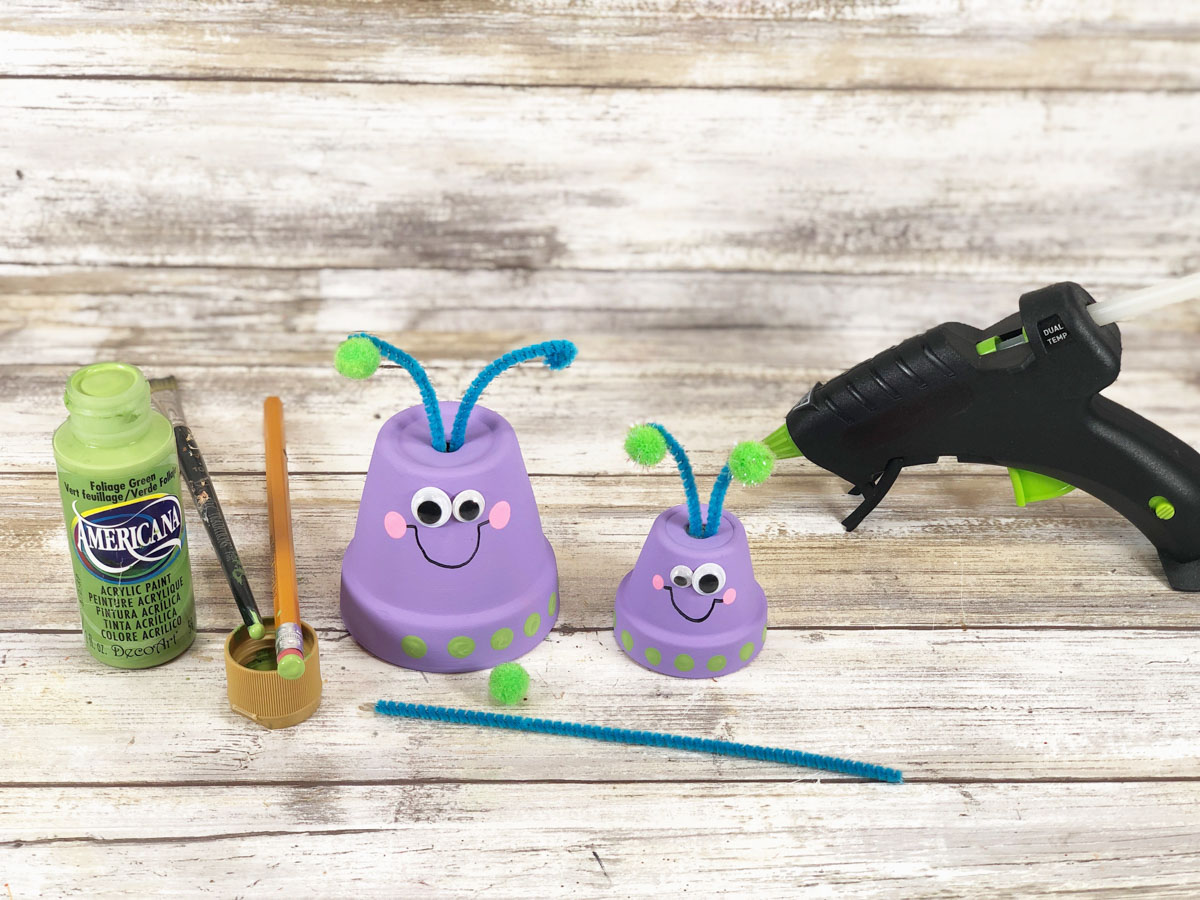
Add polka dot cheeks by dipping a new pencil eraser into pink acrylic craft paint. Set aside to dry.
Draw a mouth on the Mama and Baby Butterfly with a black permanent marker.
STEP THREE
Cut a 12” blue chenille stem in half and fold both sections in half.
Attach a green pom pom to the cut end of both sets of antennae with a glue gun and glue sticks.
Secure the folded end in the hole in the bottom of the clay pot with a glue gun and glue sticks.
STEP FOUR
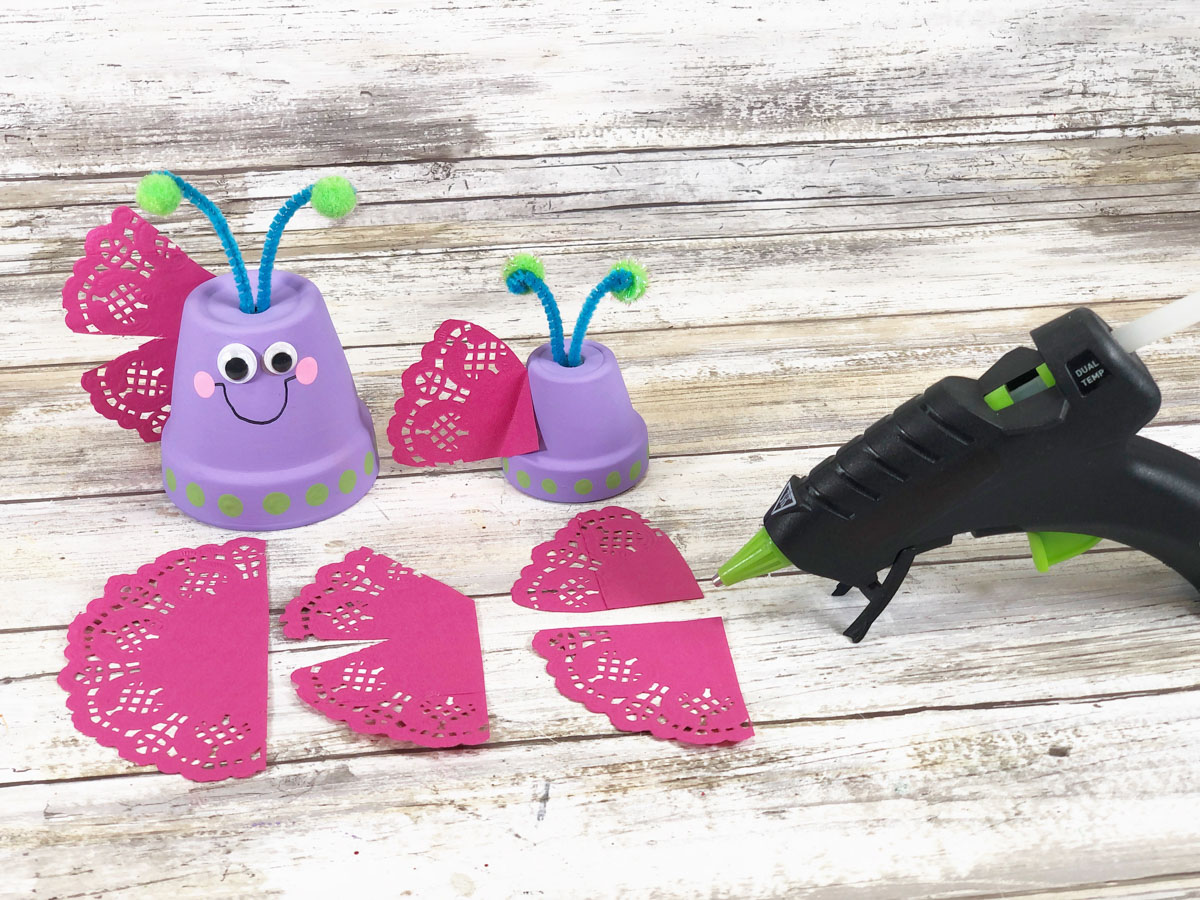
Cut one small pink paper doily in quarters and attach two to the back of the Baby Bee using a glue gun and glue sticks.
Cut the second small pink paper doily in half, then cut out a notch to create the Mama Butterfly wings, and then glue two wings to the back of the Mama Butterfly.
A great family fun craft activity to complete with the kiddos.
The perfect place card for a summer barbecue dinner, fun tag for a summer birthday present, or decoration to gift to a neighbor or co-worker!

Even more cute clay pot crafts!
Want to print or save these clay pot butterfly instructions?

Leave a Reply