
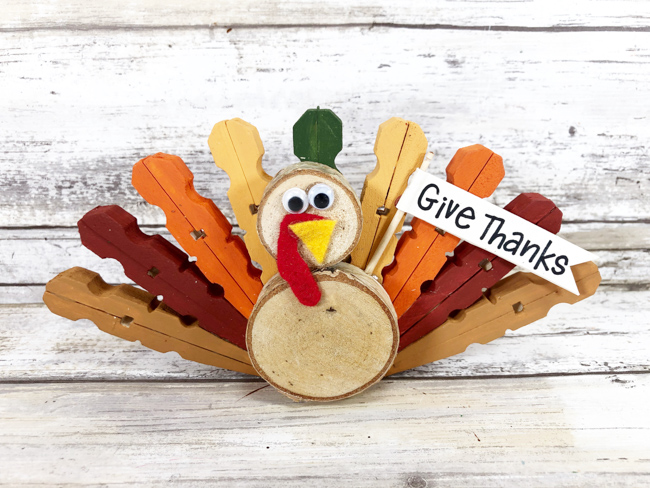
Need something to brighten that holiday table this year? Turn a few ordinary wooden clothespins into a cute feathered friend with this fun and easy Thanksgiving Clothespin Turkey craft for kids.
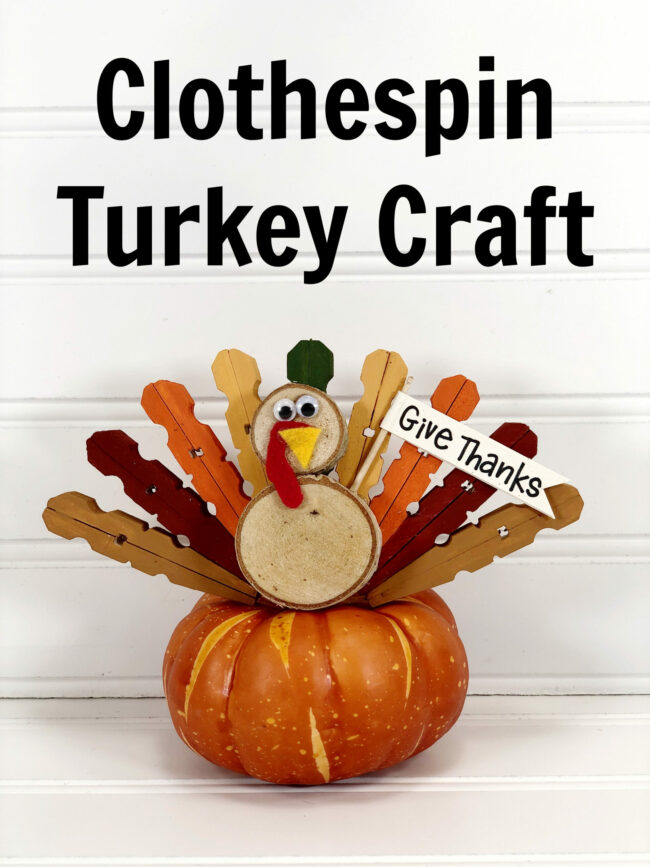
This clothespin turkey would make a great Thanksgiving day craft to keep the kids out of the kitchen or would be a great classroom craft as well. Create Clothespin Turkeys for a Thanksgiving place card or garland. He is also the perfect size for a tiered tray decoration.
It is inexpensive and requires very few supplies with easy-to-follow steps to create this cute as can be Thanksgiving Turkey in just about 30 minutes.
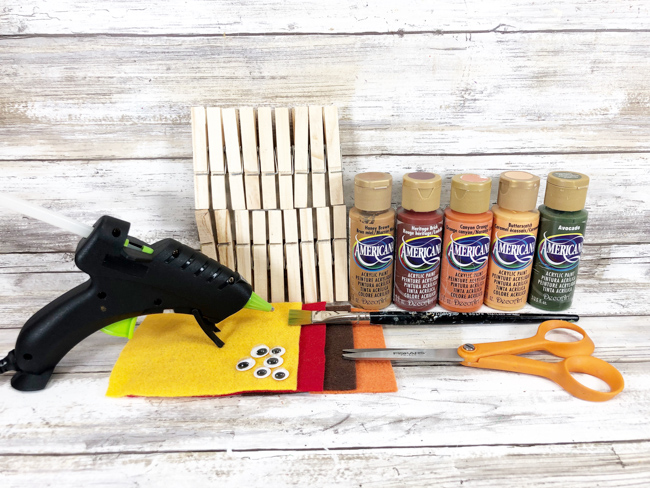
What you need to Make a Clothespin Turkey
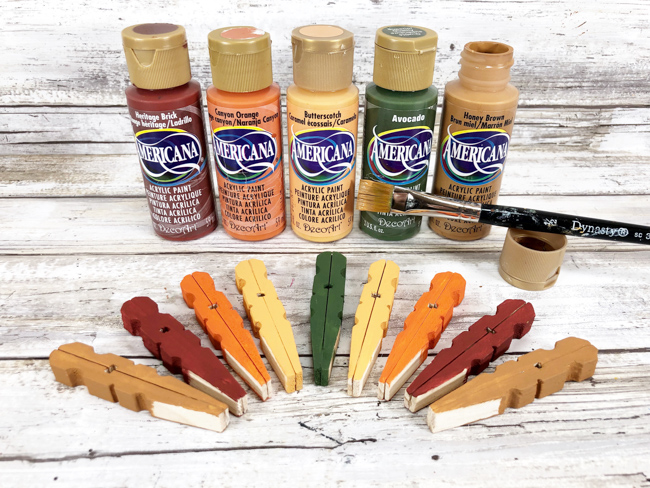
- Clothespins
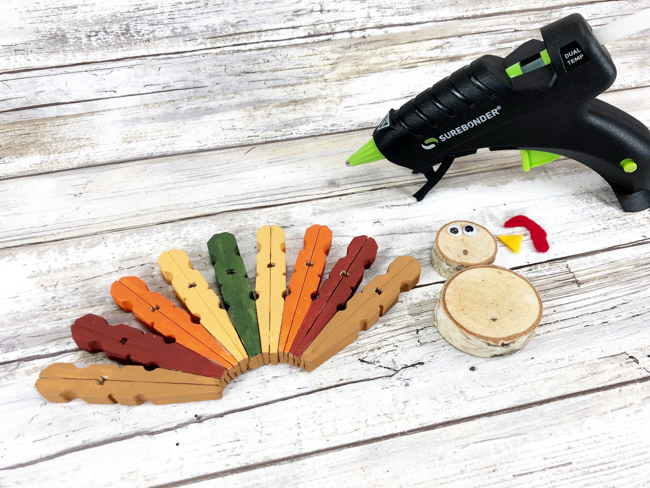
- 2 Mini Wood Slices
- Felt Craft Sheets – Red and Yellow
- Wiggle Eyes
- Wooden Toothpick
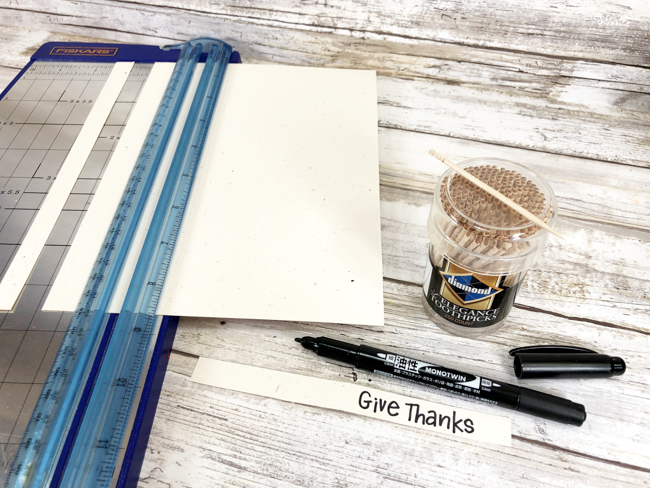
- Cardstock
- Acrylic Craft Paint – Yellow, Orange, Brown, Burgundy, Green
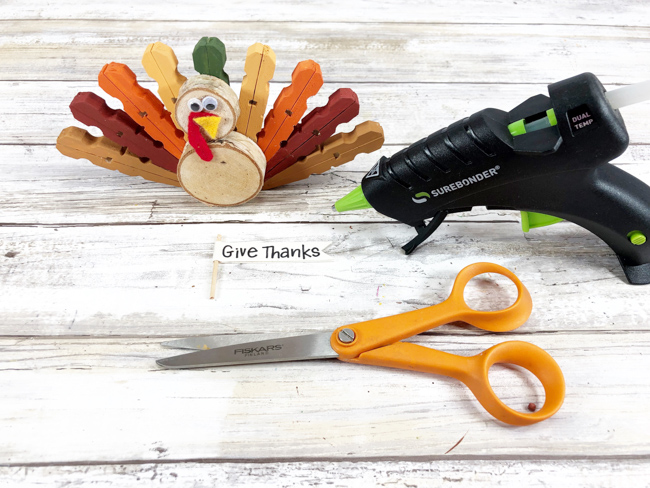
- Glue Gun and Glue Sticks
- Paintbrush
- Marker
- Scissors
- Paper Trimmer (optional)
How to Make a Clothespin Turkey Craft for Kids!
STEP ONE:
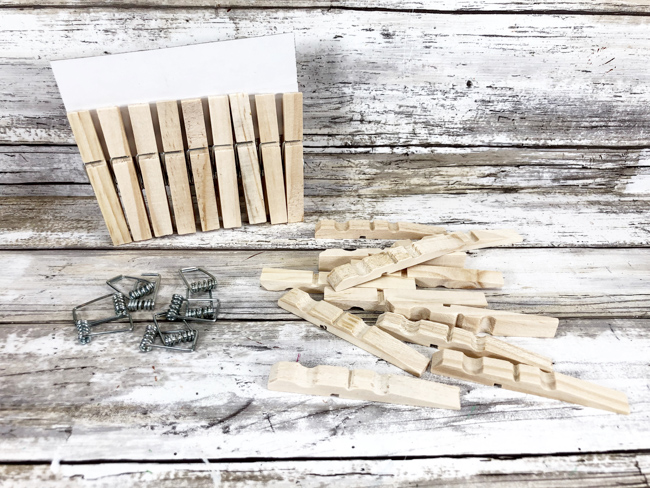
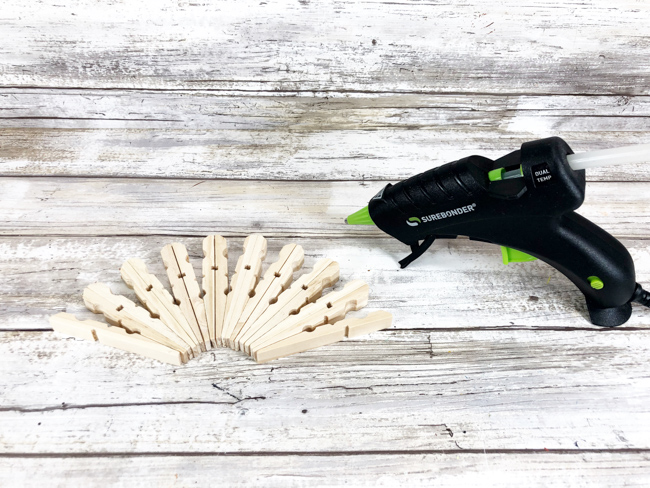
Gather all supplies. Remove the metal spring from the wooden clothespins. Line up nine full clothespins on your work surface, to create a fan shape. Attach the pairs of wooden clothespin pieces together with a glue gun and glue sticks, using the photo as a template.
STEP TWO
Paint all sides of each clothespin as follows with acrylic craft paint: one green, two yellow, two orange, two burgundy, and two brown. Set aside to dry. If you don’t have these colors at home, use the colors you have. Once dry, attach the painted clothespins together with a glue gun and glue sticks.

STEP THREE
Attach two mini wood slices together as the turkey body and head, using a glue gun and glue sticks. Then glue the body to the clothespin turkey feathers. Cut out a triangle beak from yellow craft felt and a wiggly waddle shape from red craft felt. If you don’t have felt, use colored cardstock or craft foam. Carefully glue two wiggle eyes, beak, and waddle to the head of the turkey.
STEP FOUR
To create a flag, measure and cut a strip of off-white cardstock ½” wide by 6” long. Write a message like “Give Thanks” about one inch from the right side of the paper strip with a marker. Fold the paper strip in half around a wooden toothpick, lining up the edges. Secure the flag with a bit of glue and cut out a triangle shape from the end to create the flag shape. Attach to either the right or the left side of the turkey.
While you are here be sure to check out our other fun Thanksgiving crafts for kids!
- Thanksgiving Toilet Paper Roll Crafts for Kids
- 24 Days of Thanks and Giving
- Thanksgiving Turkey Crafts for Kids
- Scarecrow Treats and Crafts
- Popsicle Stick Pilgrim
- Fall Leaf Crafts
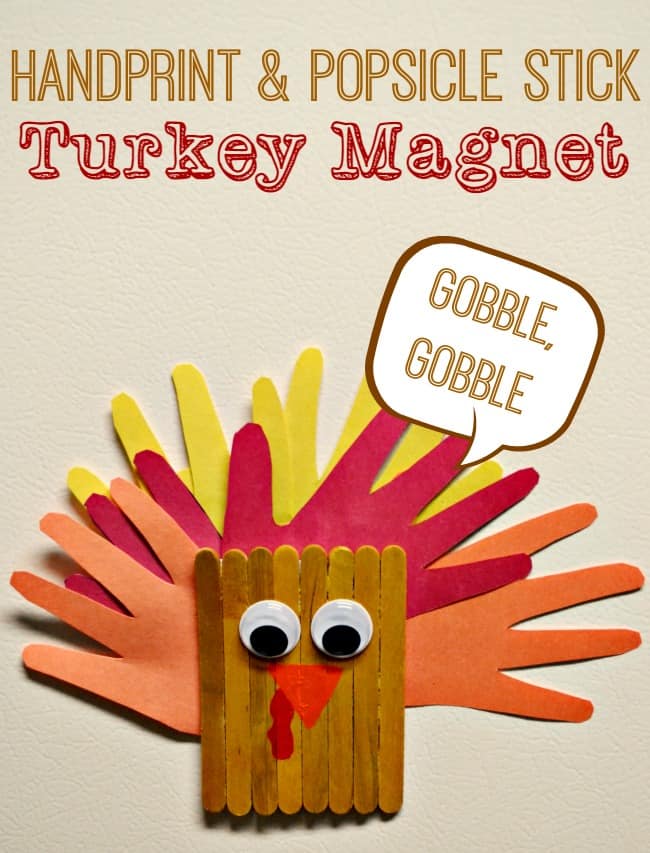
- Handprint & Popsicle Stick Turkey Magnet
- Easy Fall Hand Print Wreath
- Thankful Tree Kid Craft
- Hand Print Turkey Thanksgiving Card
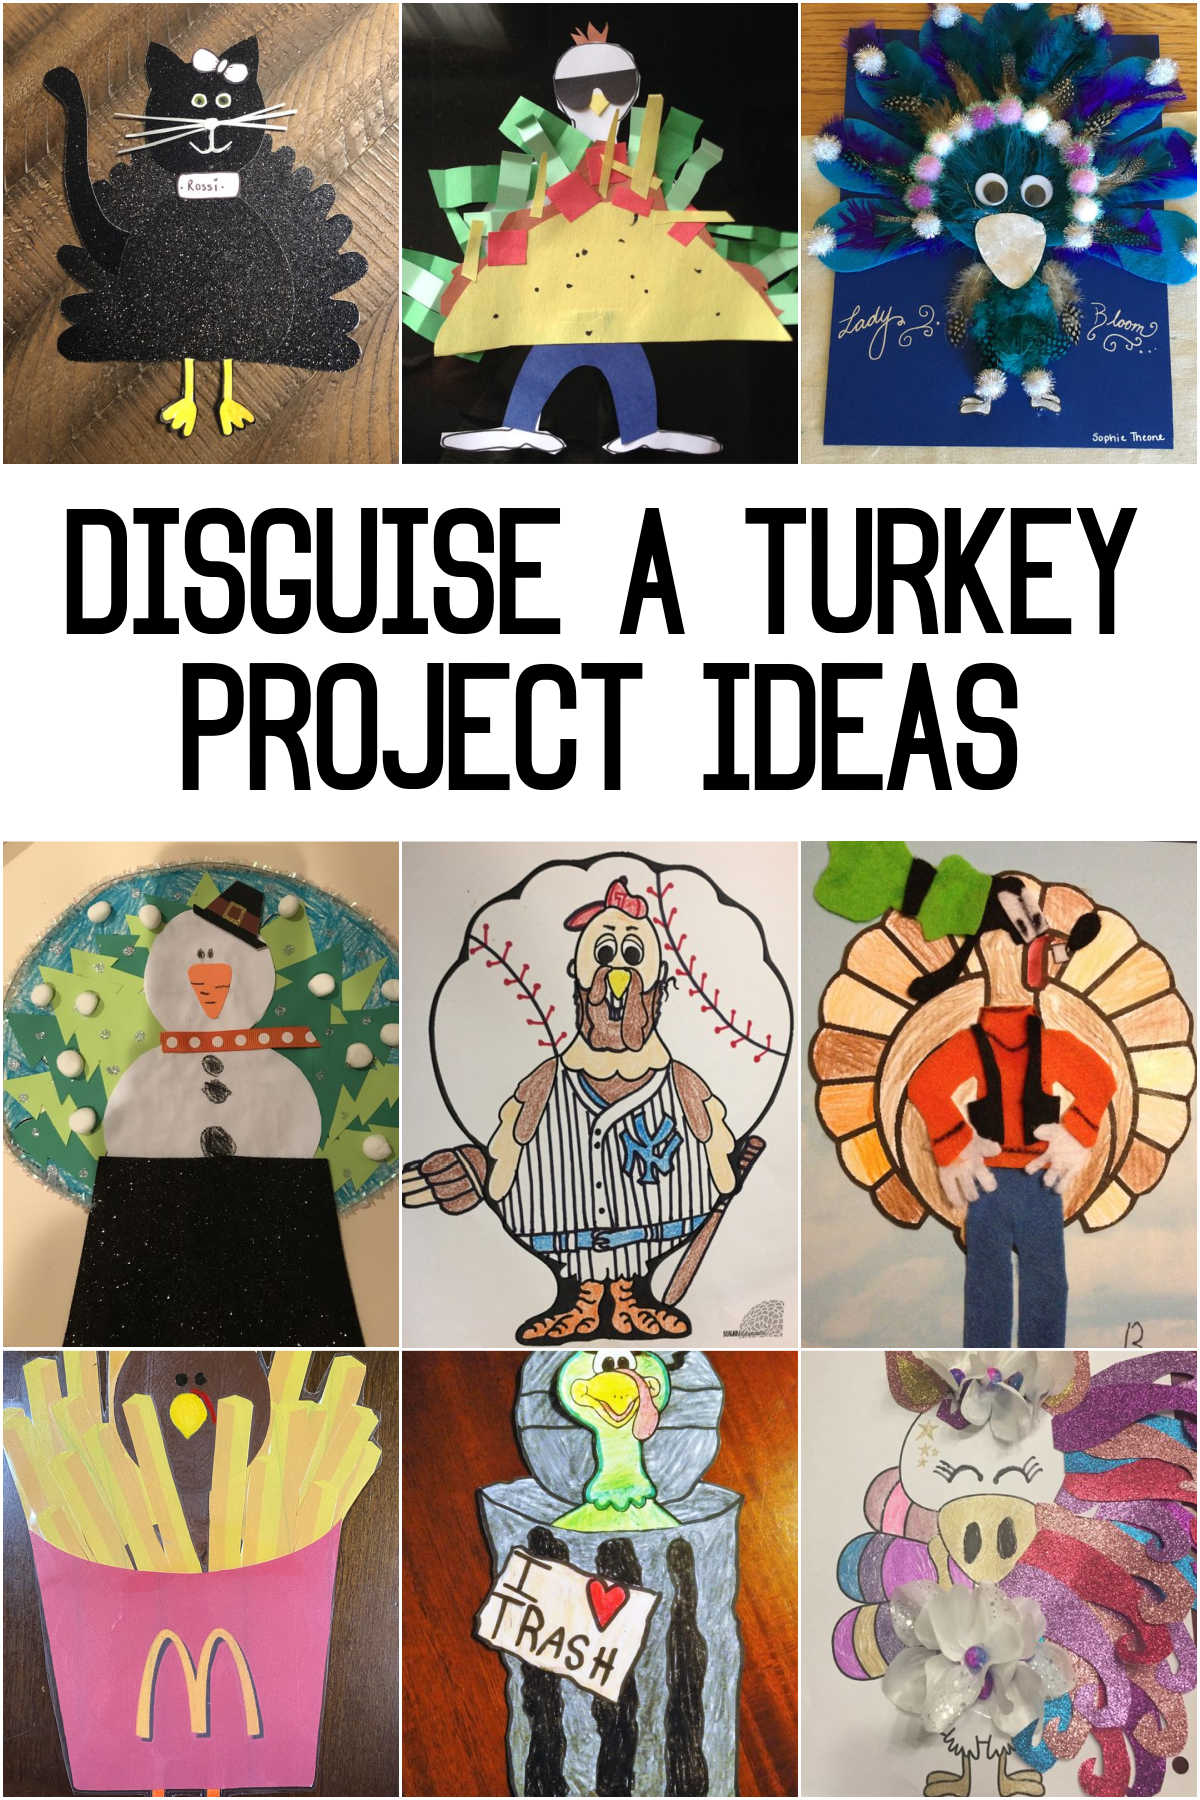
- Disguise Tom Turkey | Disguise Turkey Ideas
- Acorn Craft for Kids
Want to print or save these instructions for creating a Clothespin Turkey Craft?

Leave a Reply