
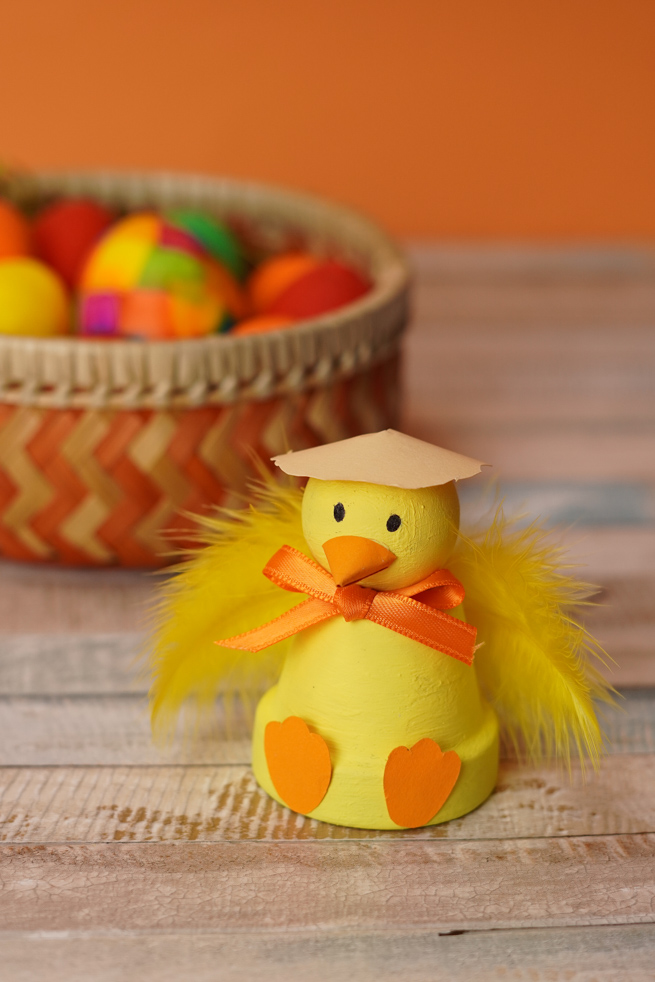
This Easter chick terra cotta pot craft is a super cute and simple way to create a great keepsake that you can pull out year after year.
Enjoy making your own little Easter friend with this easy step-by-step tutorial and a video included.
How to make an Easter chick terra cotta pot craft! - Video Tutorial
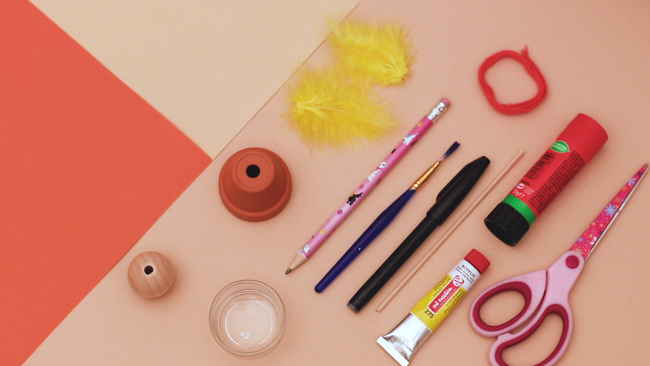
Materials you will need:
- orange ribbon
- mini terra cotta pot
- 1-inch wooden bead
- faux yellow bird feathers
- (orange and yellow) construction paper
- scissors
- glue stick
- yellow acrylic paint
- wooden stick (optional)
- black marker
- paintbrush
- pencil
Step by Step Photo Instructions:
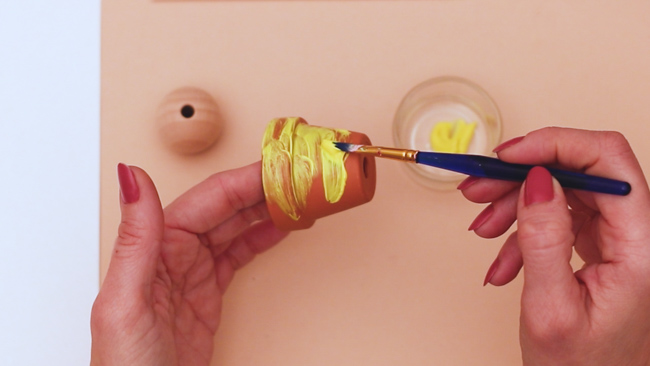
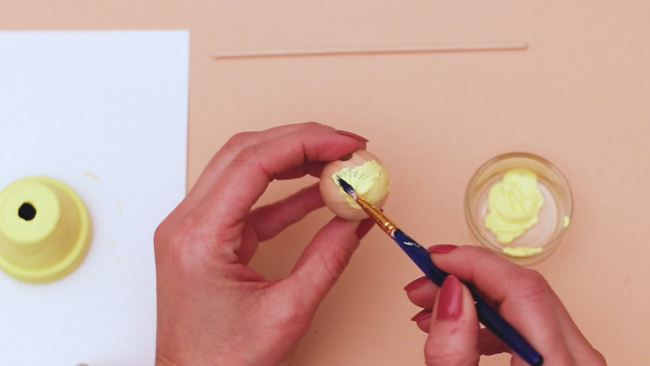
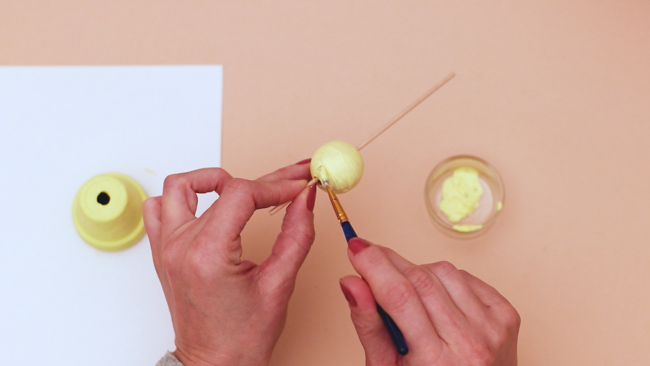
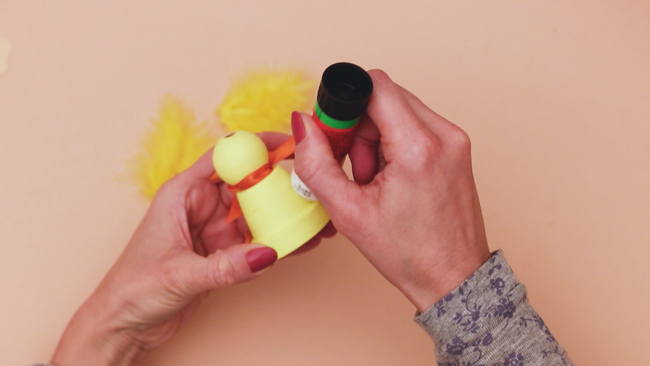
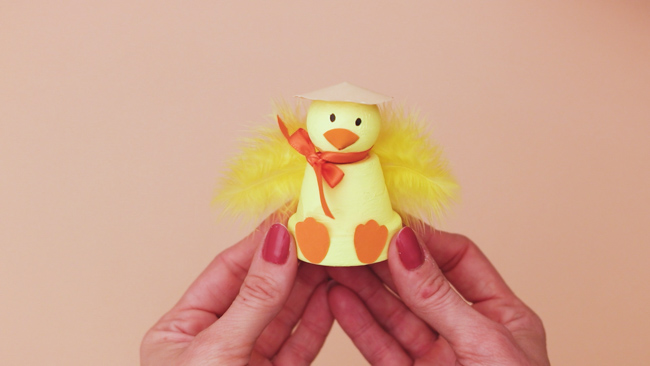
Step 1: Paint the pot and the wooden bead yellow.

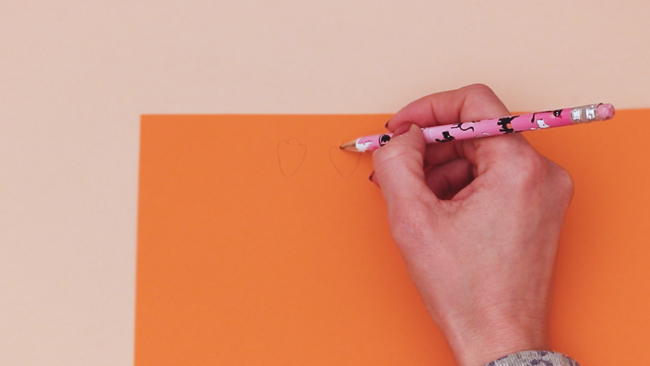
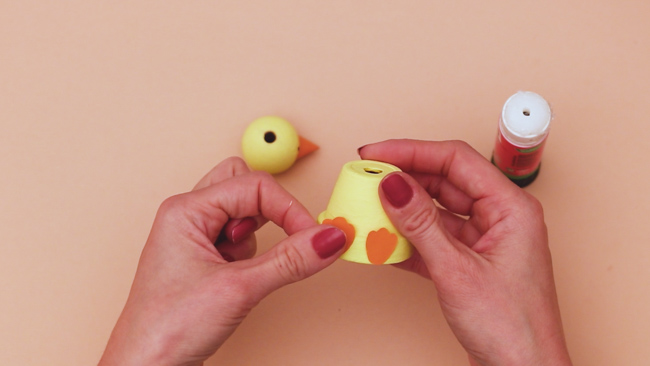
Step 2: Draw the chick's little feet on the orange paper and cut them out.

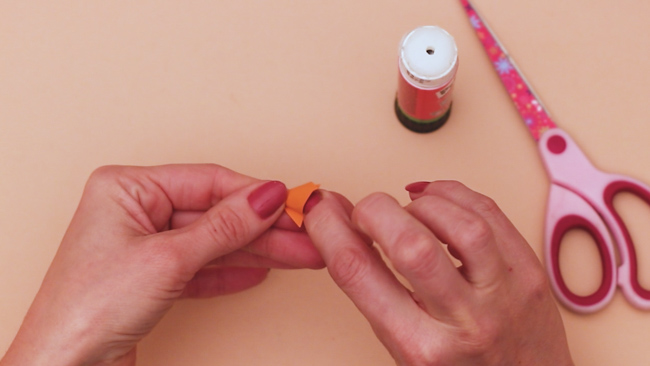
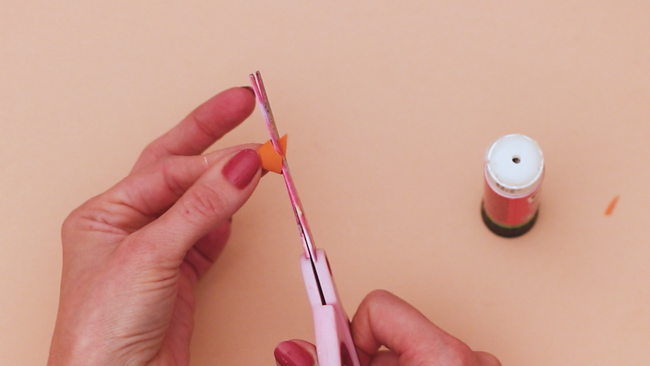
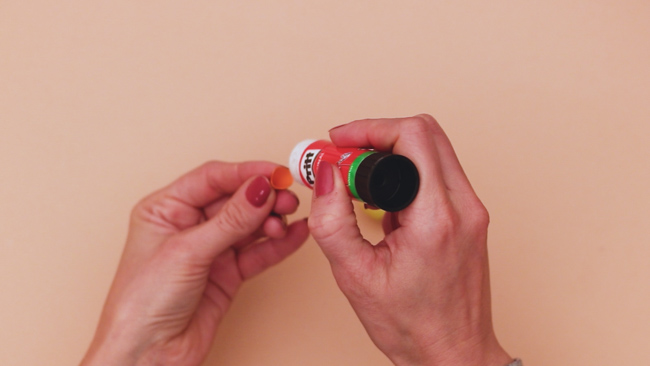
Step 3: Draw a triangle, cut it out and roll it into a cone for the chick's beak.


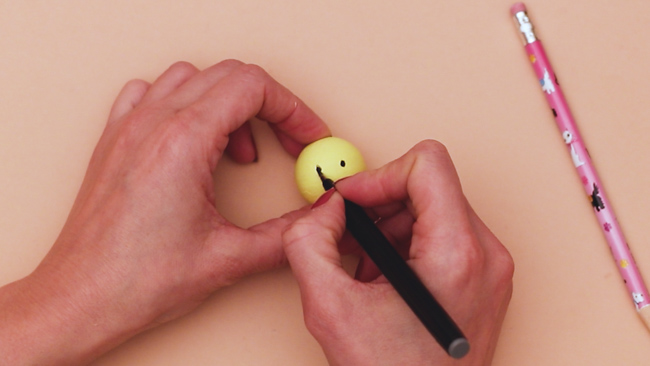
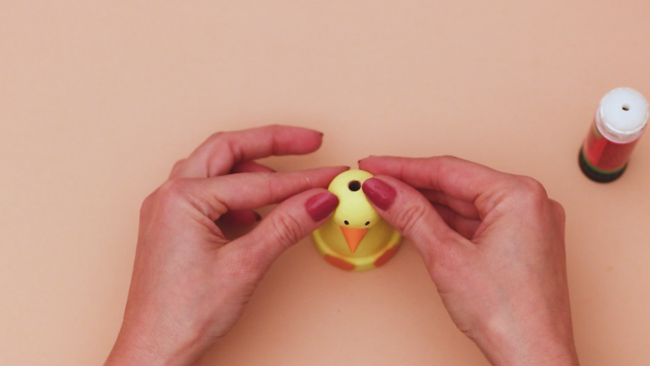
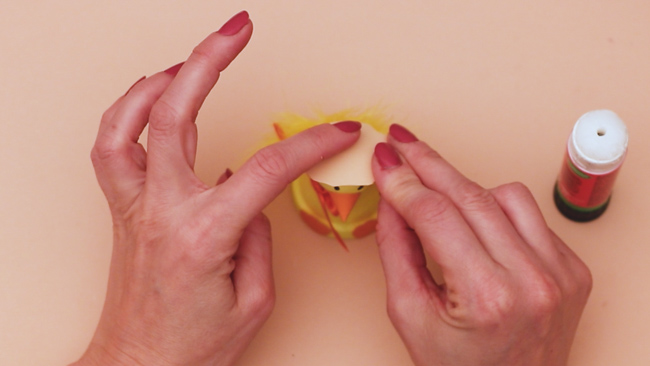
Step 4: Draw a face for the chick and glue the beak onto the wooden bead.

Step 5: Glue the legs on the bottom of the pot and the chick's head to the top of the pot.

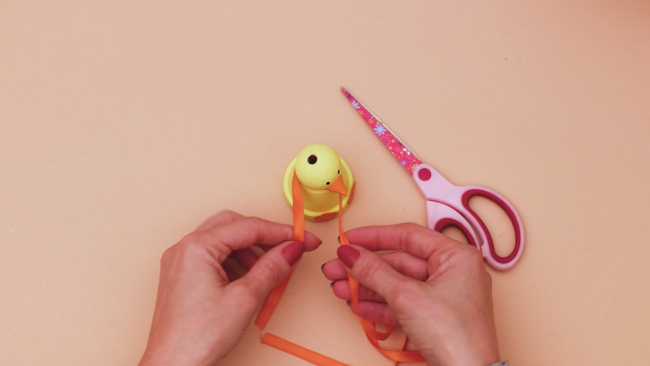
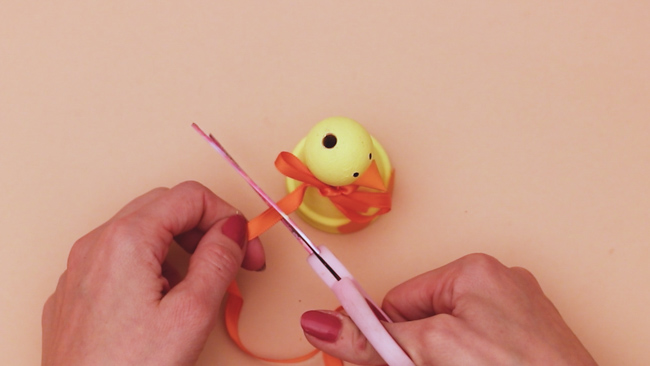
Step 6: Tie a bow on the chick's neck from the ribbon.
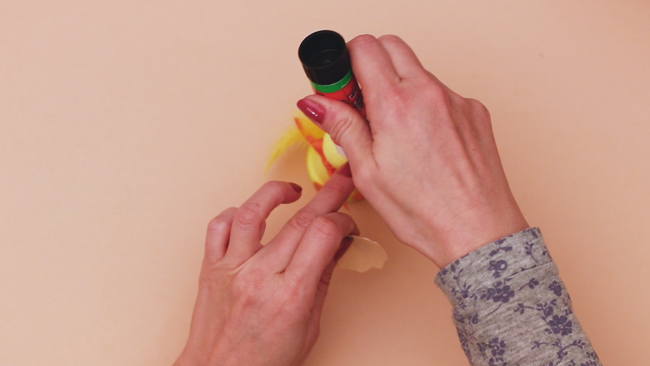
Step 7: Using your glue stick, glue on a couple of faux feathers to create the chick's wings.
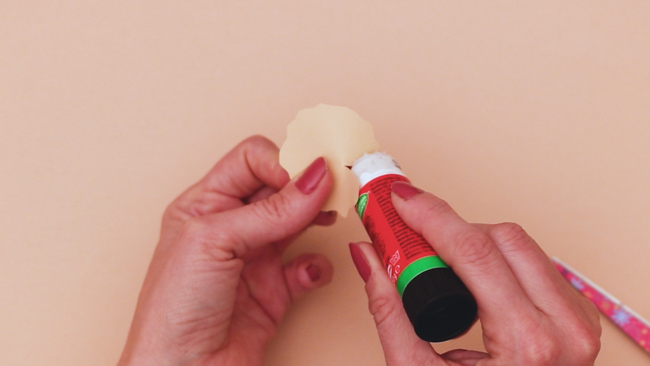
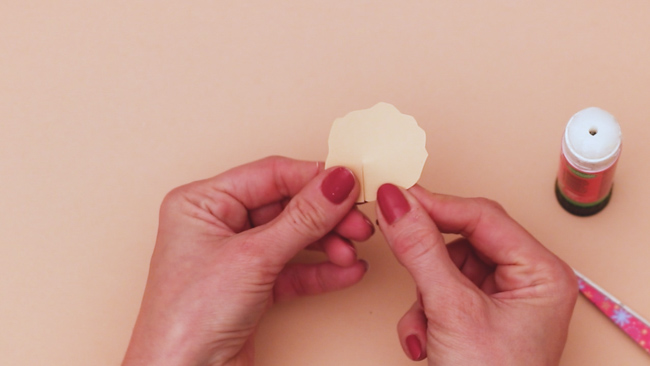
Step 8: Draw a circle with a serrated edge on the light yellow paper and cut it out. Make a little cut in the paper so that you can make it into a cone and glue it up to the top of the chick's head.

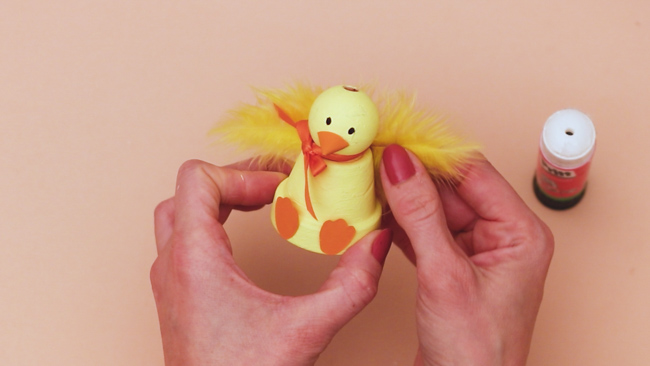
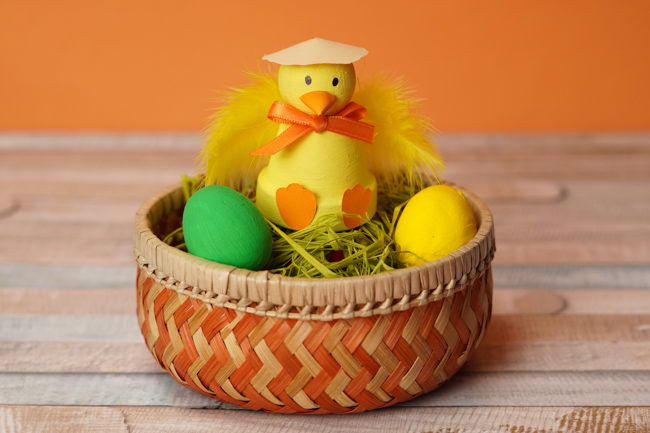
All done!
Even more Easter crafts and ideas you don't want to miss!
- Stacked Terra Cotta Pot Carrot Craft
- Salt Painted Easter Eggs
- Popsicle Stick Easter Bunny Craft
- Popsicle Stick Easter Chick
- Paper Plate Easter Chick
- Easter Crafts for Kids
- Best Way to Dye Easter Eggs
- Peekaboo Clothespin Eggs
Want to print or save these instructions for making this adorable Easter chick terra cotta craft?


Leave a Reply