
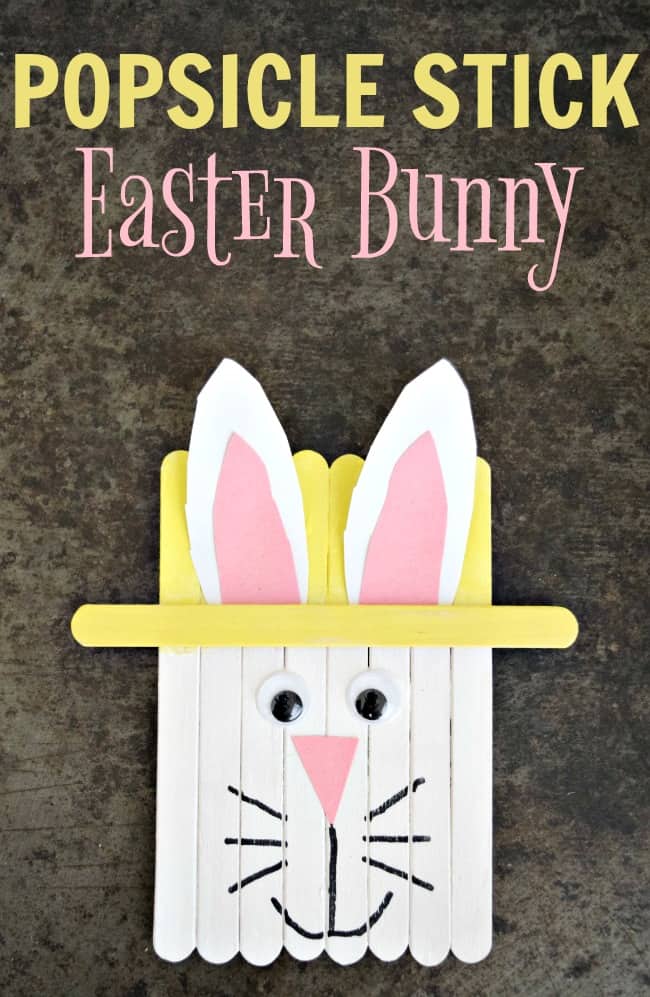
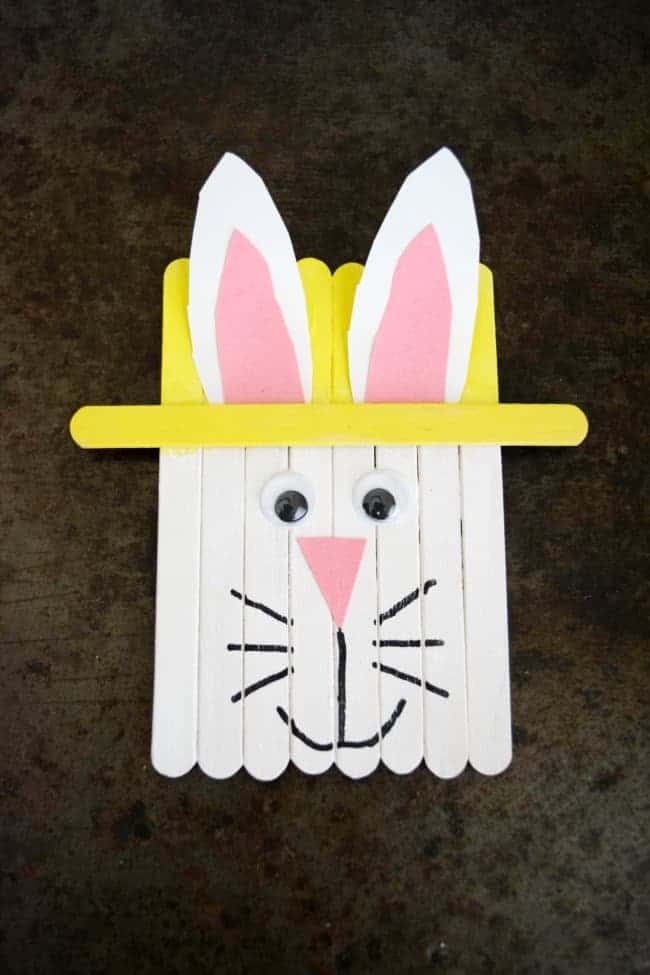
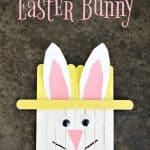
I'm not sure there is anything more iconic for spring than the Easter bunny. So, of course, we thought he would be a great addition to one of our favorite activities, popsicle stick crafts.
This little cutie popsicle stick Easter bunny is super easy and loads of fun for all the kids.
You know we all look forward to him showing up with his basket of Easter eggs and leaving the kids a little treat.
What better treat than all the supplies to make Mr. Easter himself?
Materials you will need:
- Popsicle Sticks
- Yellow and White Craft Paint
- Craft Glue
- Construction Paper (white and pink)
- Wiggly Eyes
- Sharpie
- Magnet (optional)
- paintbrushes and the paper plate for paint
How to make a Popsicle Stick Easter Bunny:
Step 1: Glue together your popsicle sticks. Making sure to add the extra one on the front to make the hat.
This time I used small ones attached to the back to hold together the sticks but you could also use a piece of cardstock or just attach the sticks to construction paper. I find the latter to be the easiest option for kids.
Step 2: Next, you are ready to paint.
Paint the bottom portion white, which will become the bunny, and the top portion yellow, which is the hat.
Step 3: Using the pink and white construction paper cut out the ears and nose.
If you bend the paper over while cutting out the ears you can cut both at the same time and have them even.
Attach the inside of the ears onto the white ones using a little glue.
Step 4: Once the paint is fully dry you can use your glue to attach wiggly eyes and the nose, then draw on the mouth and whiskers.
Step 5: Now you can use a little glue and attach the ears.
I just attached them at the bottom so they would stick up and be a little floppy like a bunny's ears would naturally be.
All done! Also just as an extra note... You can paint on the ears, eyes, and nose if you choose to.
There are no rules in crafting. Work with what you have or how you want to make it.
We like to add different textures so using wiggly eyes and construction paper with the painted parts is always fun.

Even more holiday crafts you don't want to miss!
- Yarn Wrapped Easter Egg Bunny Craft
- Popsicle Stick Carrot Craft for Kids
- Popsicle Stick Sheep Craft (Lamb)
- Mini Clay Pot Chick Craft
- Pom Pom Paper Plate Bunny Craft
- Salt Painted Easter Eggs
- Popsicle Stick Easter Chick
- Easter Chick Terra Cotta Pot Craft
- Popsicle Stick American Flag
- Popsicle Stick Shark Craft
- Easy Paper Easter Wreath

Leave a Reply